My first attemp at building a 1957 Chevy Belair stock car Late Model Sportsman with a 1/18 scale diecast, feminine stock car driver figurine… and more
Please click on the images to see them full scale, then click on the return arrow to be back in the page.
I looked on the Internet and I couldn’t find not even one person who has transformed a 1/18 scale diecast car into a short tracker. It is sure that the thing is a challenge. This is sad. I feel very lonely… and the only one in my gang. The only fool and crazy guy… once again. I would had loved to see some nice built items, and perhaps exchange ideas and techniques with some people.
This is for sure, it won’t be an easy task to do, even by a very skilled modeler, to my opinion… and working with cast metal… a level of more difficulties ahead. Fortunately, some parts are made of plastic. it is easier to work this material if you are not equiped with a milling or some other sophisticated machine.
One of my biggest passion in this life is transforming or sculpturing figurines from scratch. At first, to save time, I was thninking about buying figurines for this race car project, but my twist for crafting something unique is so strong. I took a look at what I have at hand here and as I like to modify all kinds of stuff, I will transform at least one, or two, or more figurines to add life to this other crazy project of mine. Already, in my stuff, I found a beautiful girl, Marylin Monroe style. She will be my race car driver. I still have the thinking of the little boy that I was when I was young. it’s a love story. In my little boy mind, she is my beautiful and loving girlfriend.
I discovered her on a 3 levels shelf where I have 3 mountains of dusty scale models, diorama items and figurines of different scales. I had to dig in the piles. Then suddenly, this sweet heart was there, waiting for me to find her. I didn’t remember this particular beauty of a girl. What a shame… but at the time I didn’t have any project for this particular scale.
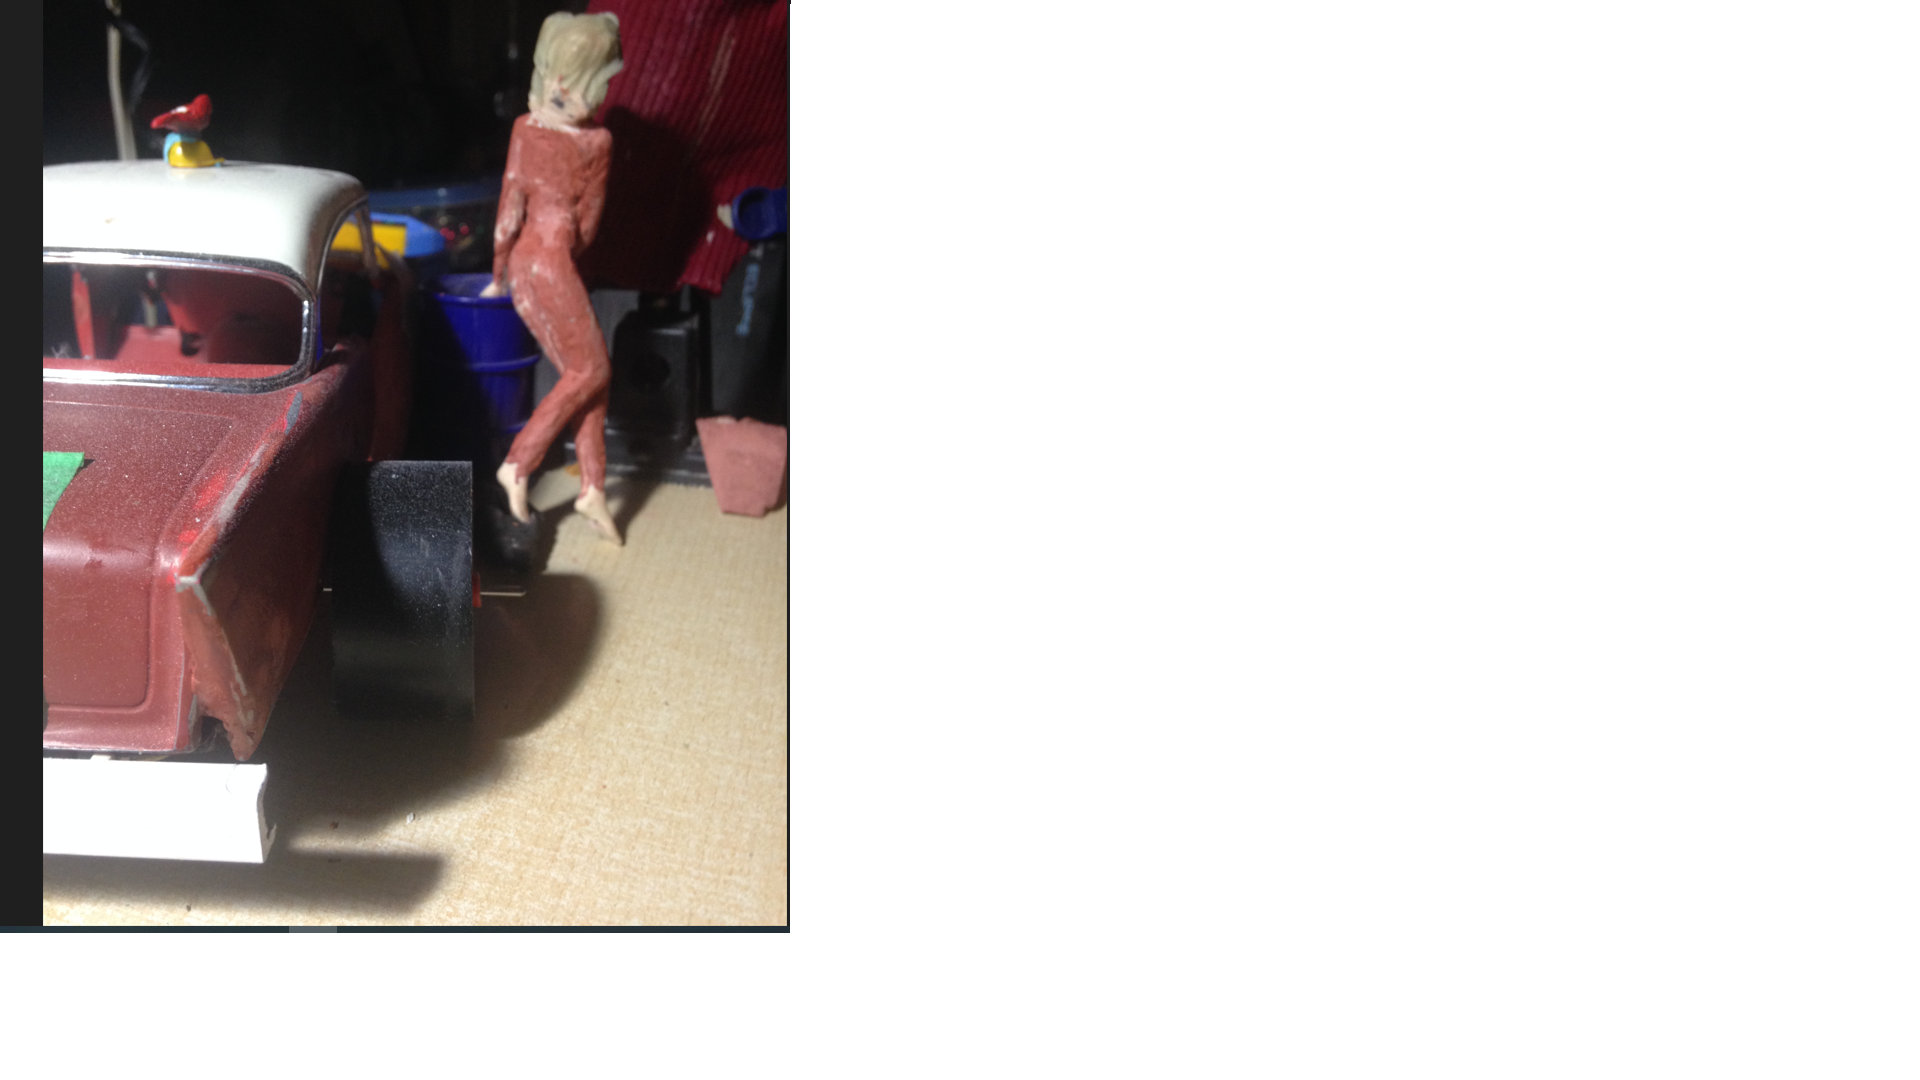
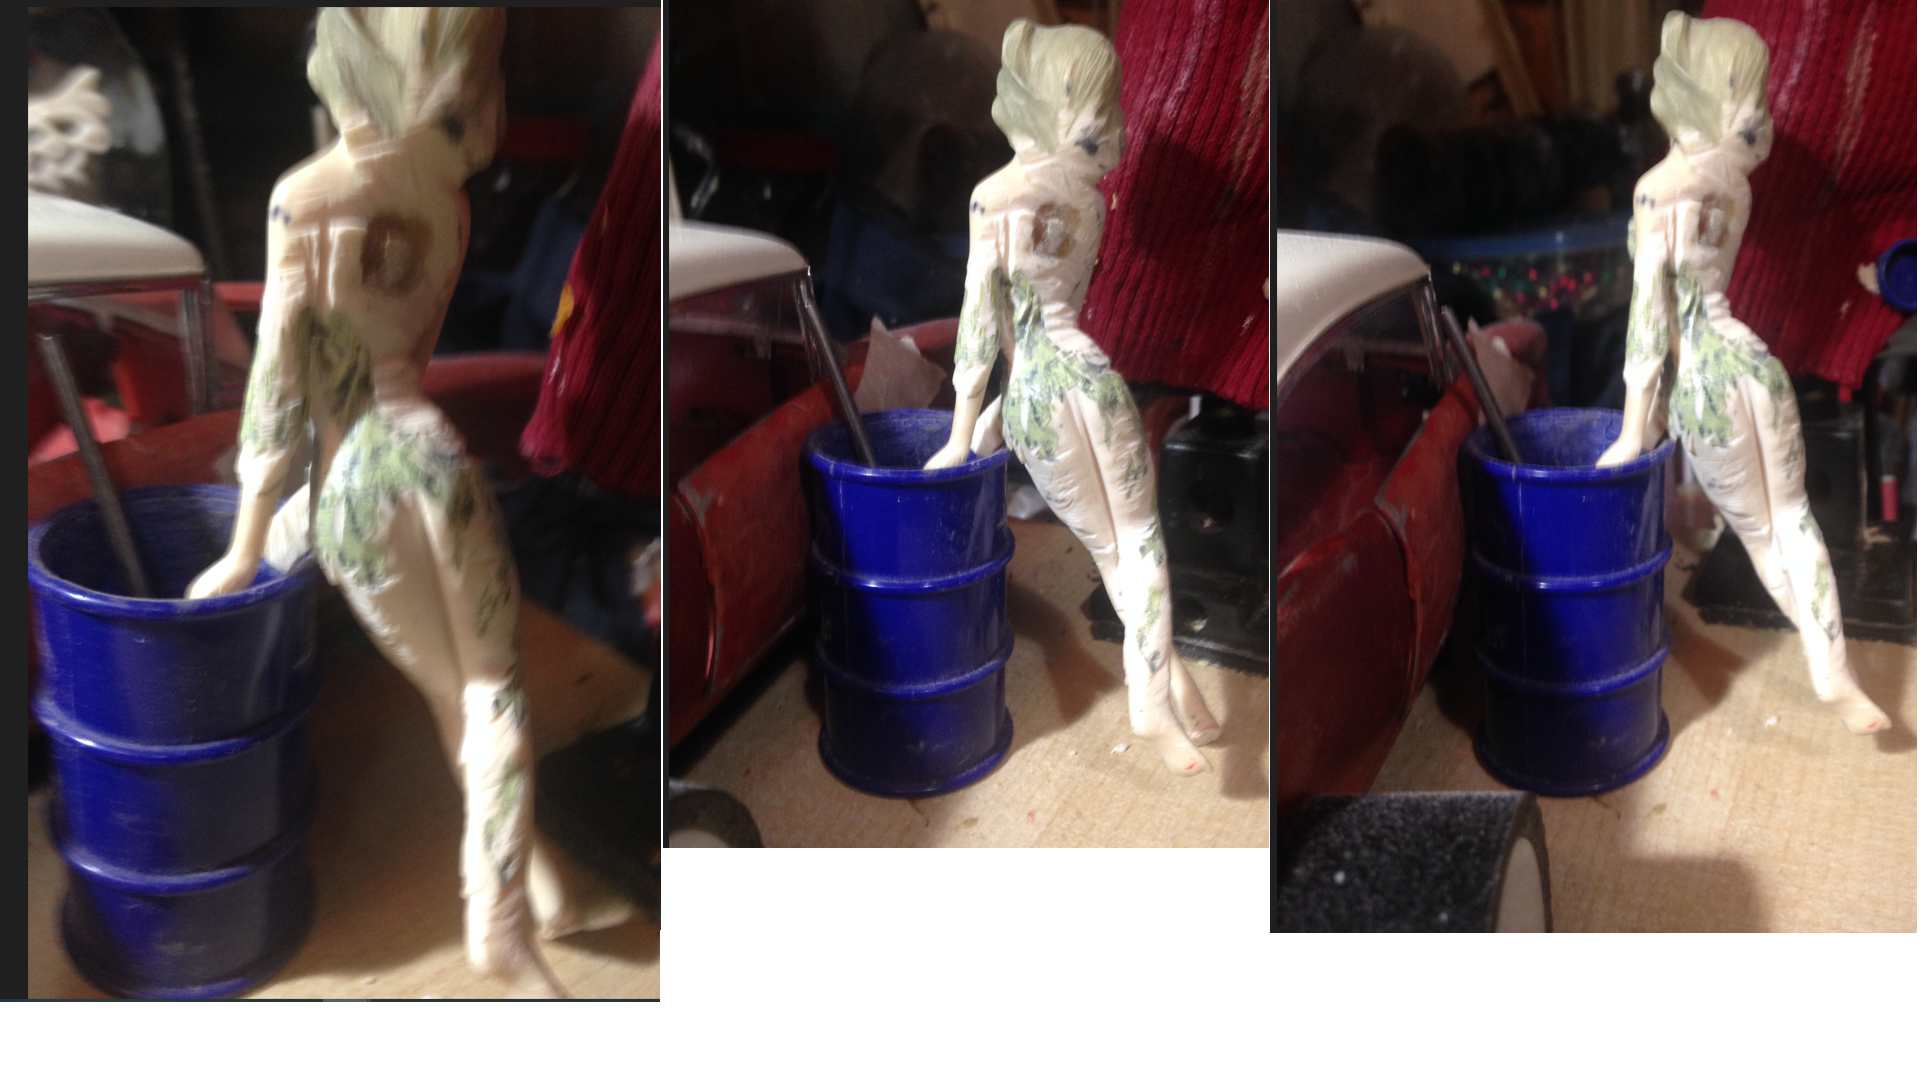
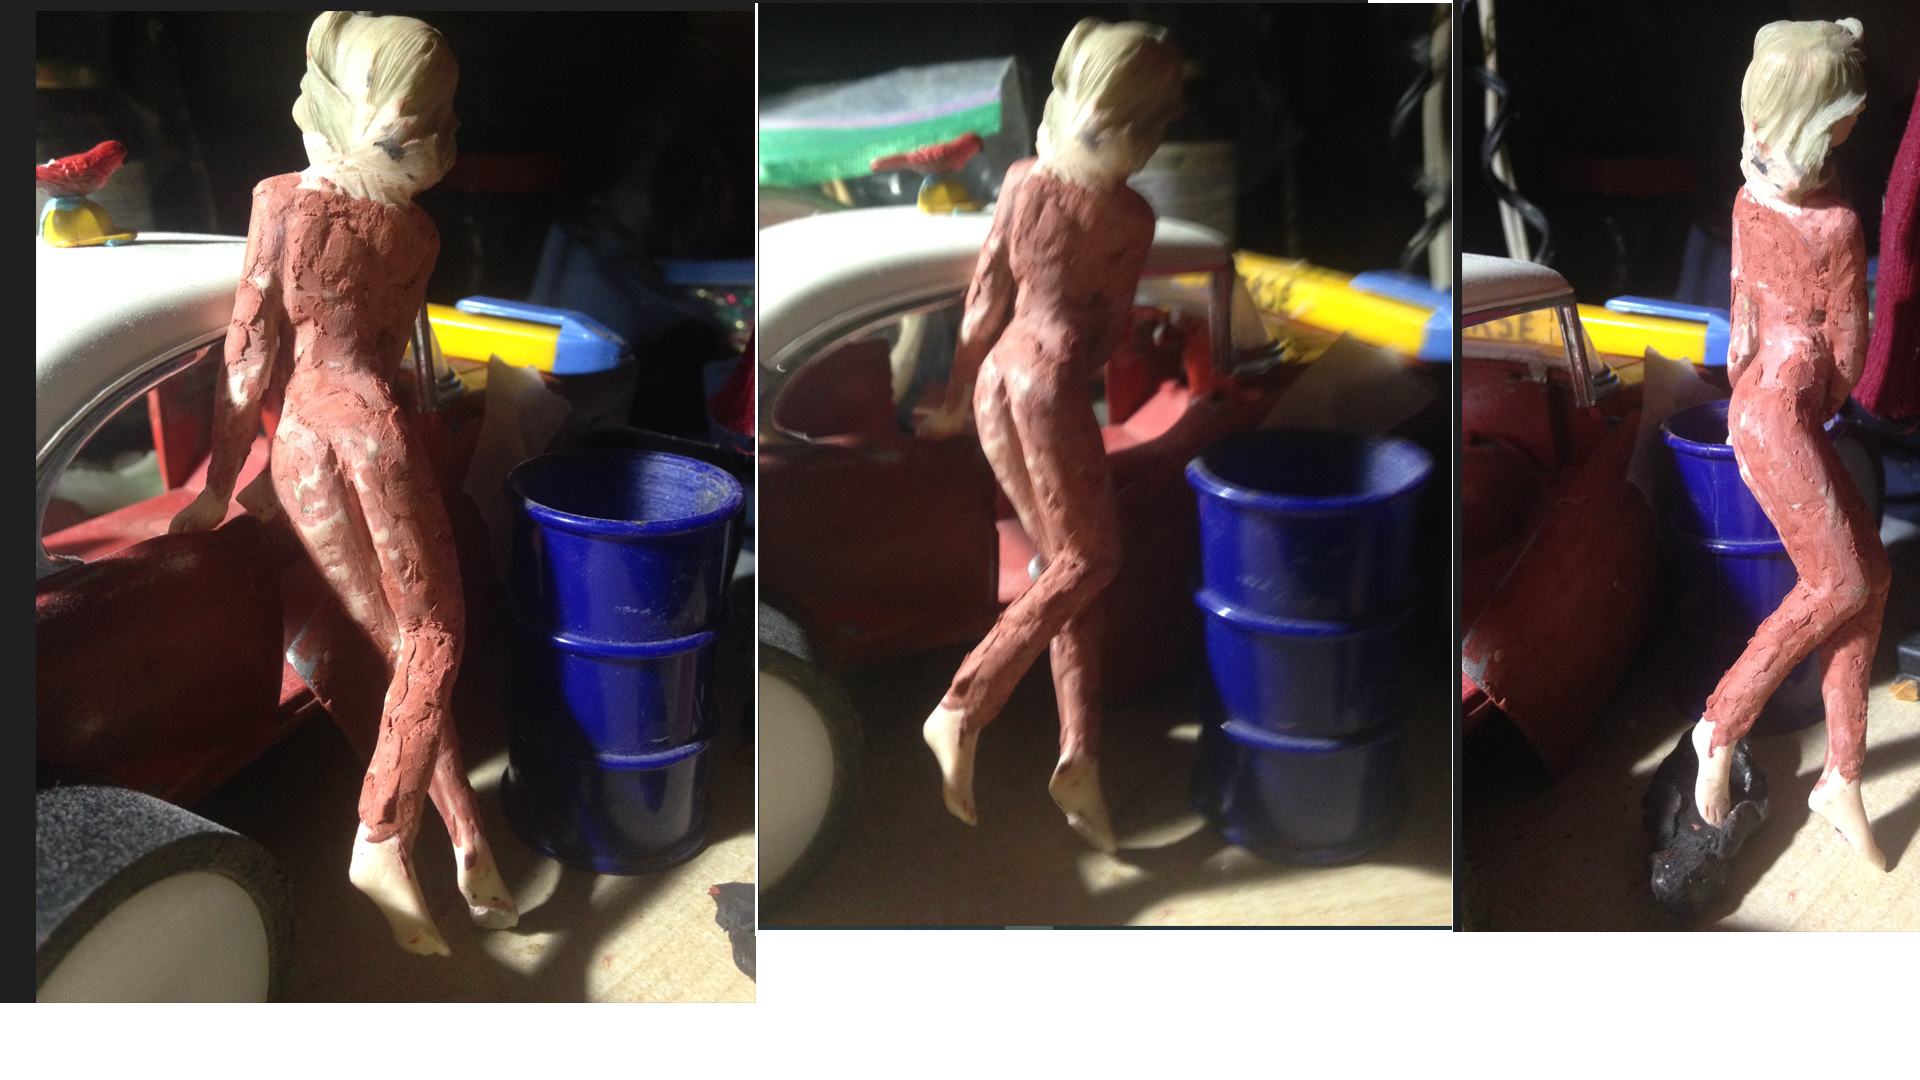
She was wearing a long dress. A beautiful feminine angel. She should be correct for the scale of the car. She has a beautiful face. She’s tall and slim. She’s made of polyester resin. She would make a stunning race car driver. She was leaning on a big stone that looked more or less like a remnant piece of a broken tree, but because of the grey color it would be instead, a bizarre kind of stone. It would be about 3 feet high into our 1:1 scale. As I didn’t want her in a long dress, I worked hours to trim everything around her, the base, the big stone, and I wanted to get rid of her long dress. I had to reshape her in a race car driver jumpsuit. I had to sculpture the deep lines to separate her legs. Particularly in her back side.
Her bottock looked flat as a skirt, so I had to dig the line and round the curves of her legs to transform the dress into her racing outfit. There is still some work to be done, and I plan to shorten her a bit because in the 1/18 scale, she looks to be 6 feet and 6 inches. Nevertheless, she’s a beauty.

This is how she was originally, prior starting working on her.
And then, whit some work done. The process is started.
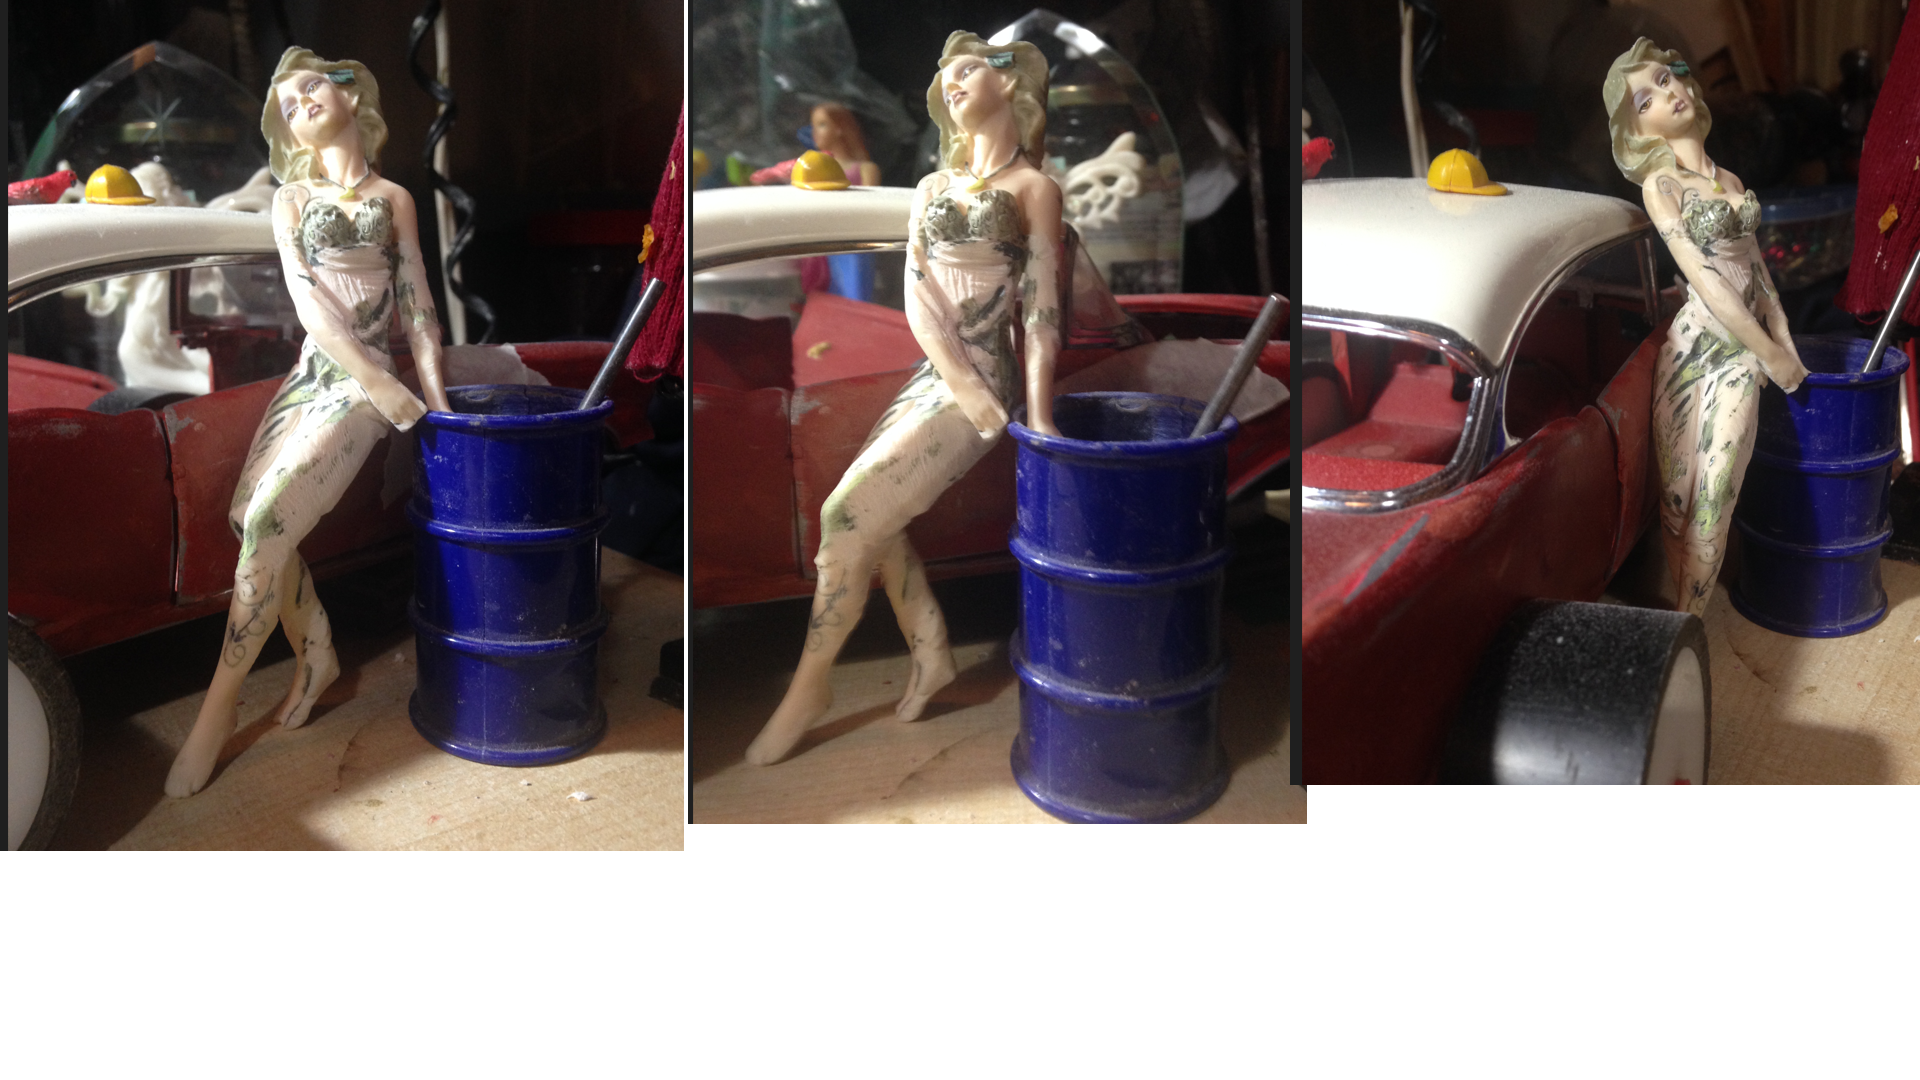
She looks like a movie star or a fashion girl in a race car shop doing some photo shoots.
Her 2 hands were lying on the top of the stone. It’s gone for ever now. I plan to cast a copy of her and then change her pose for someting else that I have in mind, but I will keep the original gesture as I find it nice as well.
I love you Baby… Here are some love songs. they inspired me for this beauty of a girl.
<ahref=”https://www.youtube.com/watch?v=dDyFRZ1F25E”>https://www.youtube.com/watch?v=dDyFRZ1F25Ehttps://www.youtube.com/watch?v=vGJTaP6anOU https://www.youtube.com/watch?v=oofSnsGkops
Alain Barriere – Ce qu’elle disait..
https://www.youtube.com/watch?v=JBnA97LO8Vk<
Aimes moi – Claude Barzotti https://www.youtube.com/watch?v=CShiNsws85Q video with female signer https://duckduckgo.com/?q=Aimes+moi&t=newext&atb=v312-1&iax=videos&iai=https%3A%2F%2Fwww.youtube.com%2Fwatch%3Fv%3DcI_NntHklRU&ia=videos
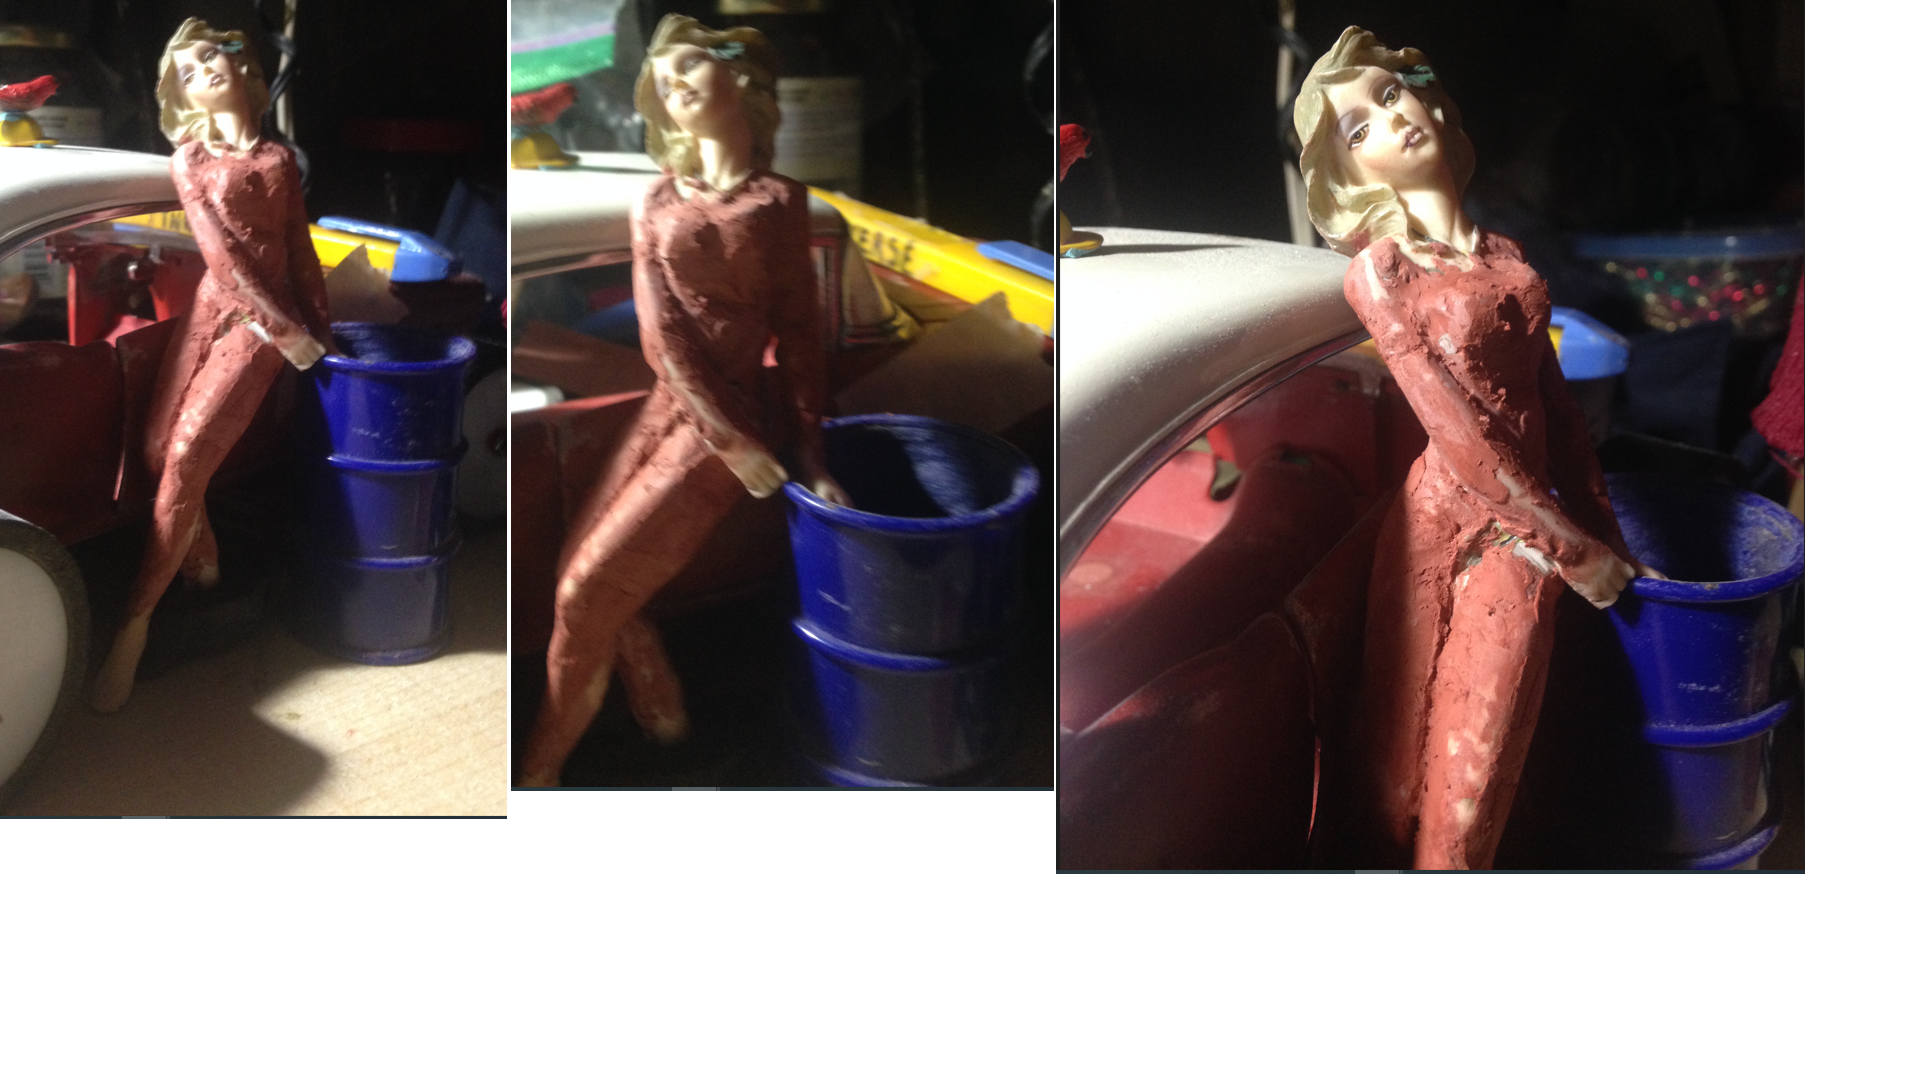
Her first coat of fresh glazing.
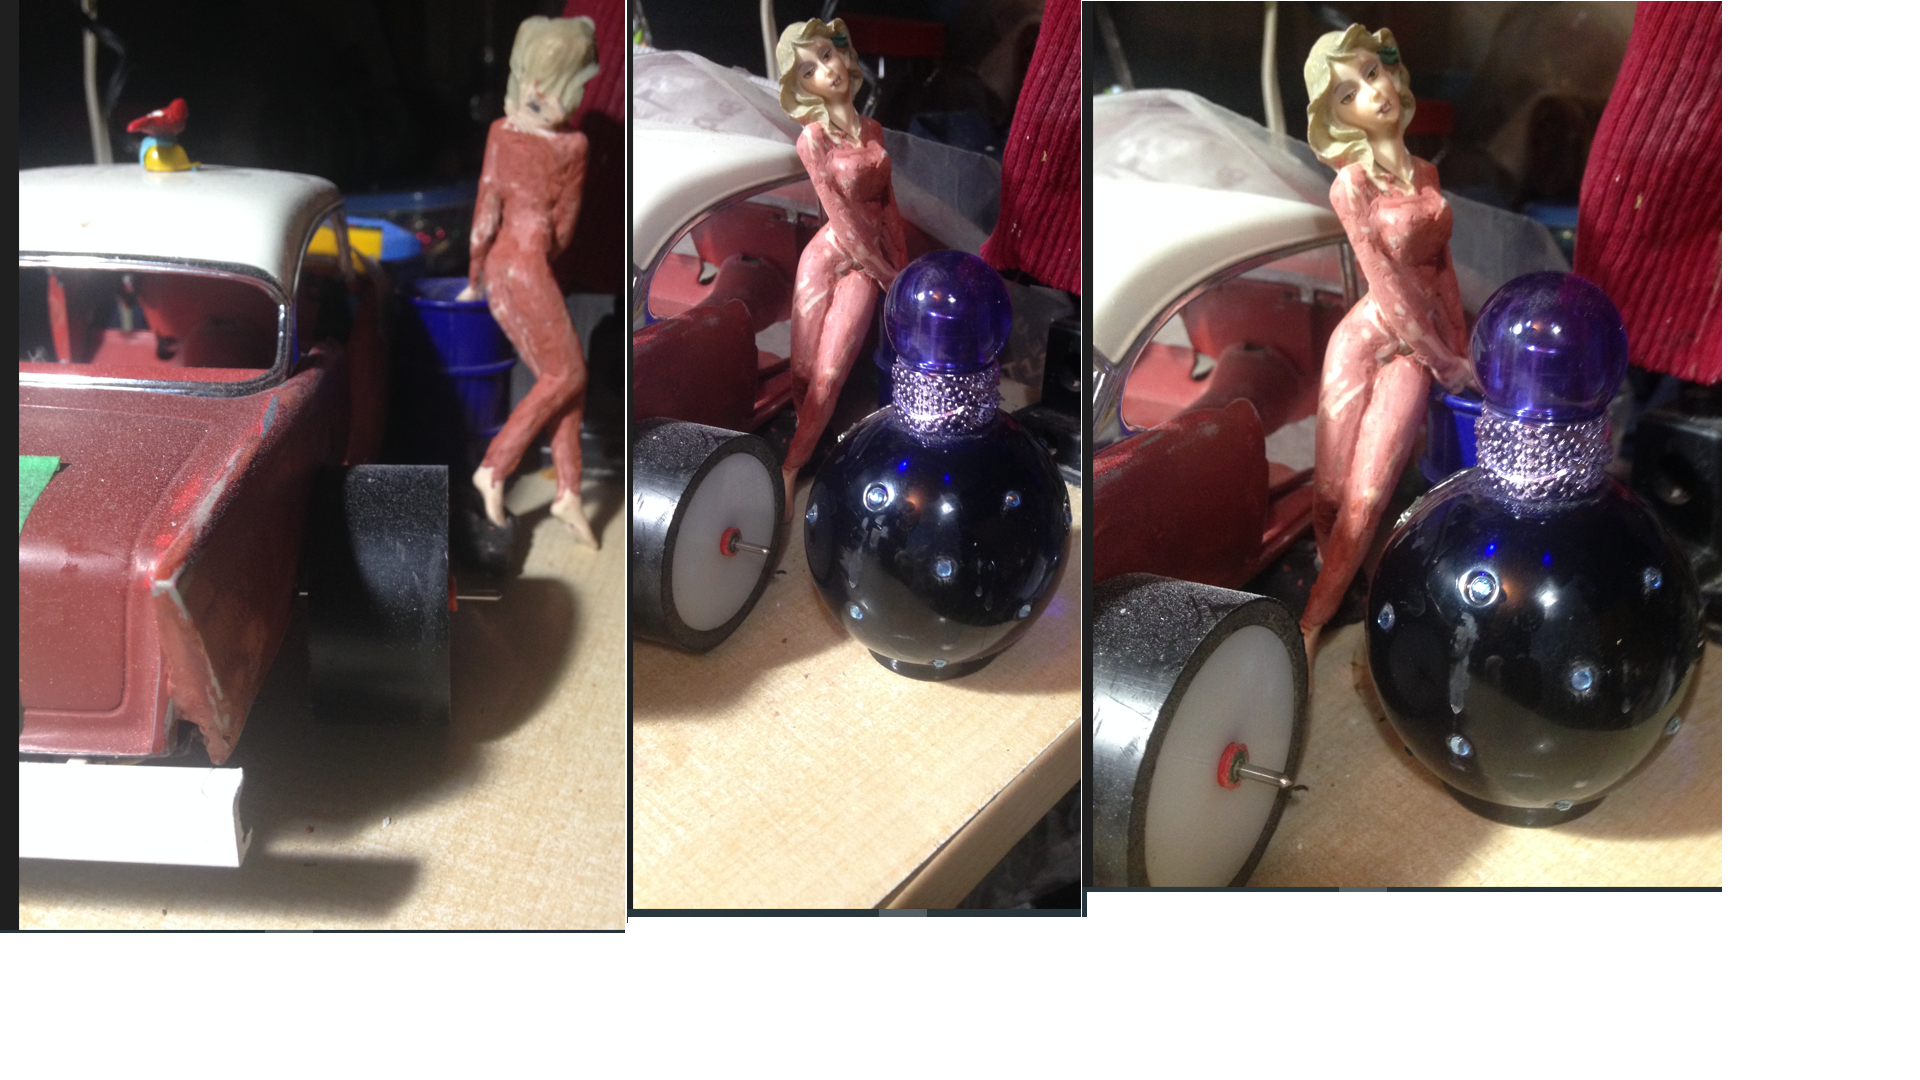
Once dried, here is the first coat of finishing compound sanded… or maybe the second one. I am not sure. Why do you see a blue bottle of parfume next to my girl? The reason is that I found this bottle and wanted to ask my best friend Mimi and ask if she wanted it and at the same time I sent her the new pictures of this part of the project. So I took the pictures of the figurine and the bottle at the same time. I install pictures here and there on this page, at different levels, on different little projects on the page, depending on which item I am working on at the moment, and also the time of writing and editing the new pictures is some extra work that I do along the way. Many times I write this page in the middle of the night. I am so tired that I make a lot of mistakes. When I revise my writing, I get mad at myself because I published a nigthmare of errors all over my page. It’s sometimes on the Internet for days and when I review my work I am discouraged. This is it. What can I say?
About the car :
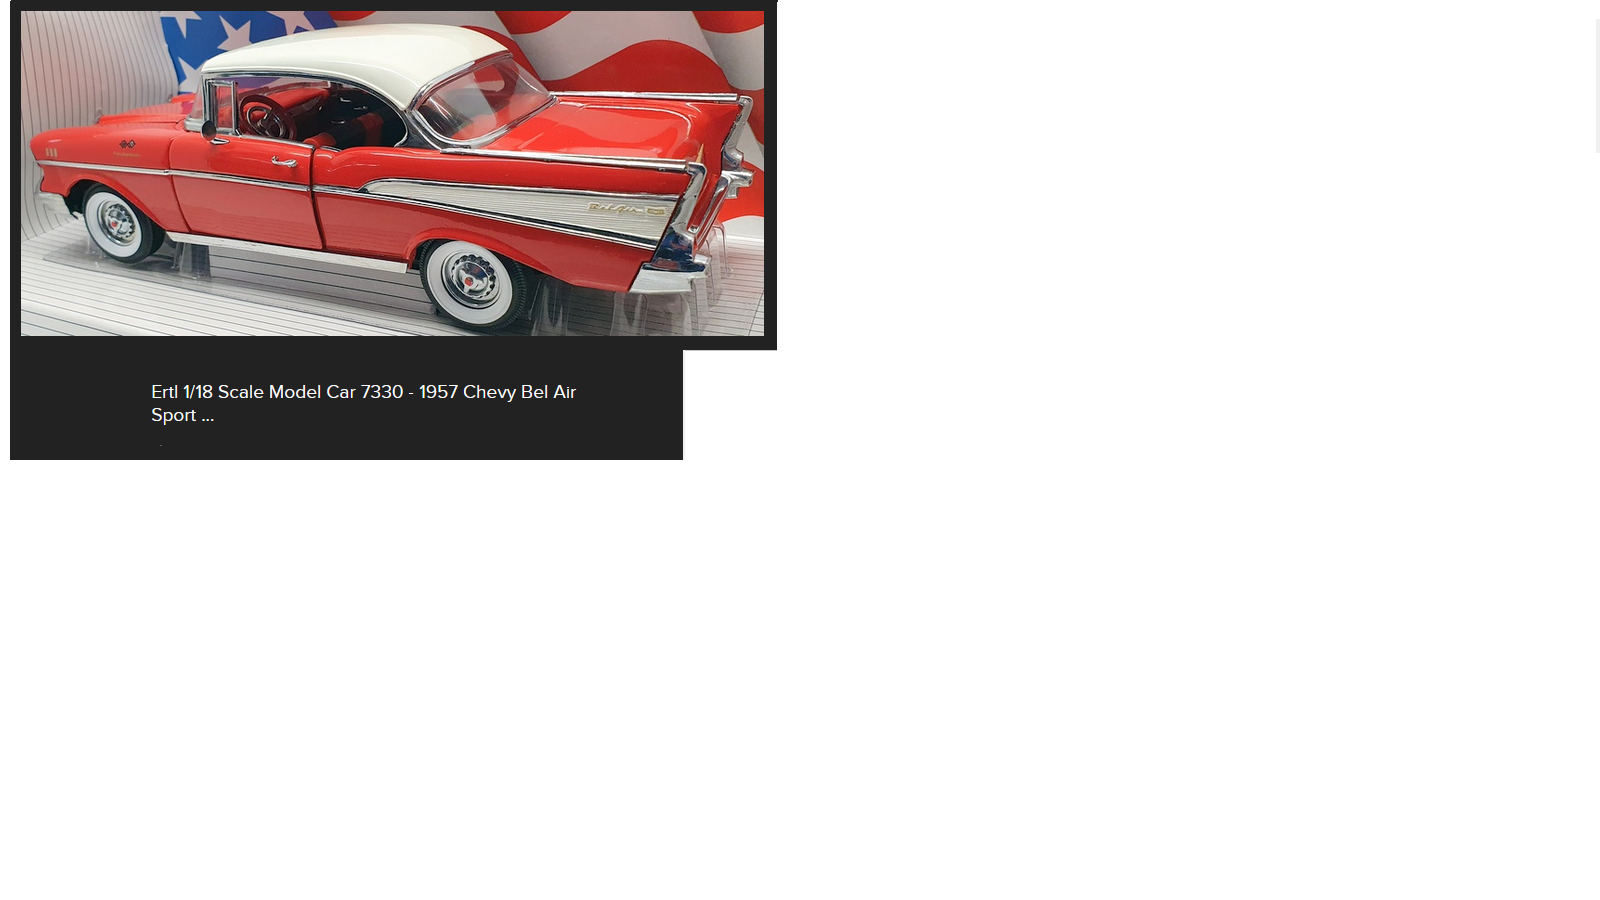
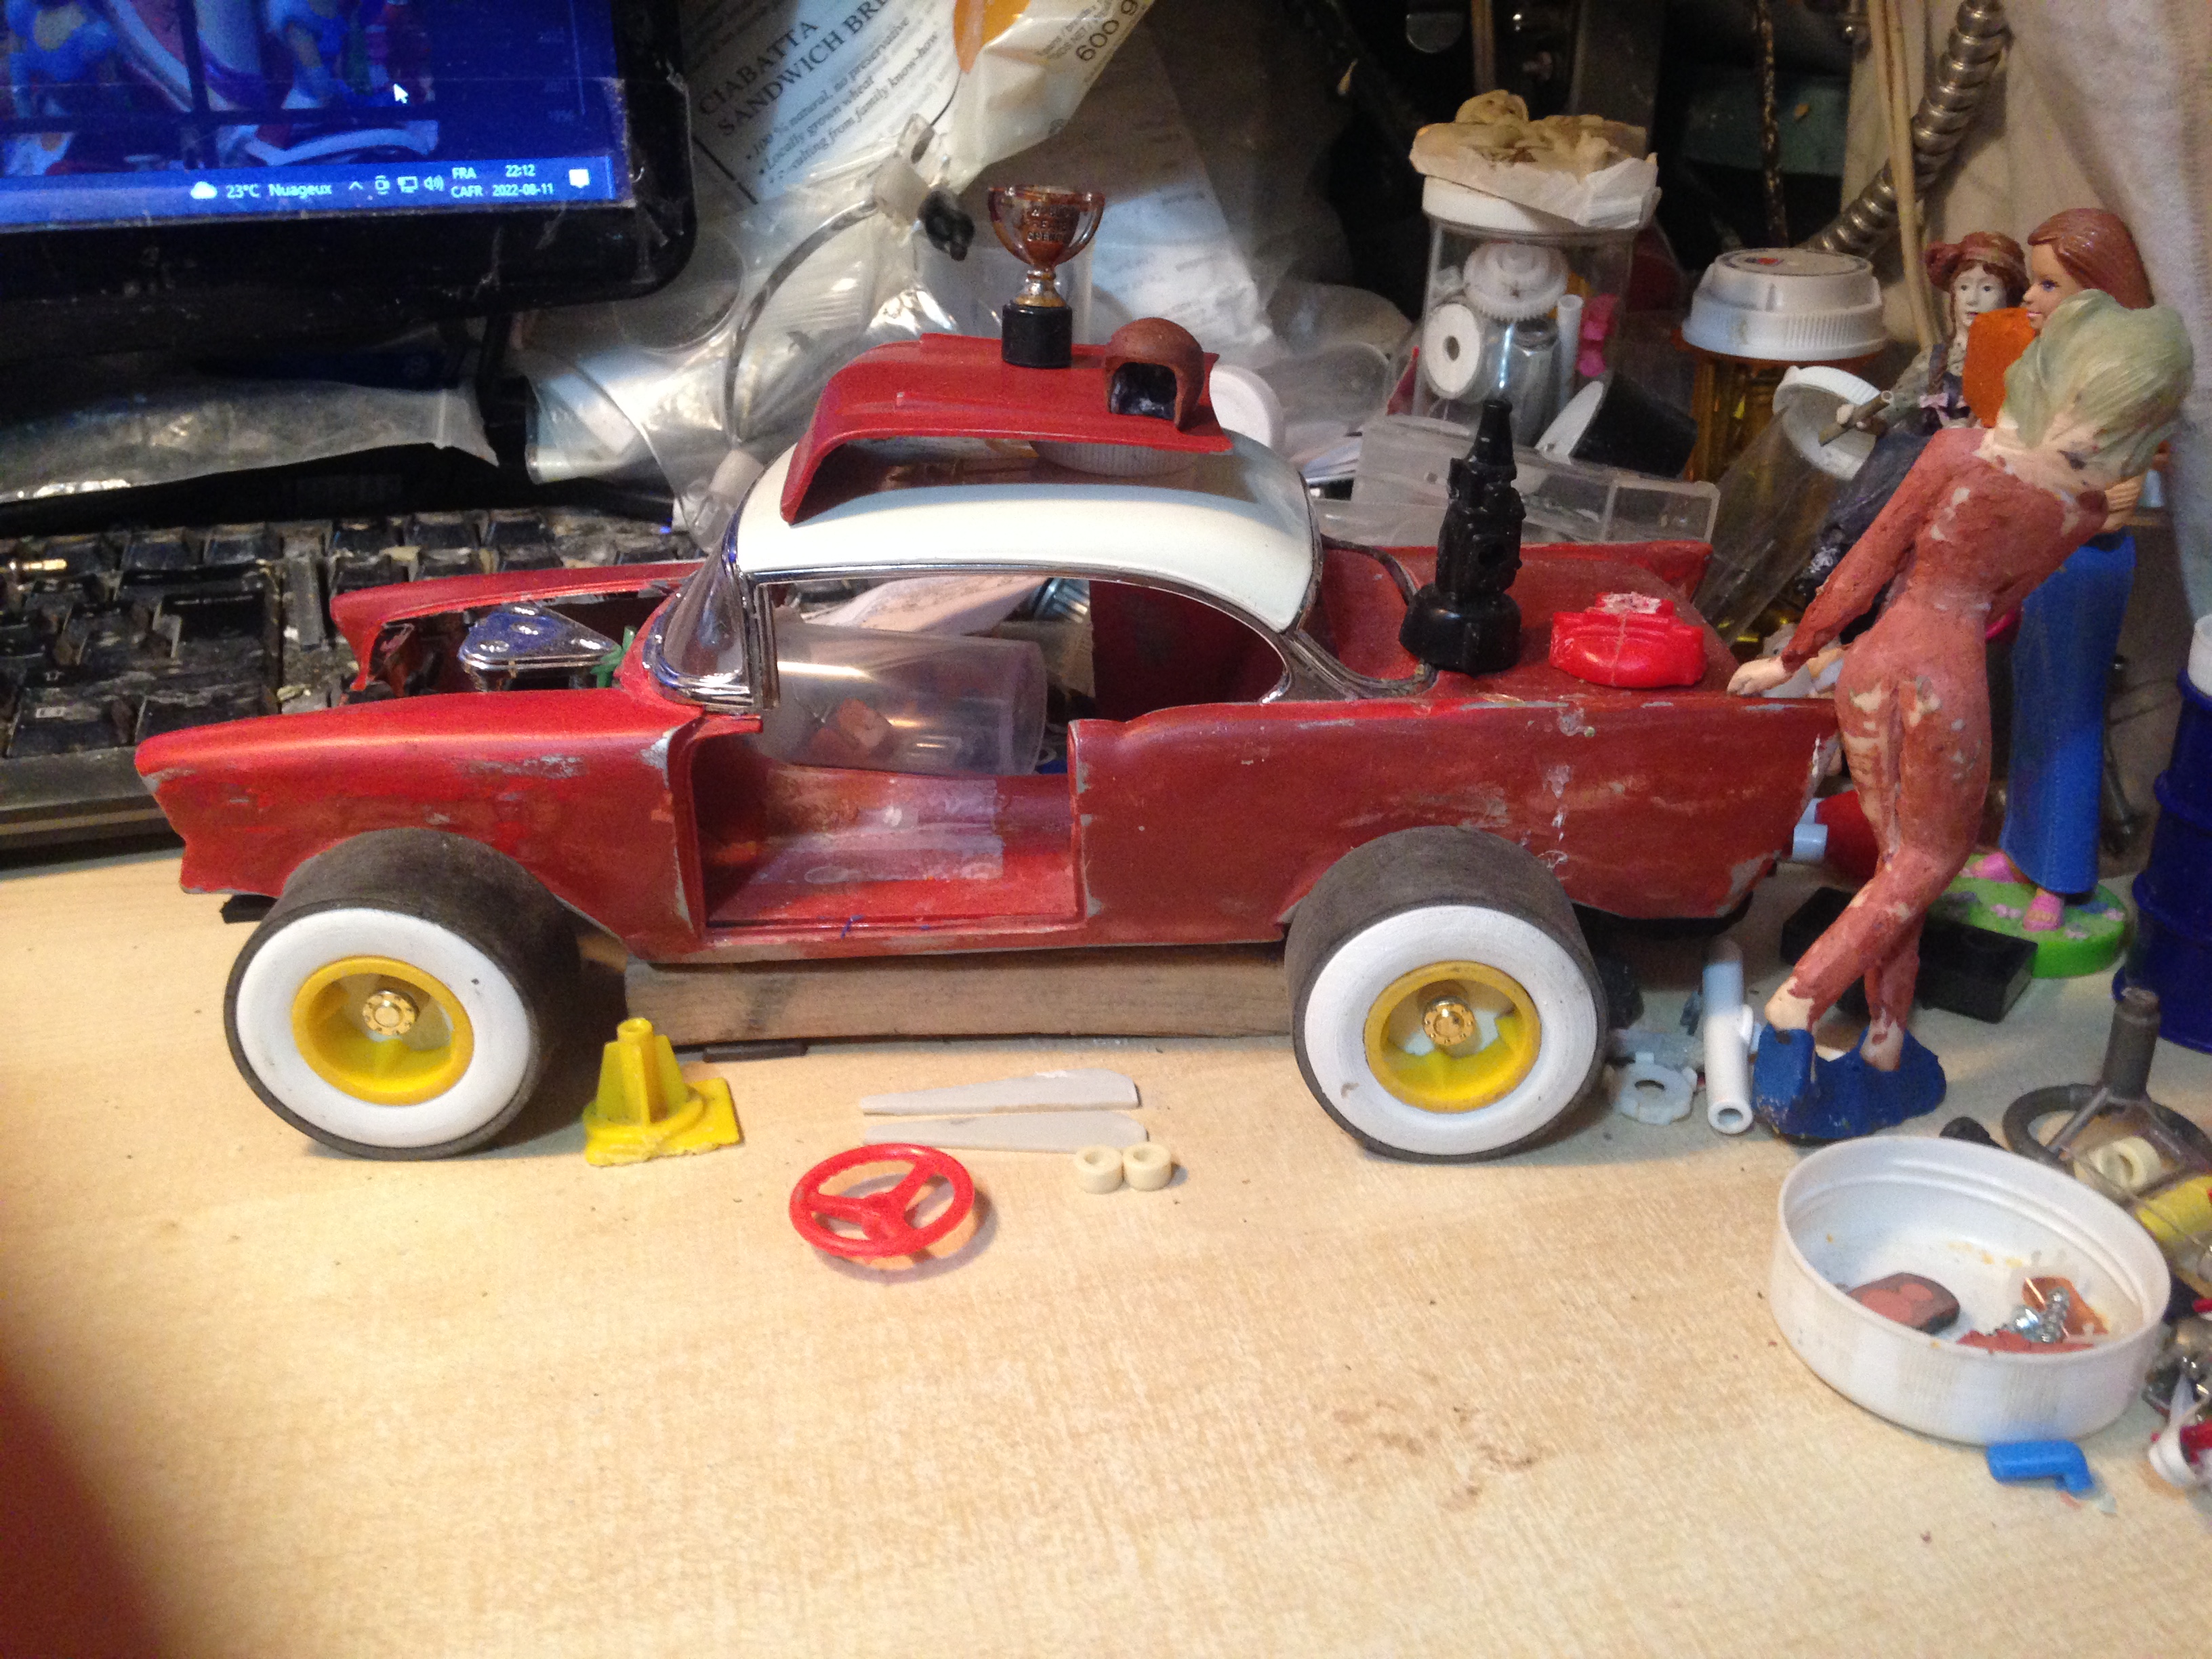
This is what I started with. I got it for a reasonnable price, It was like brand new but without the original box. It was a bit sad to alter such a beautiful model, but I always think that I will build something unique with it, and nobody will have one exactly like mine. I will work slowly, diligently and won’t build anything lousy. I like details and I am not in a hurry to have it finished.
I started this crazy project months ago. I am working on it once in a while. I have been thinking to take the challenge to work on a scale model made of metal (diecast) since a long time. I had many reflexions on how to do the most difficult steps on it. It is another crazy dream of mine. I guess that I like complicated works, or I like to push myself a step ahead in my skills. It is demanding a lot of thinking. Trials and errors, plus corrections… or a restart from scratch for some difficult steps. I am used to that.

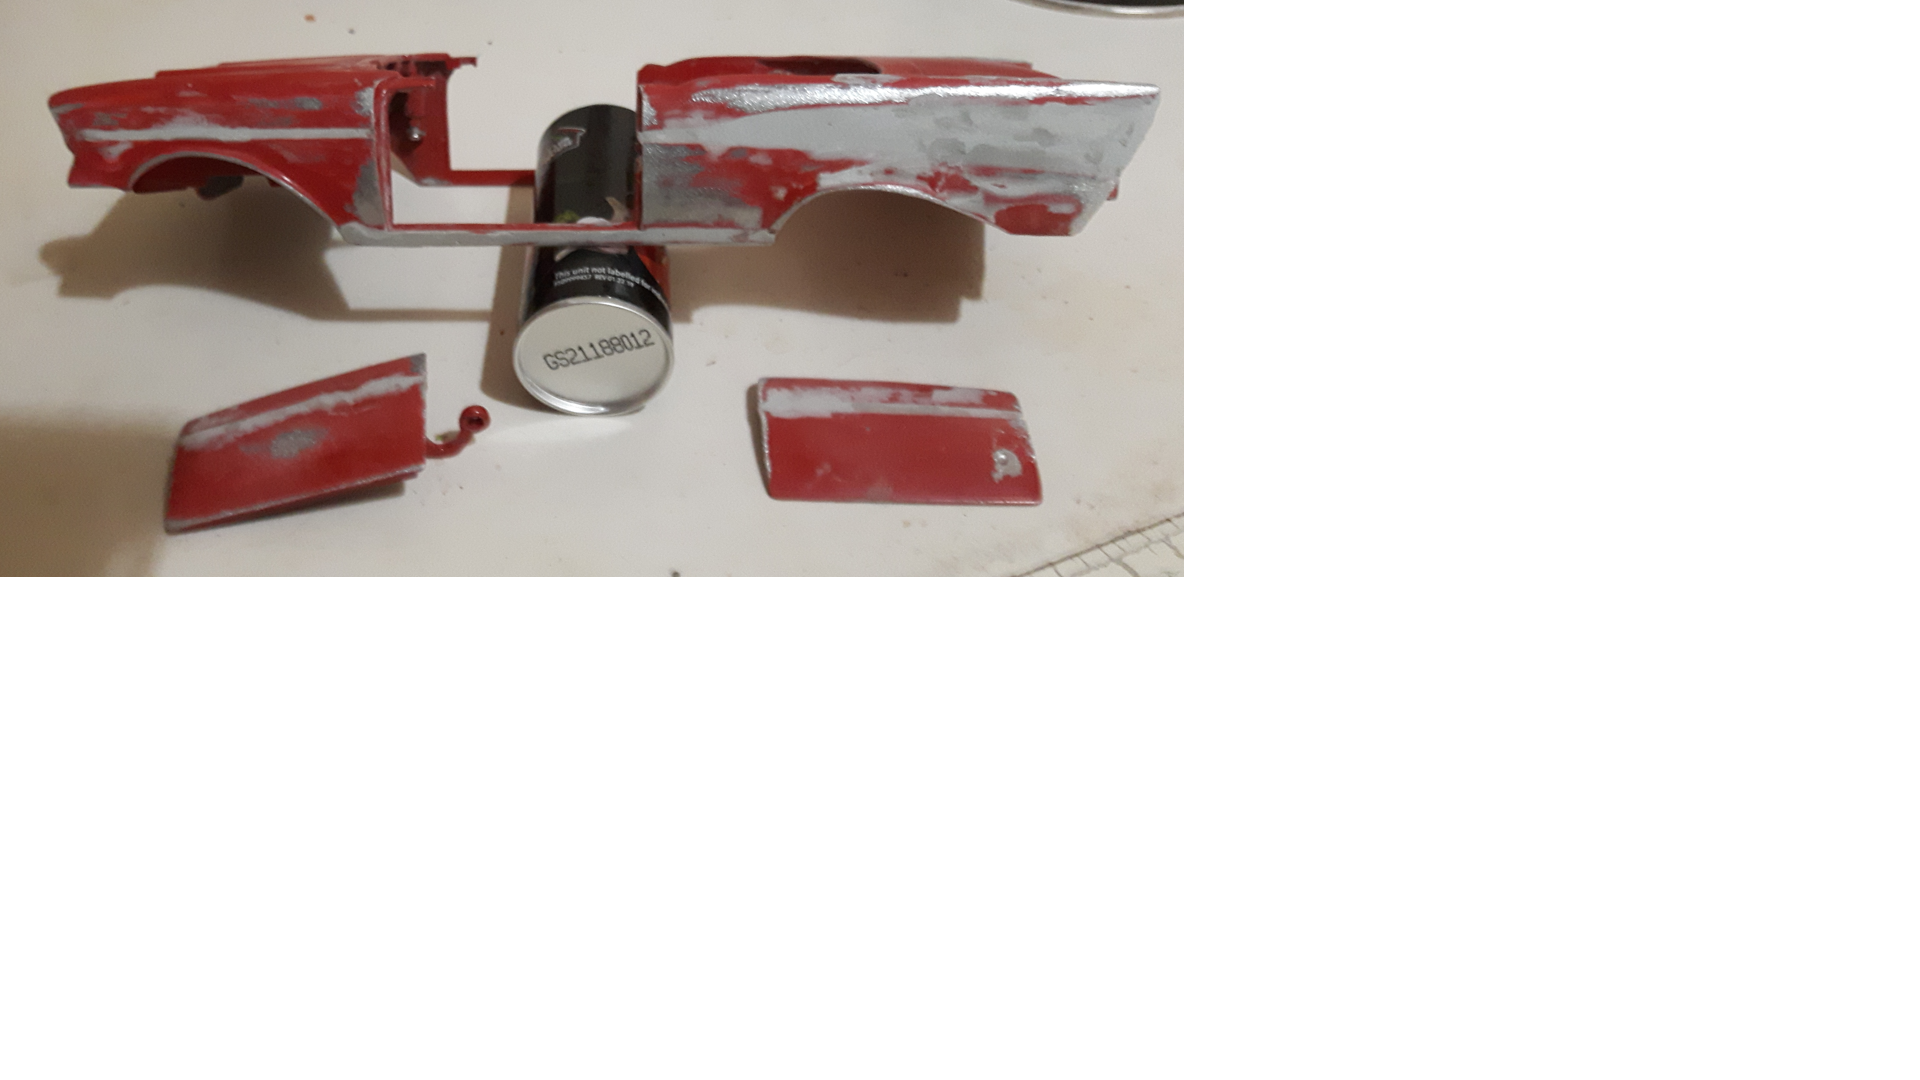
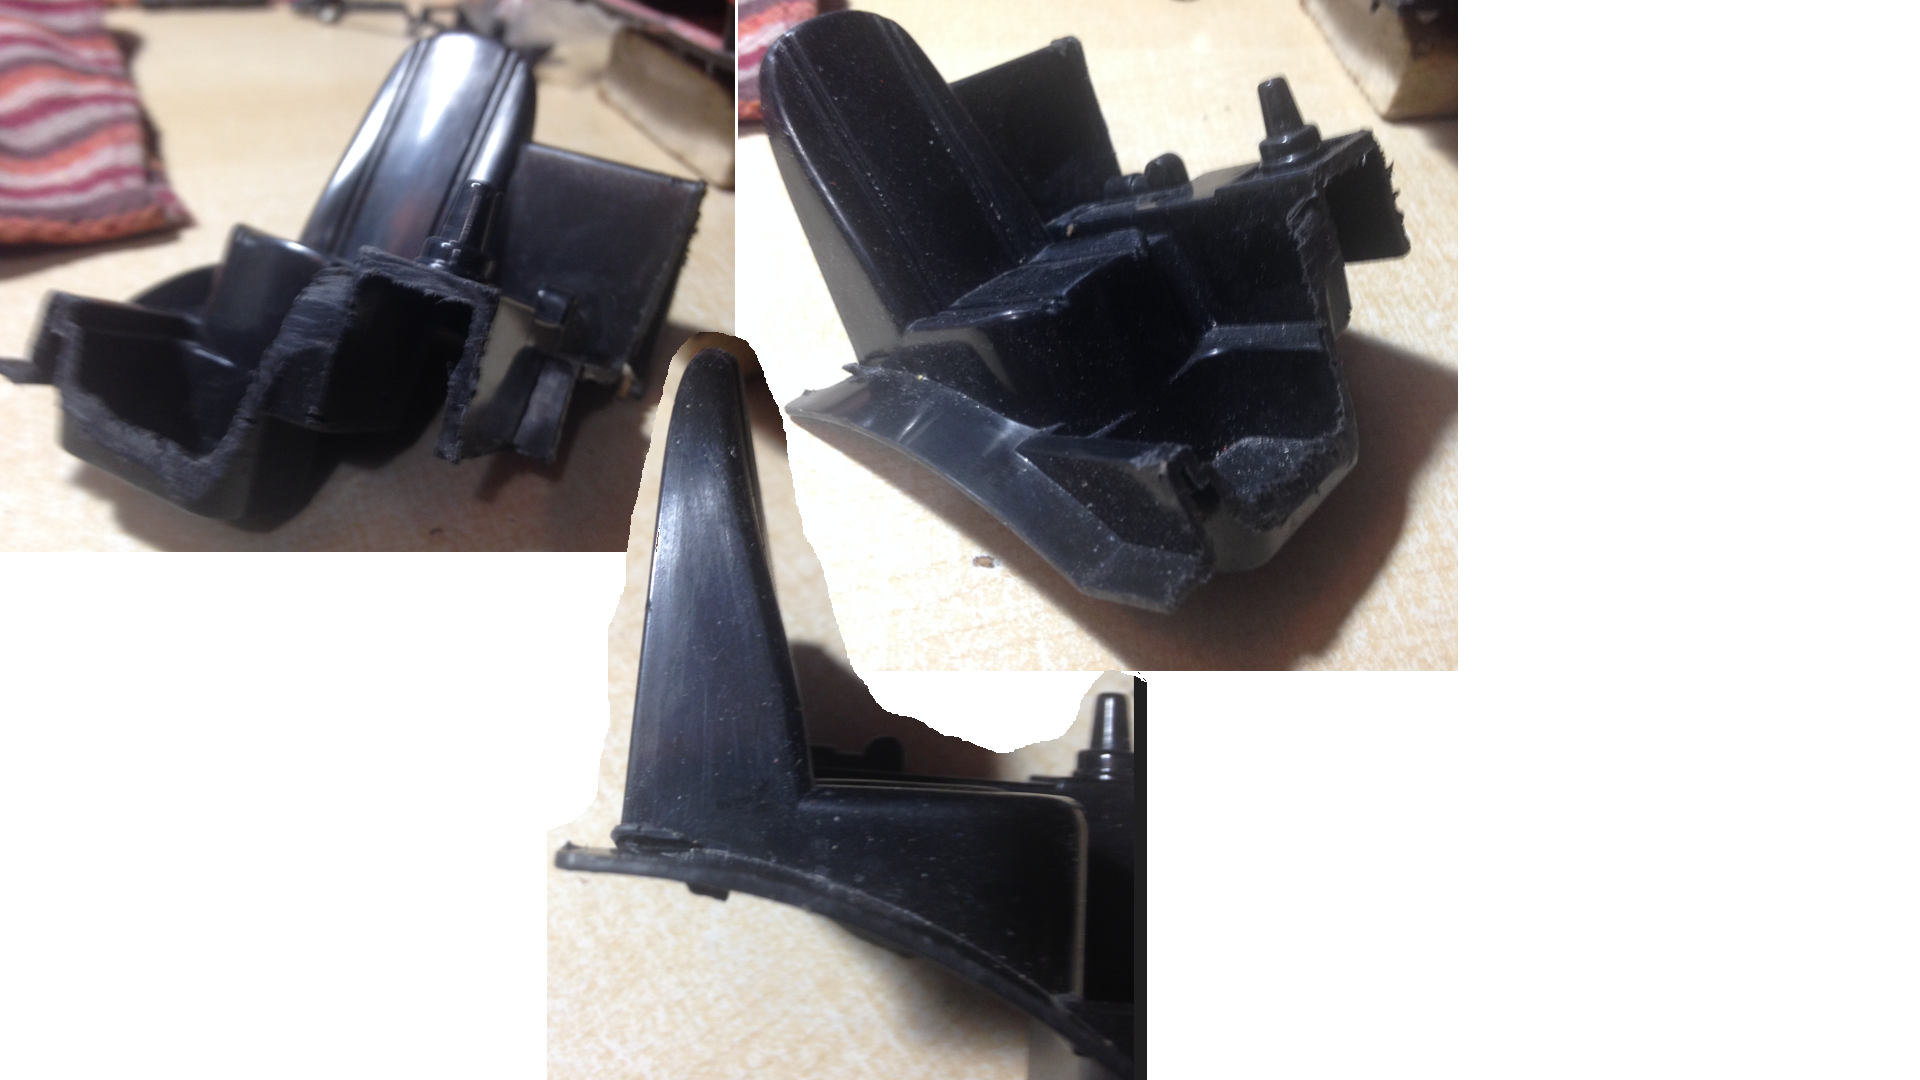
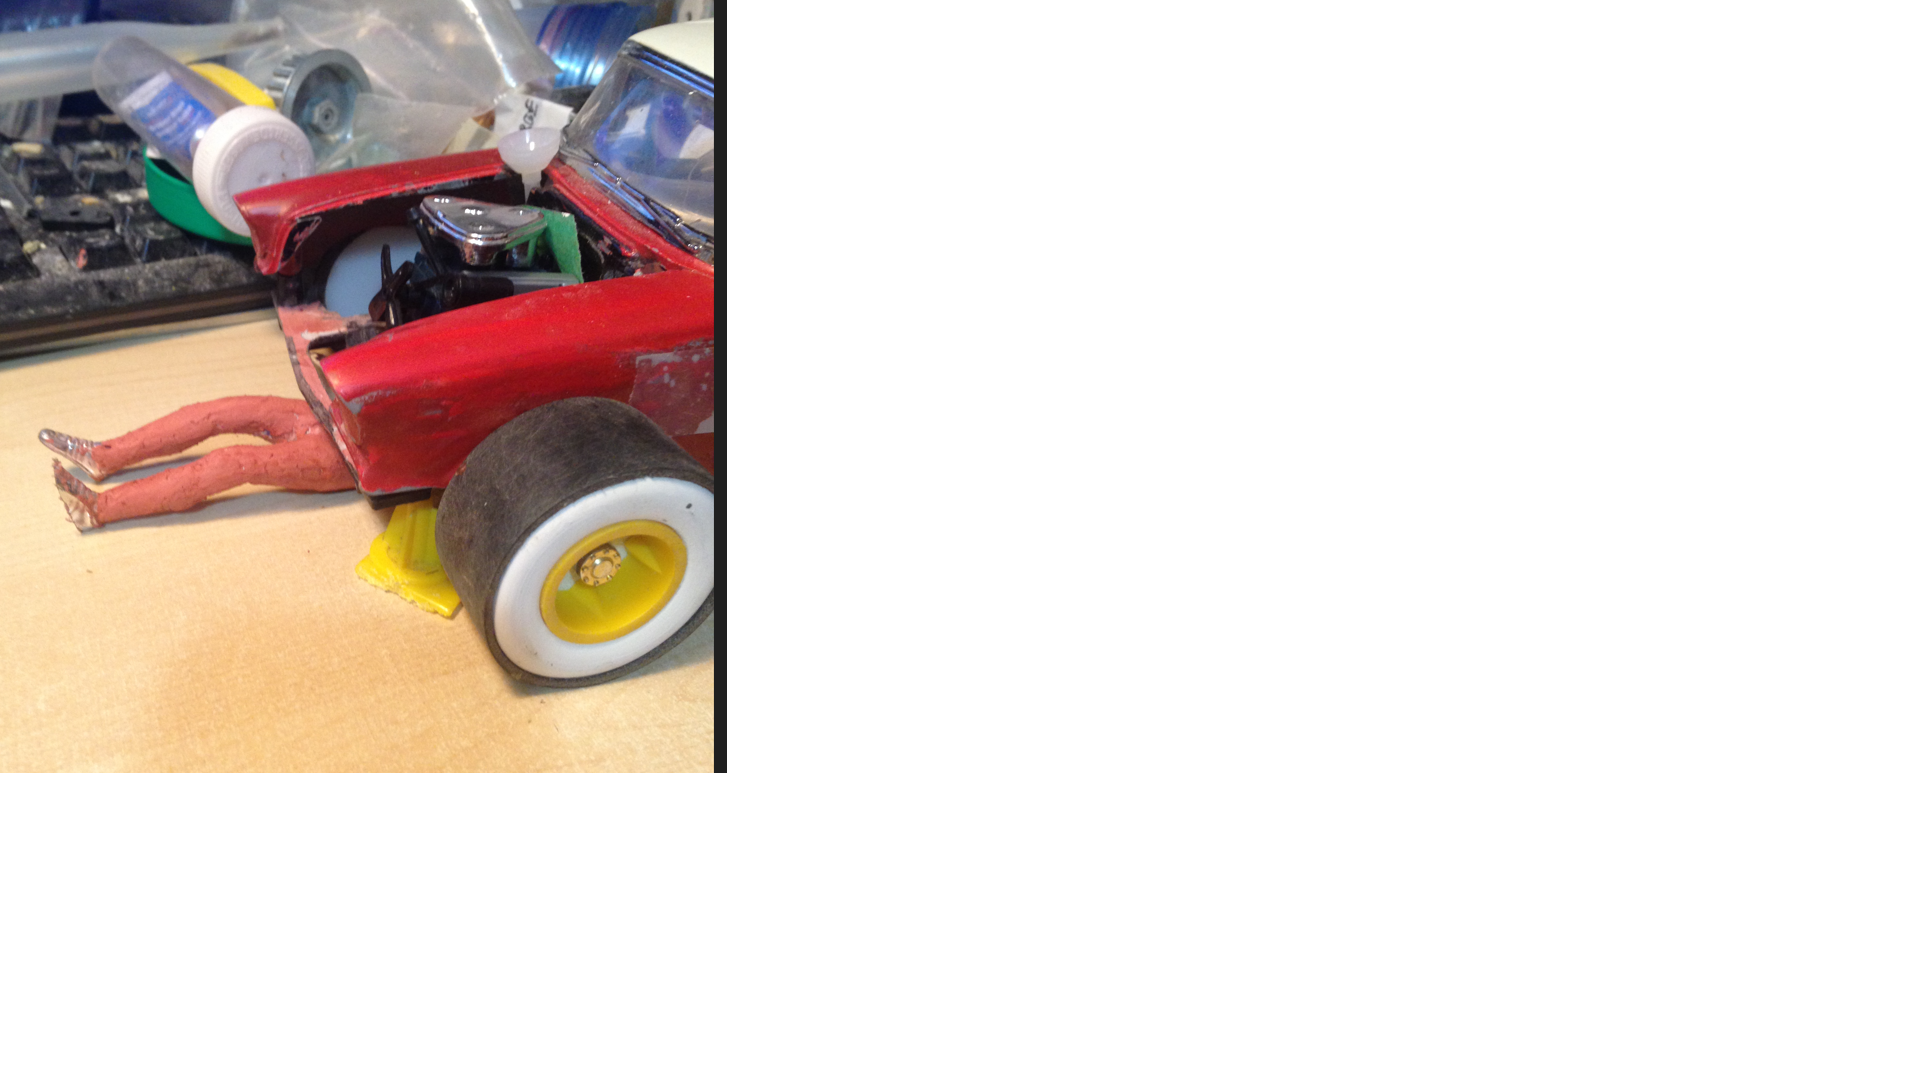
I had to remove all the interior of the car including the cutting of all the surrounding parts of the doors, ending up only with the outside ”door skins”as we call it in the body shop language. Lots of cutting of metal.
This type of work is very different than doing jobss on a styrene scale model kit. I have to develop new tools, even I am working part time on building a sophisticated machine to be able to grind the wheel openings the way I want to have them done. There are many things to think of, working on this machine. Always a new problem to solve, but I think that I have found most of the solutions for the different steps of ths additionnal project. It will be useful for other projects of the kind because I got a few other diecast cars for cheap and I plan to build more Late models of this era after this one. In this particular 1/18 scale, there is no part on the market to be bought for the type of race car that I build, so I have to scratch many parts by myself. It is not so much a big problem because I am used to do it. Sometimes I can use some parts that I took on some toys or other venues, but most of the time I have or to modify them to get closer to what I want as result, or making them from scratch.
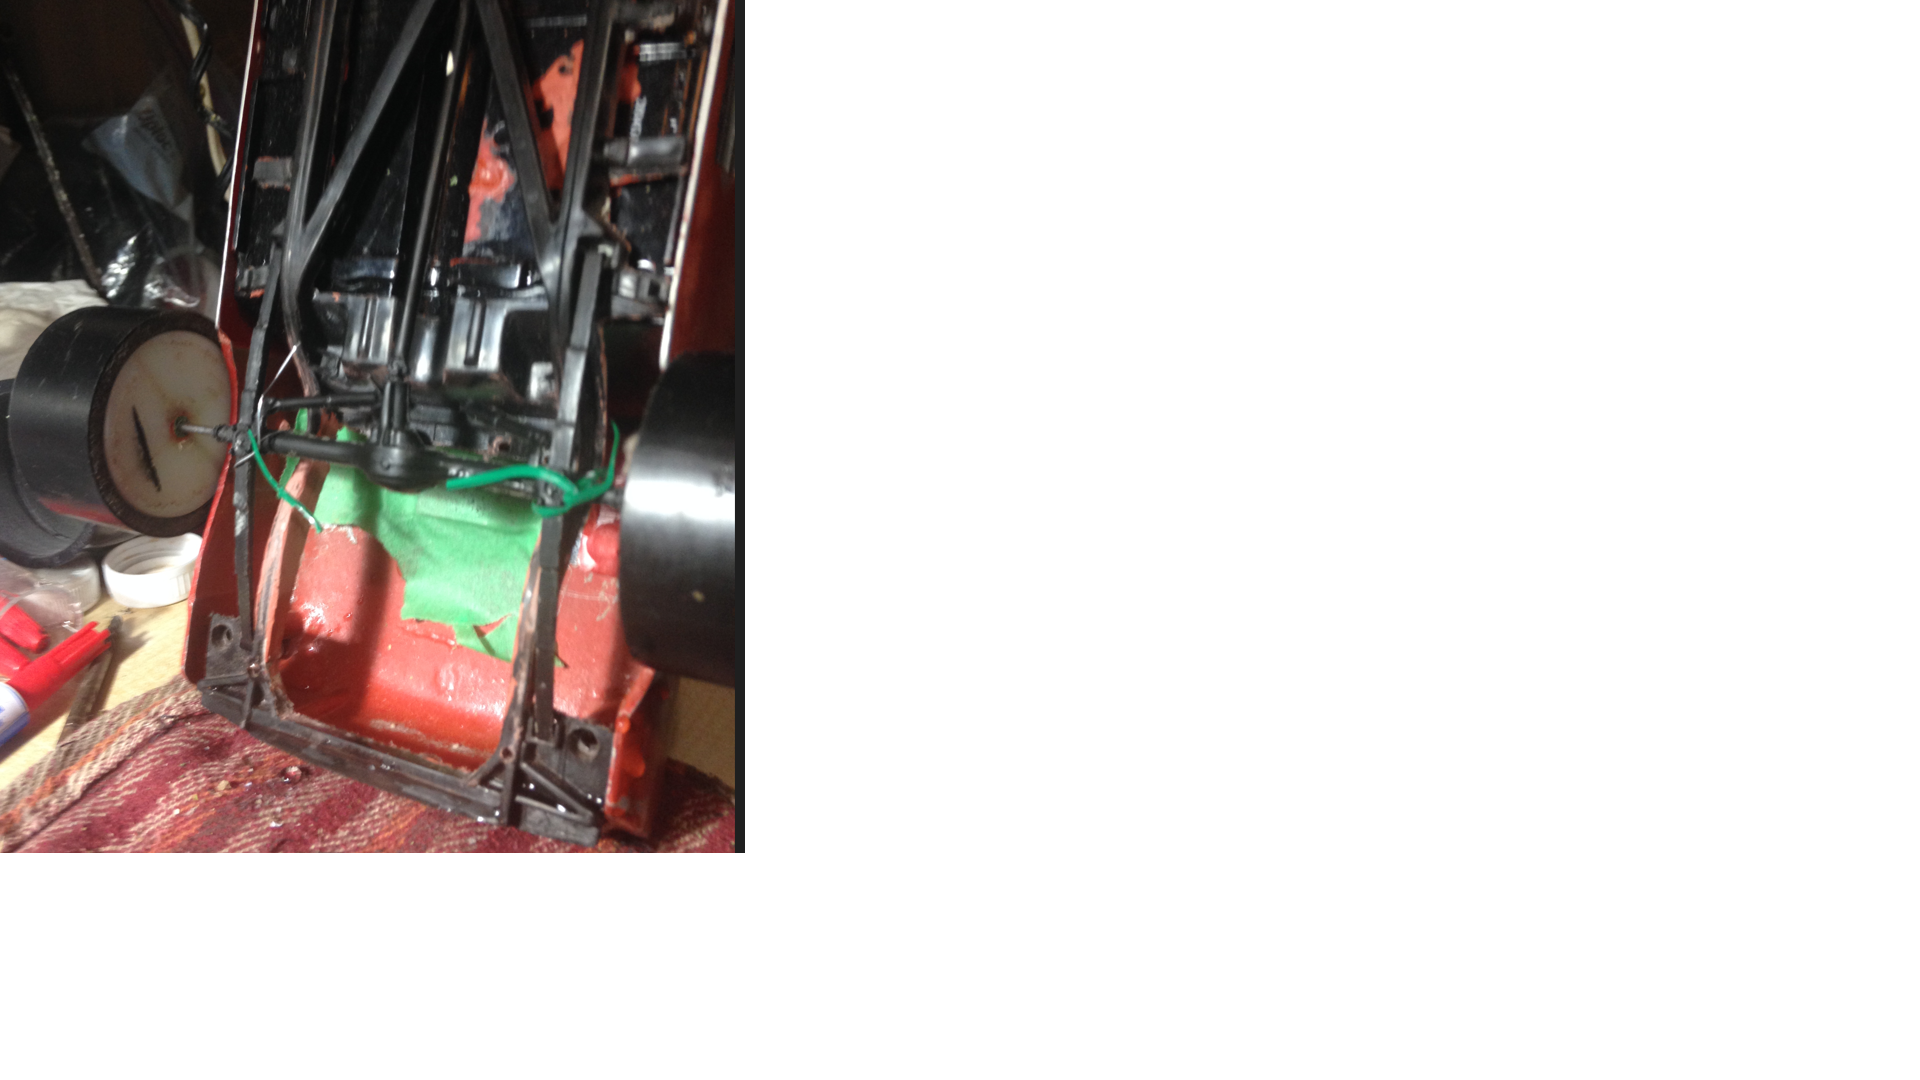
Late model Sportsman cars had no trunk floor. Only the frame and braces, a fuel tank, adjustable suspensions at the 4 corners was a must, shock absorbers, a differential.
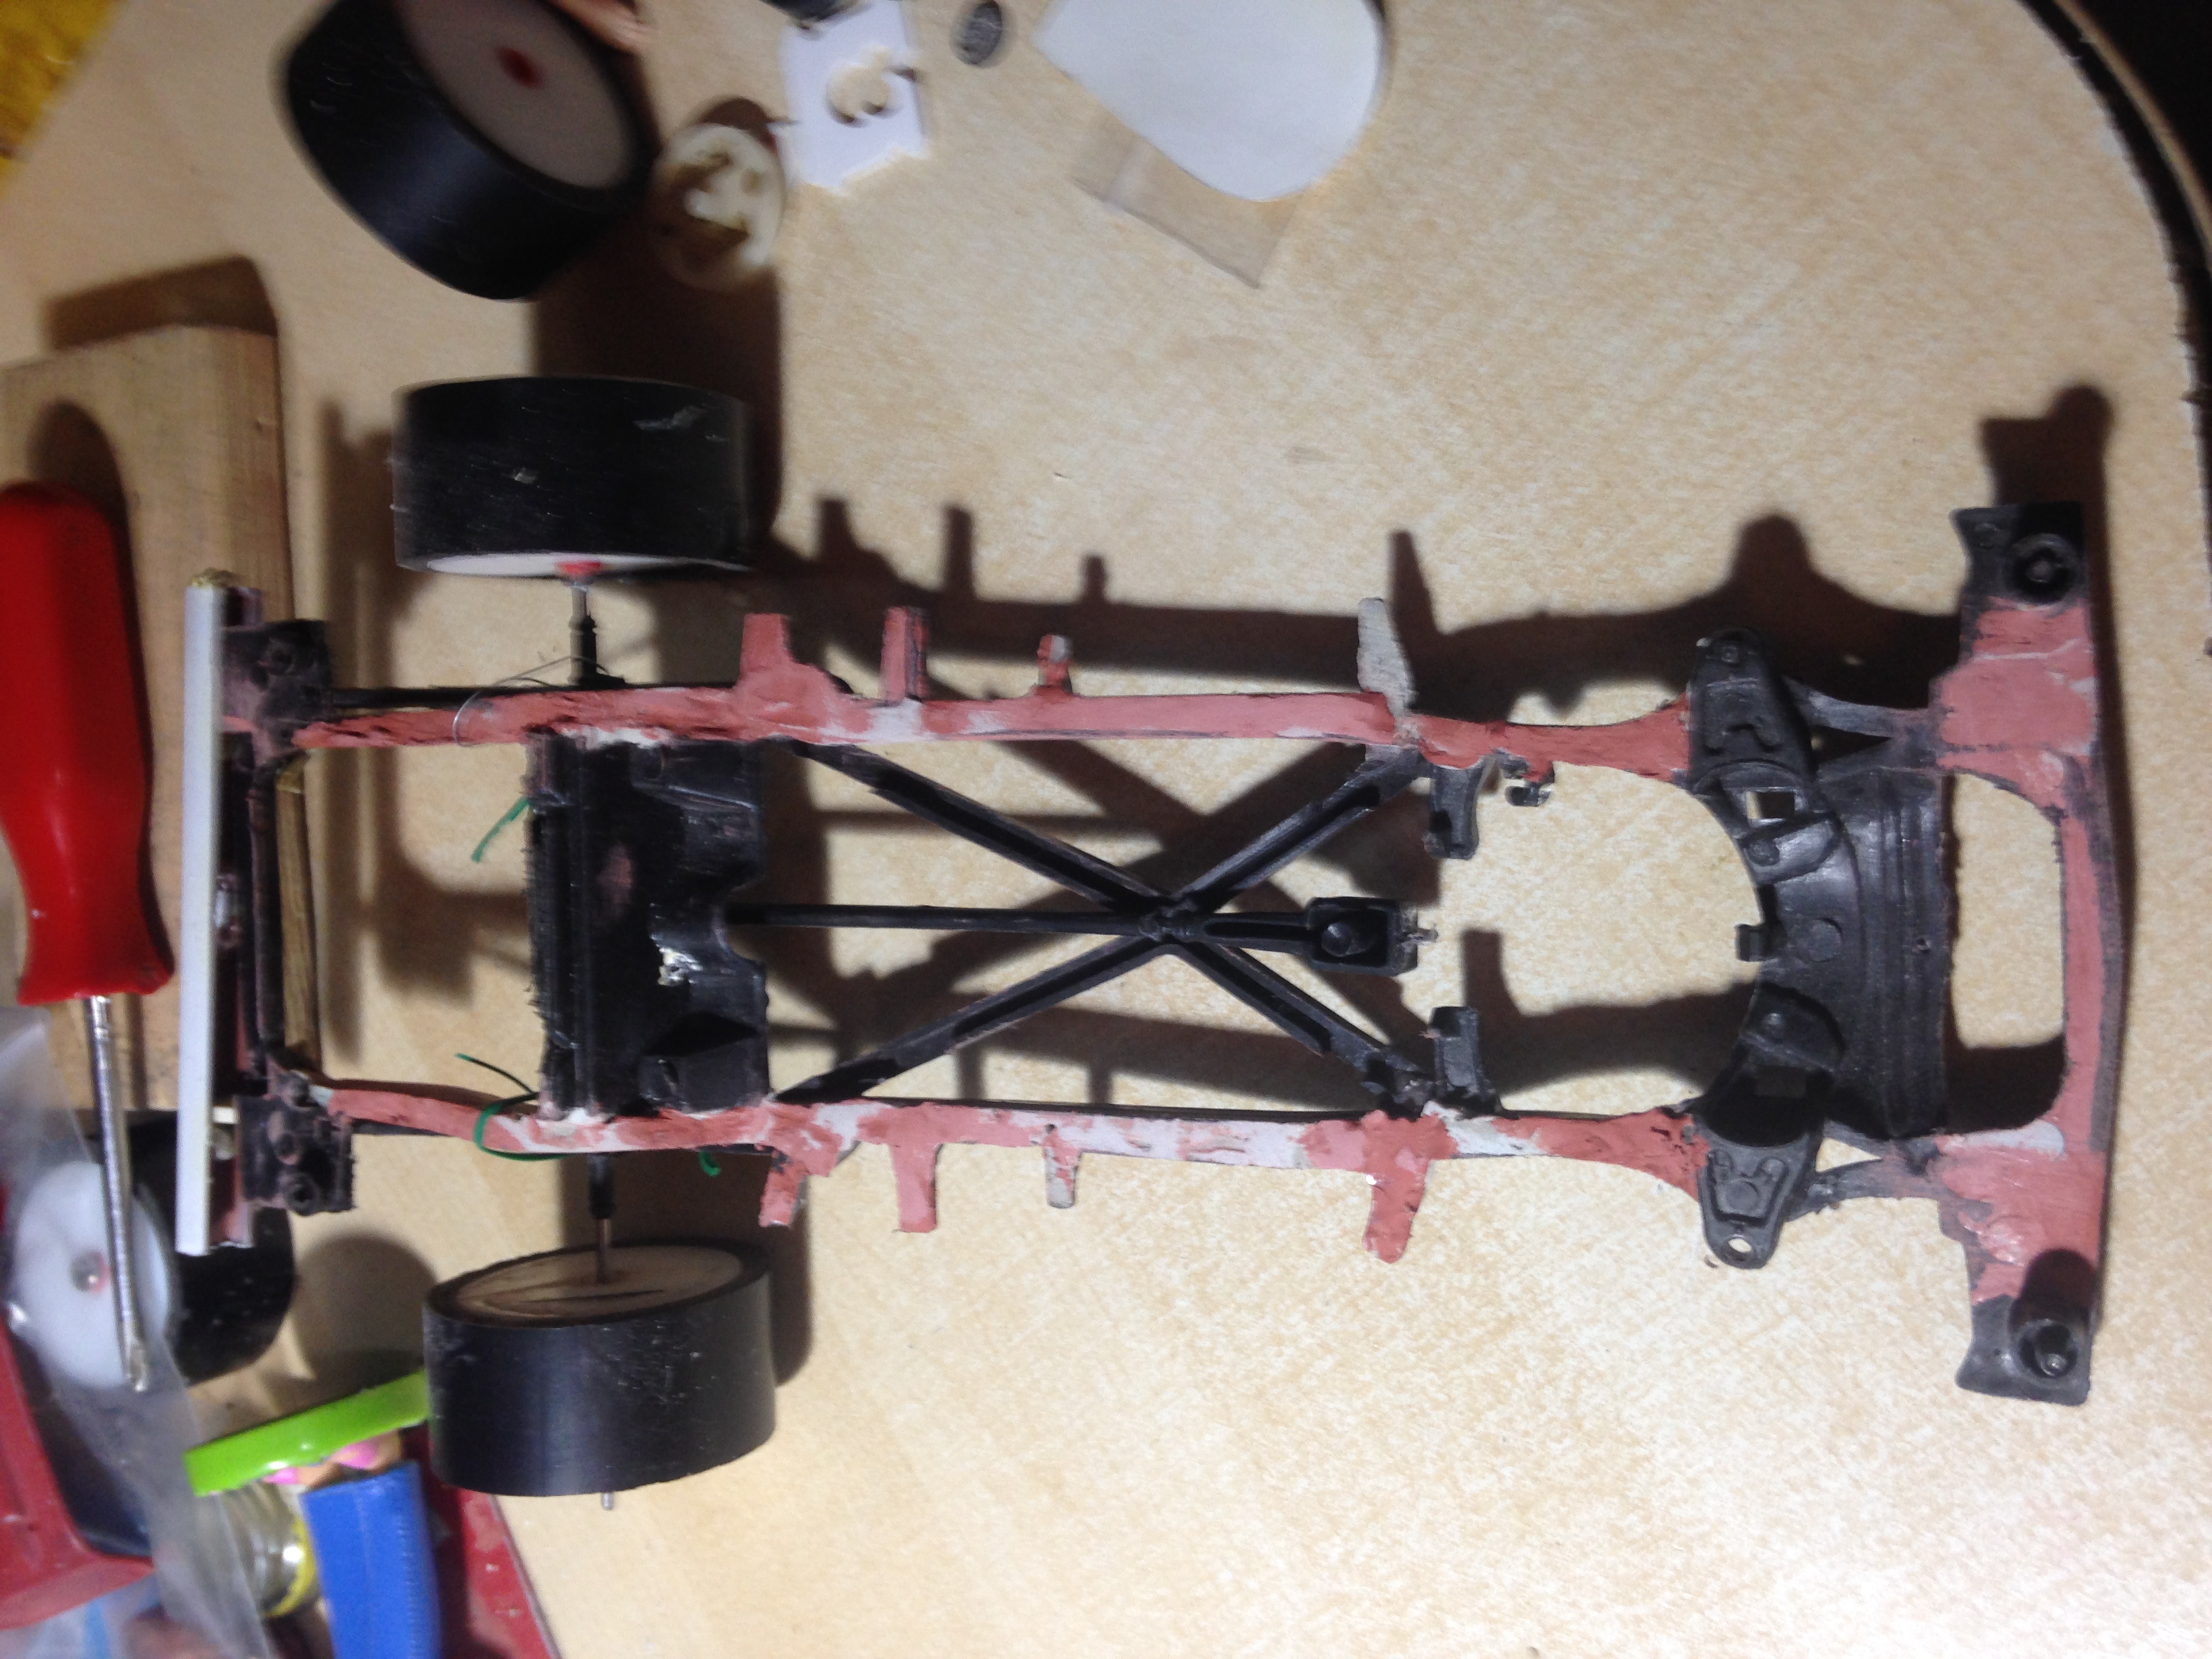
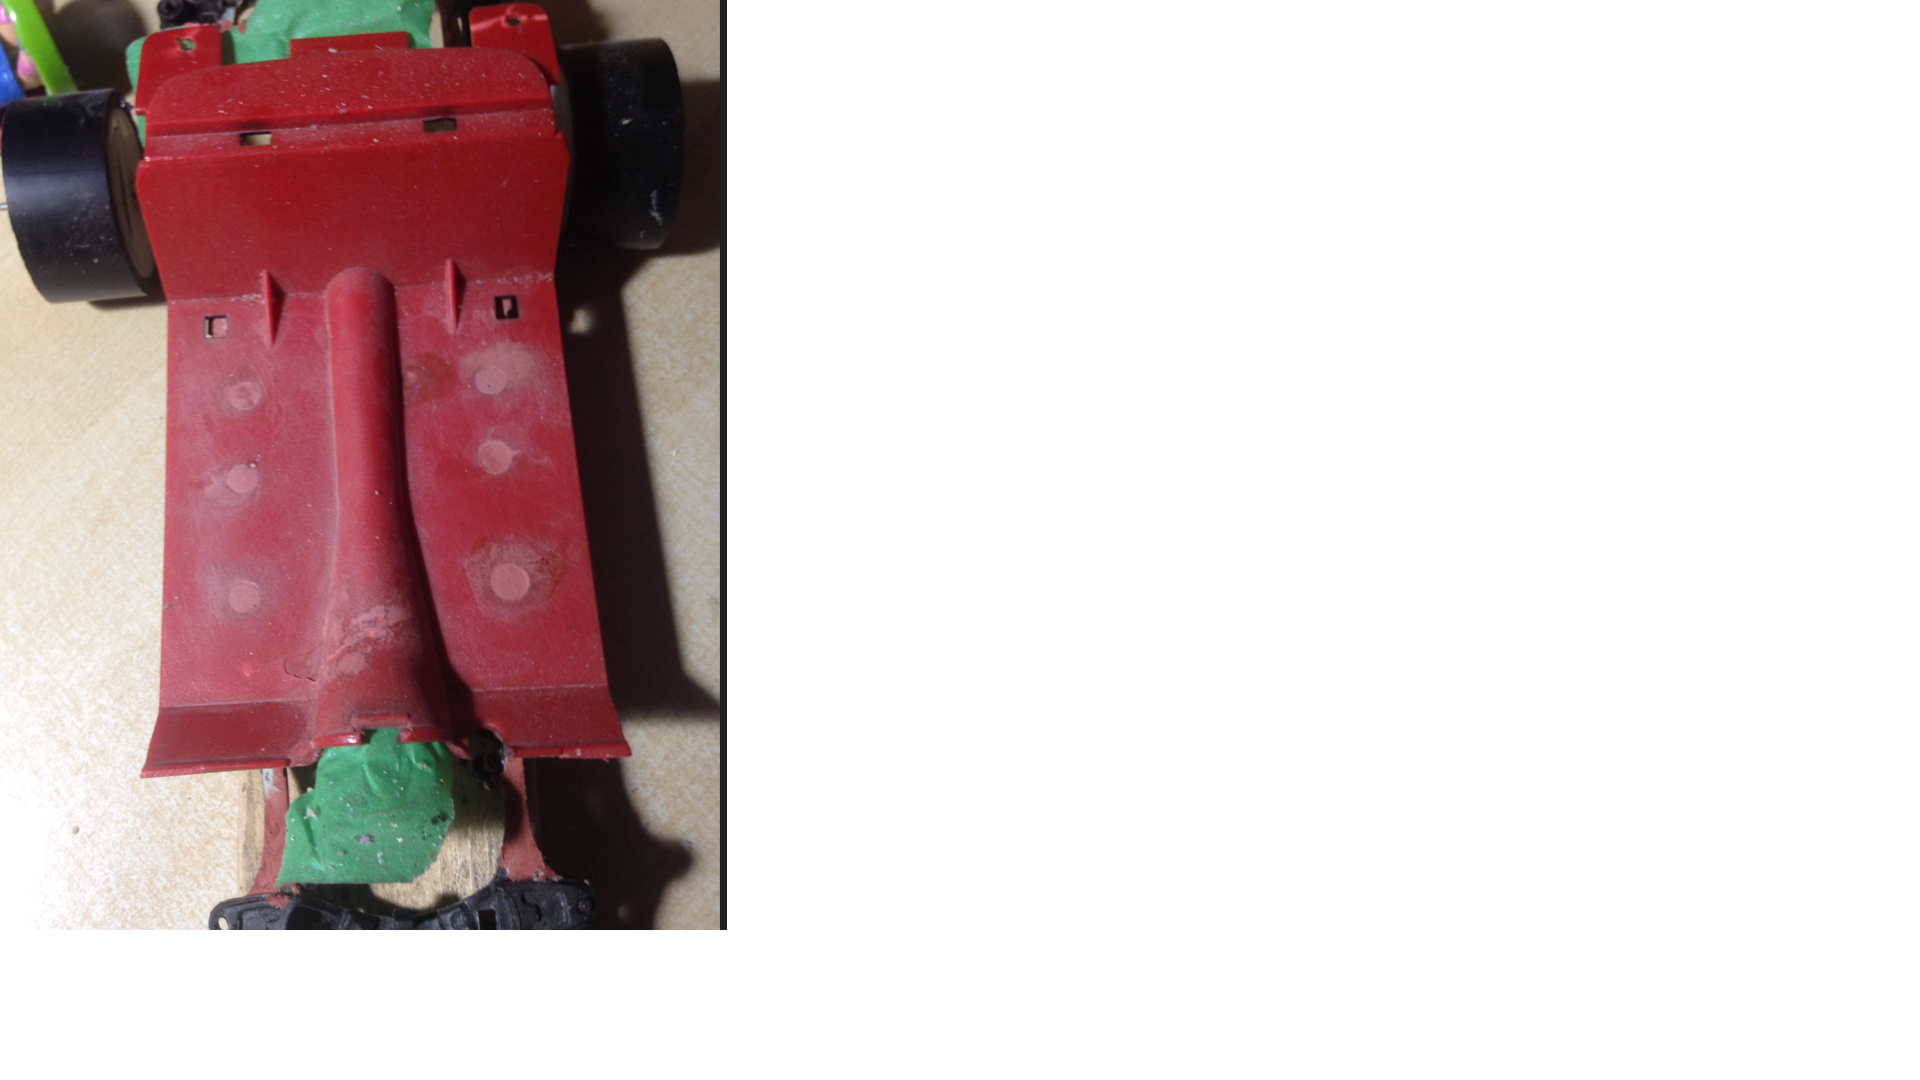
The frame, under the car is made of a soft plastic probably some kind of vinyl and it was hollow. I filled it with car body filler. It became more sturdy. I also removed all the body mouldings and filled the body of the car with putty, including the headlights and taillights areas. I am not going to put the original bumpers on the car. I will build custom ones with U beams and tubbings as it was the case in the years around 1967 for these kind of race cars, even on asphalt race tracks it was the fashion of the time. I have seen many of these cars and I am also well documented on this topic. The trunk lid doesn’t open on this model For the moment, I don’t know if I will cut it open, because it is a lot of work. This is funny, in my miniature material, I found a barrel, a 45 gallon one (steel barrel style). It looks exactly ”in scale” for the 1/18 dimension. I do not remember where I got it but probably in a store where they sell all kinds of used items… including toys.
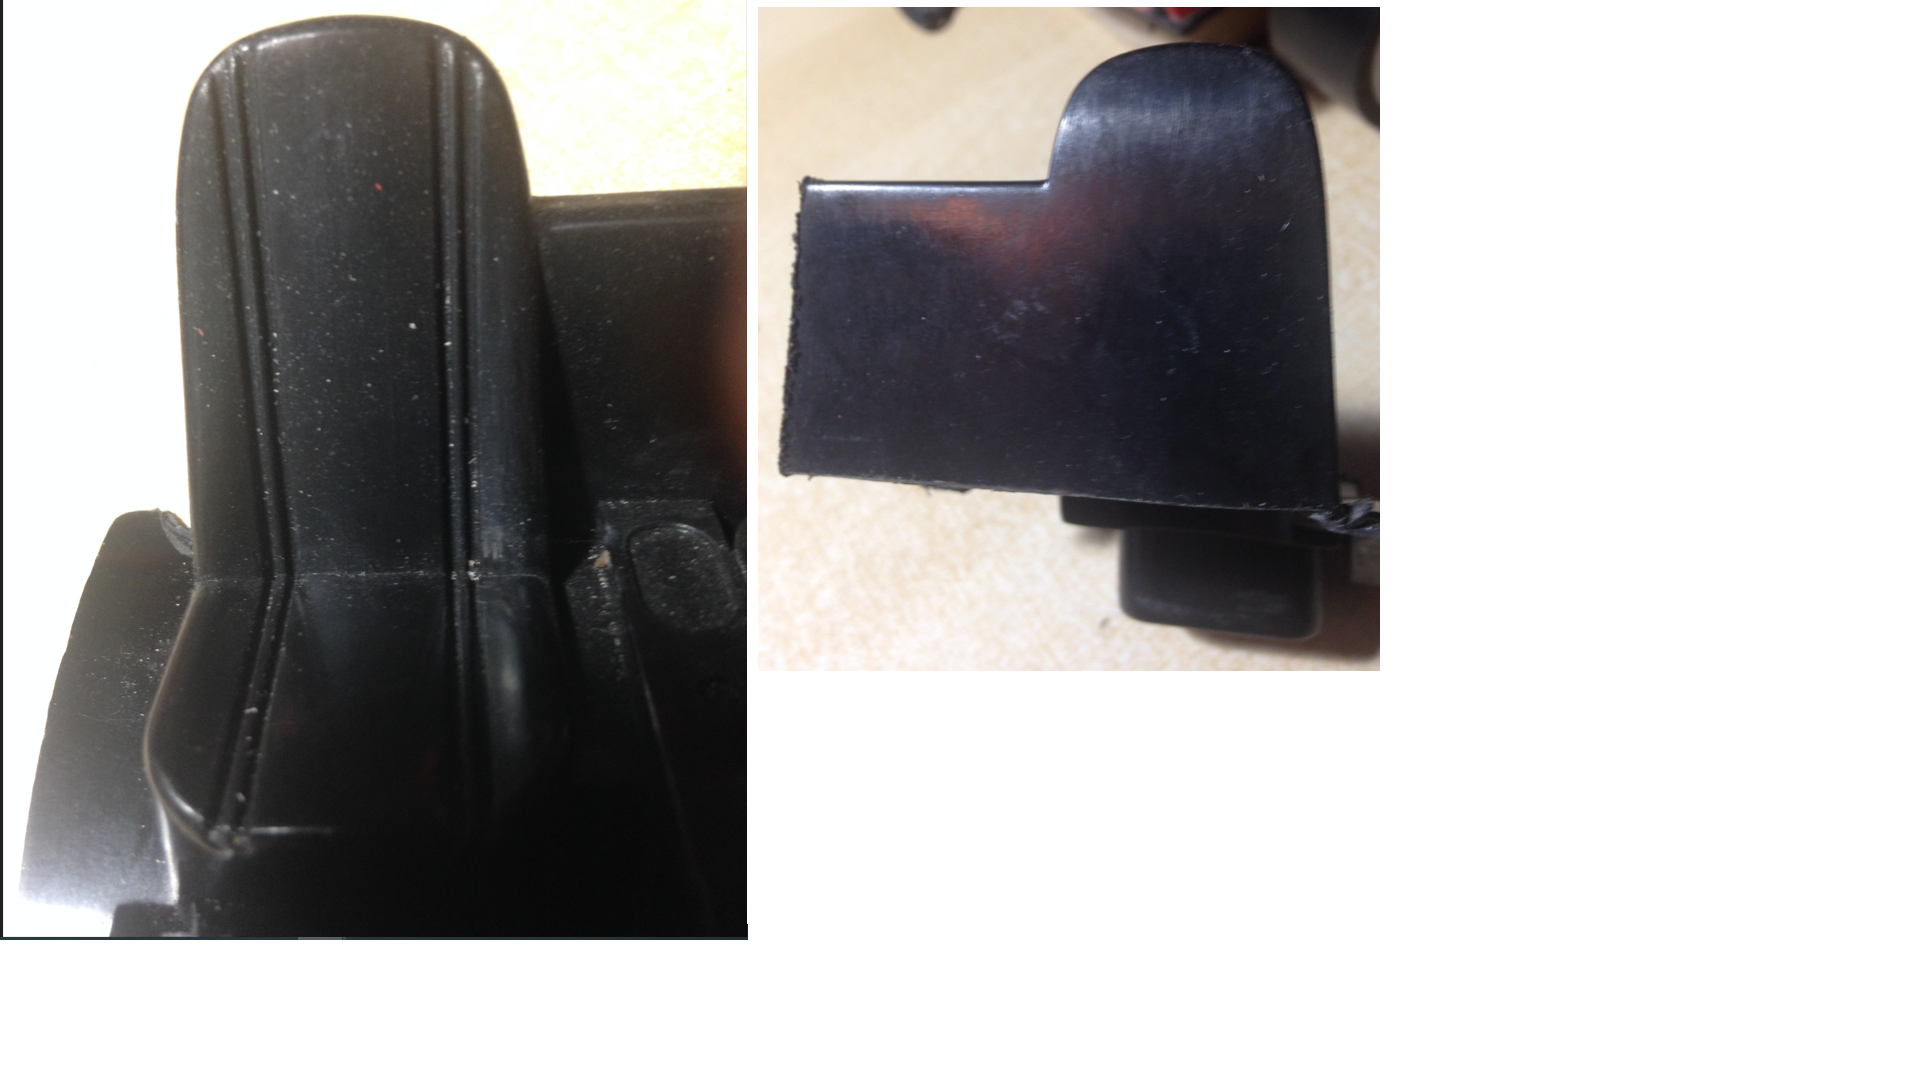
Removing the roof and reinstalling it is something very tricky. Once it was removed, from the car I made cuts to remove the backglass as the ”short trackers” of the time did not carry this item, probably to remove as weight as possible from these race cars.
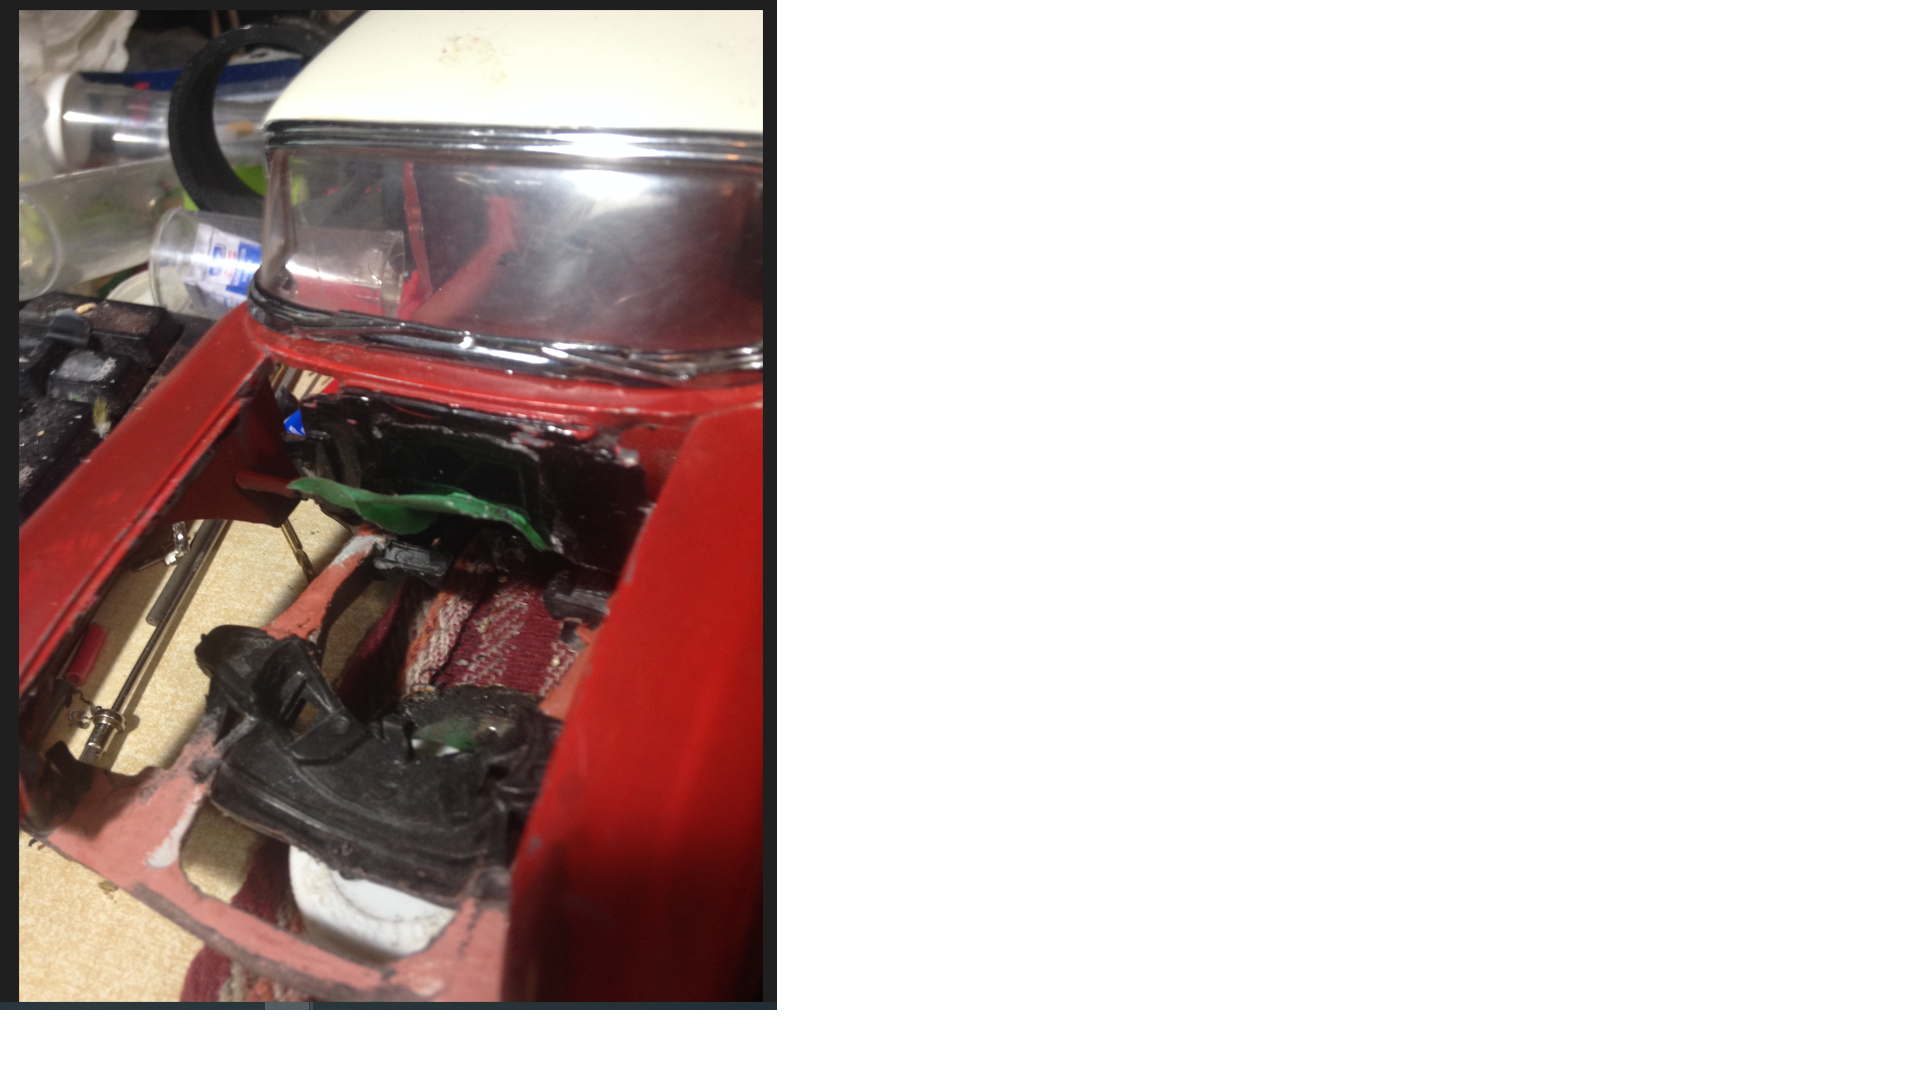
I ended up working hours under the hood of the car to patiently cut the radiator wall, the fenderwells and other pieces. The roof is back on the car. The rest of the body is on red-brown primer. I will have to build 2 sides of the firewall, till the fenders. The maker didn’t bother making these details as the fenderwells were touching the firewall and we did not see these details with the hood open. Now, with the fenderwells removed, we see the missing parts. I have cut the radiator from the radiator wall. I will reinstall it with custom stock car frame. It will look more like a real short tracker this way.
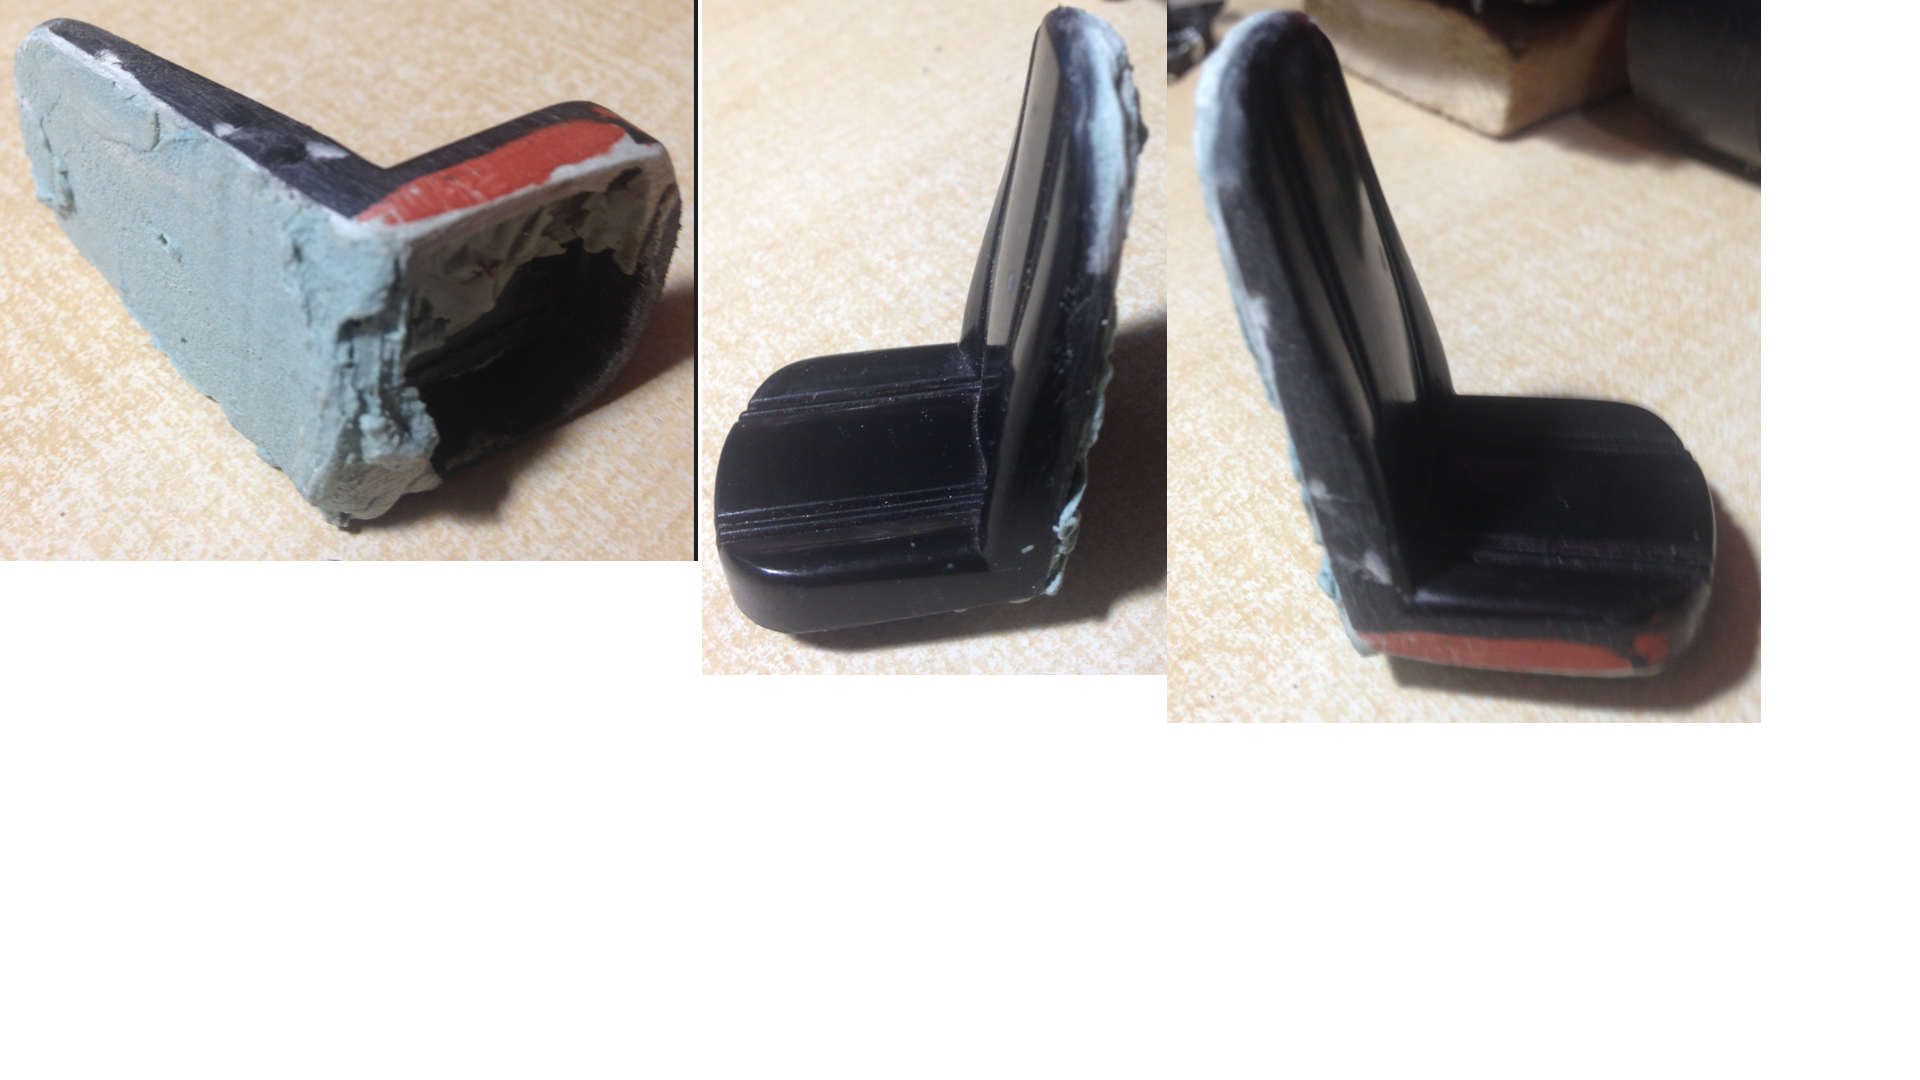
There were holes in the floor panel. I filled them with glazing, then I sanded them.
Tracy Chapman – Fast Car
https://www.youtube.com/watch?v=AIOAlaACuv4

The back bumpert of my choice is a plastic u-beam that I took on some toy or game or whatever it could have been. I thoutht that it would be perfect for my race car.
These wheels that I crafted, are mockups to give me an idea of what it would look like on huge race tires and also that I wanted to figure out some dimensions for the machine that I am building to radius the wheel openings of the car. The rod going trough the back wheels is a bicycle spoke. The very tricky work that I succeeded to do was to drill the differential of the car from one side to another. There was no hole in it, but plastic shafs going inside the original wheels of the car. I needed the huge tires on the car at their right place to take measurements. I have made these temporarily sidewalls/rims out of scrap pieces of white plexyglass with cutting drums on a drill press and on a drill guide that I modified to my needs.
The center holes in these plexiglass pieces have 2 small tubbings one inside the other to fill the gap between the shaft and the white disk on each side, so the wheels are not wobly, but tight on the spoke. The smallestl tubes had to be drilled the correct diameters to be fitted inside the bigger ones, real tight. No work on a lathe.
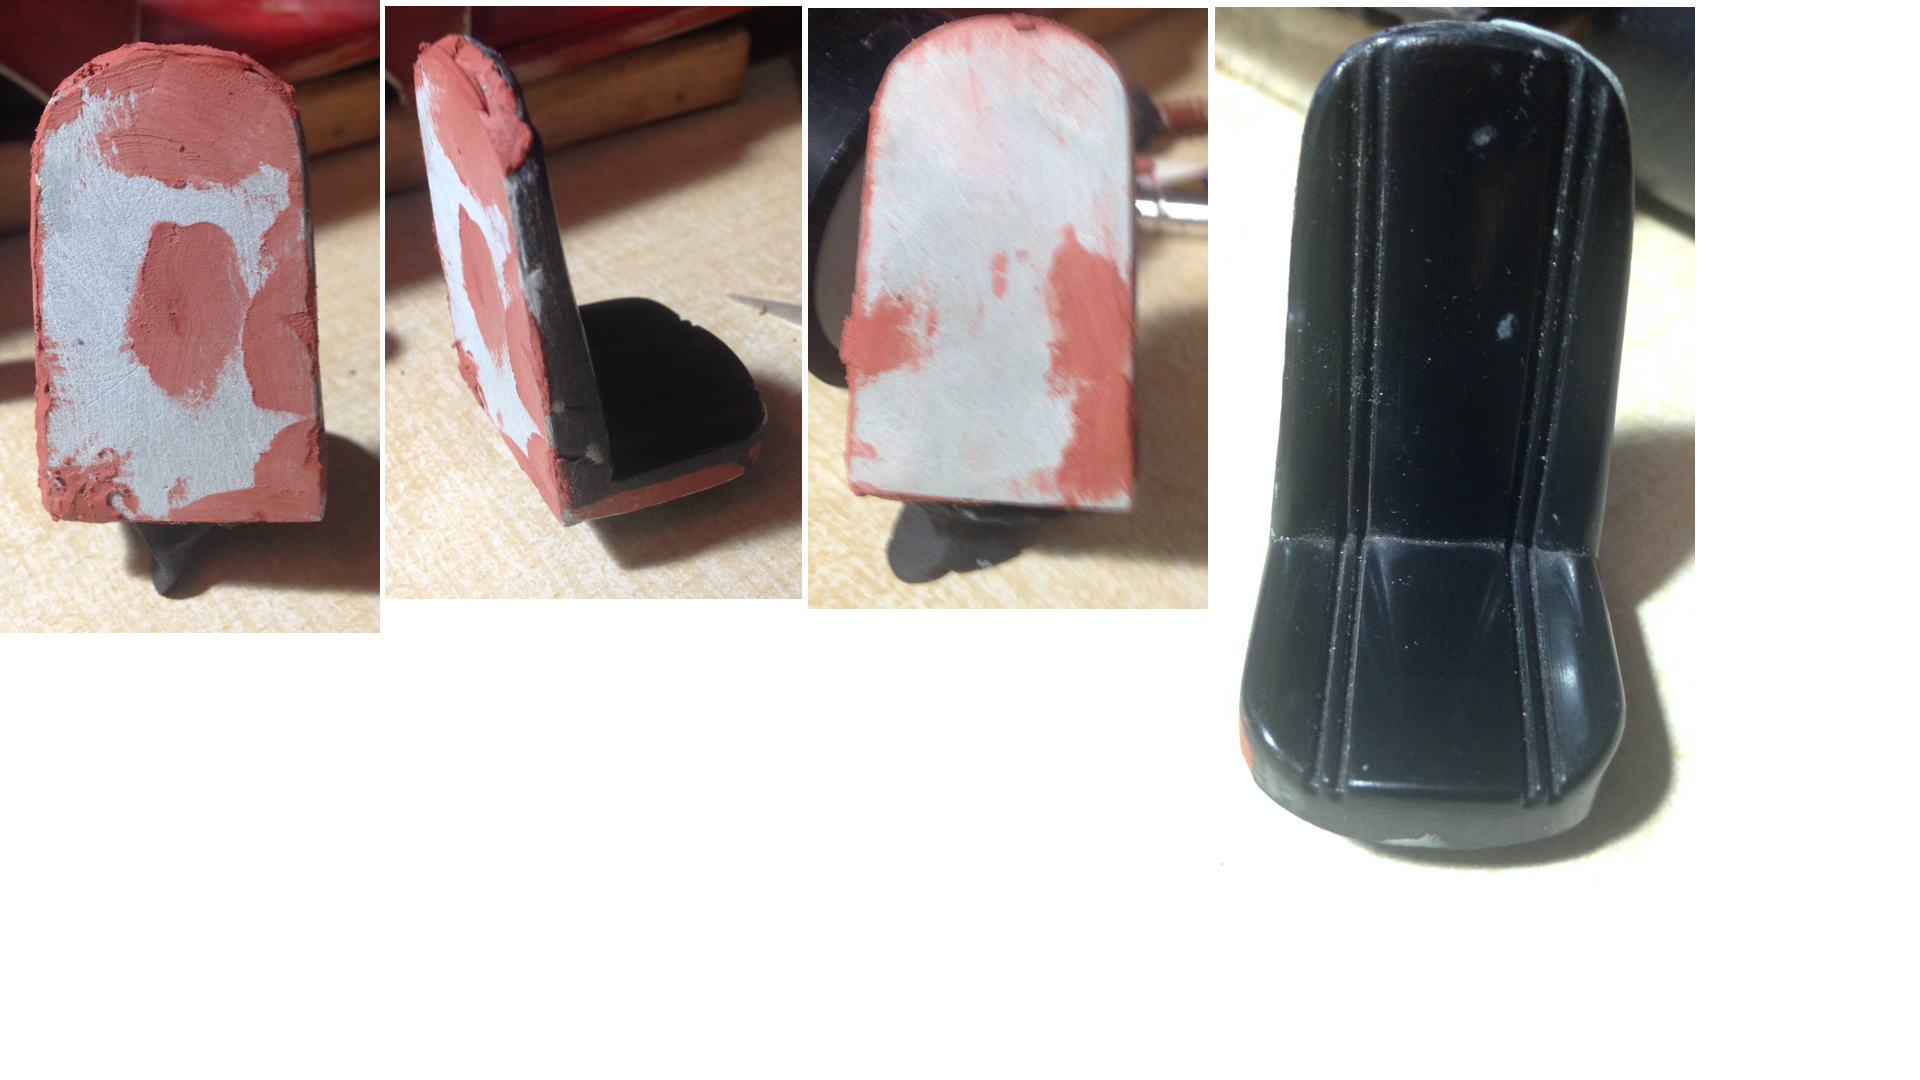
Building à 1/18 scale open face race helmet.
I have been in the mood since a long time to build an open face race helmet for this 1/18 scale. When I am working on a model I am always thinking about building diorama items for it. I don’t know… it’s in
me. A model alone doesn’t tell me much. It has to become more complicated. I guess that by nature I am looking for trouble when I am doing scale modeling. When I have built another little item, a little something additionnal to my project, I don’t know… it gives me courage. I find it nice. I am like a little boy who just received a beautiful gift. So today I was looking for a big container that I have somewhere here, plenty of domed or semi-spherical parts that I collect. From very small pieces to big ones. After all, I build things of various scales. I had in mind to build this helmet and also, a project of a baseball style cap, as these things are related to stock car racing. So I had a good idea of the 2 different sizes and shapes of the items that I would look for in this clear container. When I found it, I turned the container upside down on the floor, and started to look for what I wanted. I went to all the pieces and took a few of them and even some more as looking at some parts, they gave me ideas for other items to build with them. New little projects in sight. This is crazy, I know.

Please click on the image to see it full scale.
Looking for a starting piece to build my race helmet, In my stuff, I foudn a white plastic cap, some kind of a fastener that snaps in a hole with a dome cap. It had a semi spherical head, molded in on a recessed tube. Looked like a mushroom. The dimensions were OK for the size of helmet that I wanted. I would install some putty around the tube and sculpture the part of the helmet adding more coats of body filler and sanding them successively, coming closer and closer to what I have in mind for this beauty. Just another little crazy thing on the run.
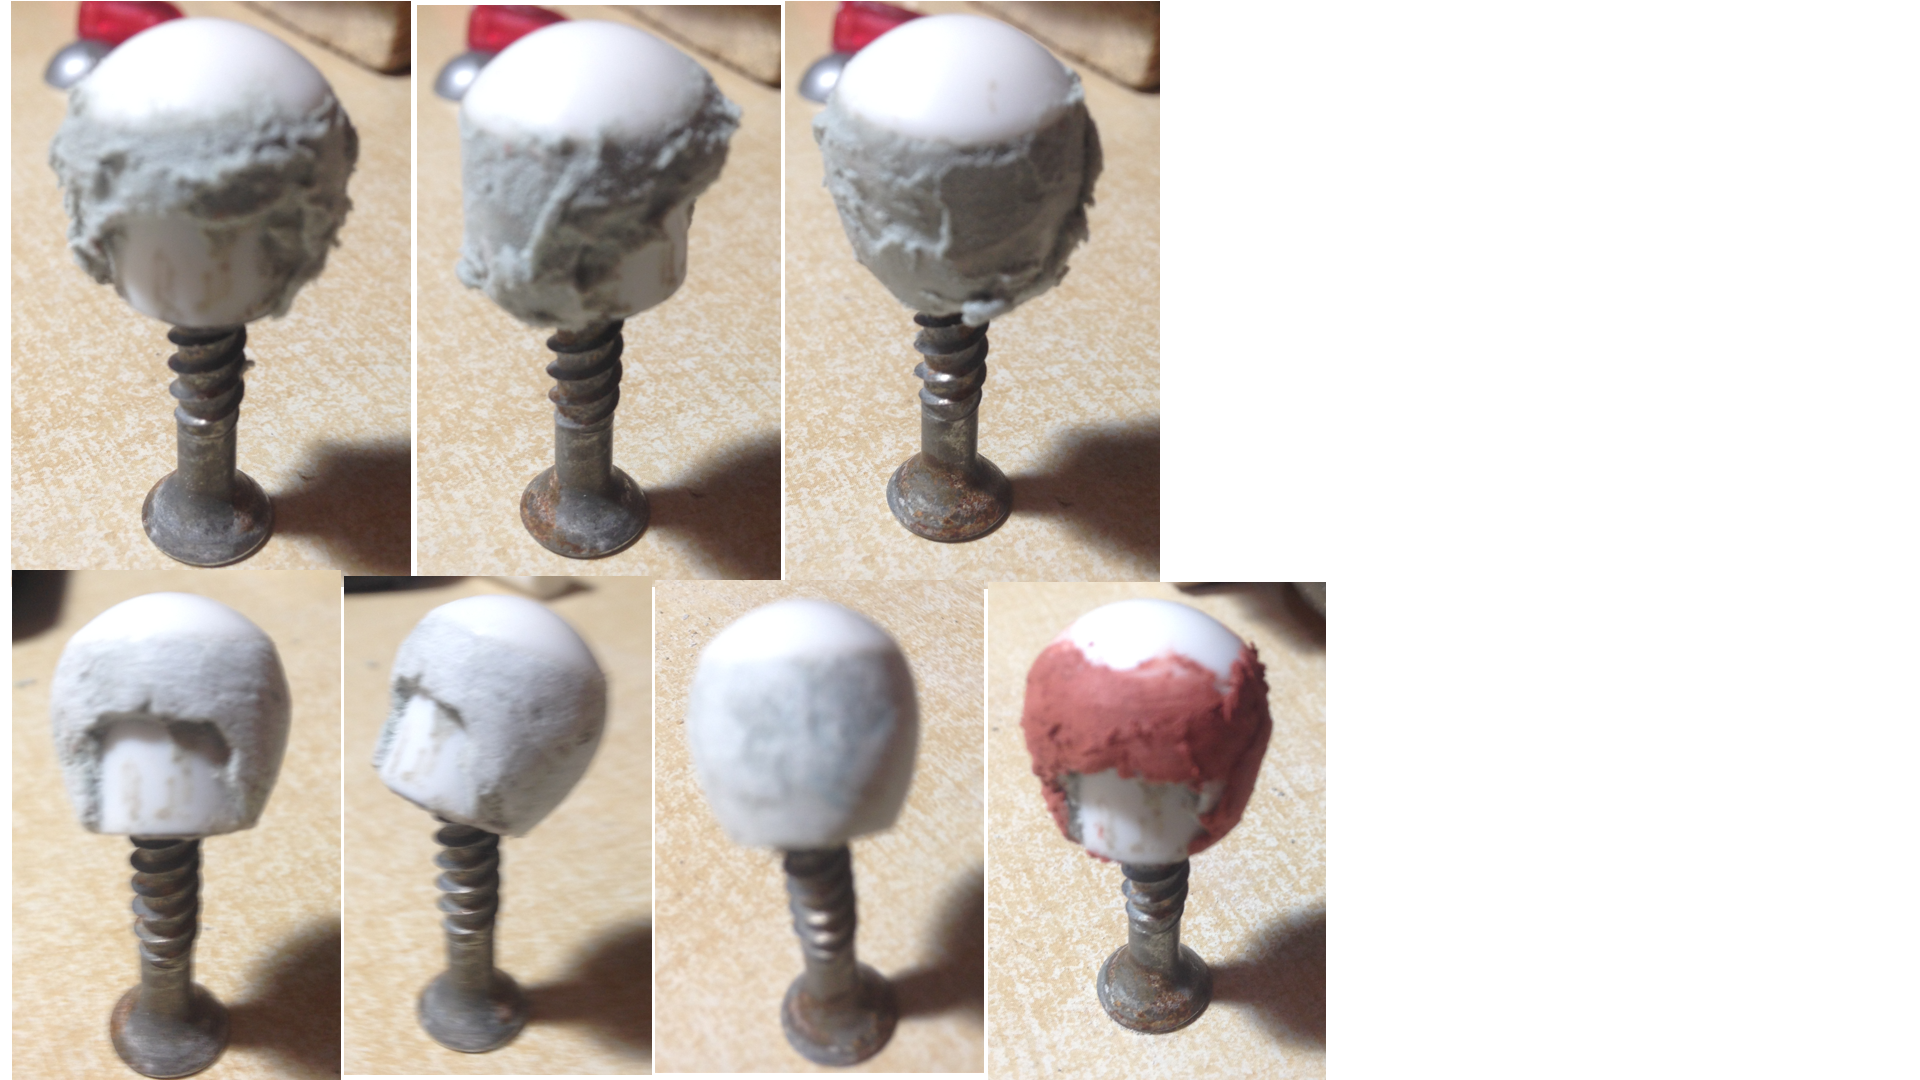

I went trough several steps of putting body filler, cutting, some carving with a knife, sanding with a round file, a flat one, using sanding papers, one coat of white primer, still some sandings, more coats of glazing putty and repetaing these steps, then a thick coat of brown primer.
The next day, the helmet was still very sticky. Shit! I was not happy because I was in the mood to work again on the helmet. This is why it is on a little piece of paper on the hood of the car… still sticky. I still have to work on it. So today I have to work on something else.
As days have passed, I did not came back to work again on this helmet. I am involved in so many different things. I don’t know when I will in the mood to work on it again. Some day.
The need of a bucket seat for my race car
As I have removed all the interior of the Chevy, I don’t want to use the original front seat of the car (long bench seat). It would be really out of context. So, or I have to find a bucket seat of my taste, or making one from scratch. Looking in boxes of parts, it is not rare that I am searching for something else and I happen to see something interesting for another part of the project. It happens so many times. I came accross a molded piece of an interior of a toy truck. This interior was made in one piece, all molded together : dash, stering, floor, console, shifter, 2 bucket seats and a kind of pannel in the back of the bucket seats, going from one to the other. Strange configuration.
The seats had nice carved lines. They had some realistic configurations but they had also some ugly and unrealistic shapes by areas. I knew what I had to correct to make one of them nice for my driver seat. It would fit well in my vintage stock car. I knew what to remove and what to add. I had to cut the seat from the floor and from the console. I would have to fill the bottom of the seat on the side of the console, remove the back of the seat, sand the bottom of the seat in a different angle.
The back was hollow so I filled it with body filler. I had also to cut a thickness at the bottom of the seat to give it a normal shape. It came nice but I had another idea in mind to make it even nicer and look even more like a racing seat. Ths is very tricky to do. I will see if I can succeed doing this extra job.
Once again I had forgotten to take pictures of the whole interior prior cutting the seat on the driver side. Nevertheless the pictures of the remains can show you what the seat looked like when looking on the one on the passenger side. I had also removed the piece of the floor, molded to the dash of the toy truck. These pieces were so ugly that they were not usable, so they went into the garbage. I kept the remaining piece in case I need another bucket seat for another project.
Work on the seat to be condinued in times ahead.
Today I had to go outside. On my way in a narrow trail between the 2 appartment builgings here, as I was looking on the ground, I saw something that catched my attention and stopped, I bent and gathered an old black tie wrap that I had seen there so many times. I use to find all kinds of fascinating pieces on the ground when I walk or ride my bicycle. I mean, as a scale modeler’s perspective. This is a regular exercice for me to inspect a piece, to turn it from one side to another and searching in my memory what could be built with this insignificant piece… for most people. I have done this mental reflexion many times with tie wraps of different sizes, wondering what could I do with a shape like that. The one that I grabbed was a big piece. I was looking at the head of the item and my reflexion was that there are a couple of different shapes of head for these tie wraps.
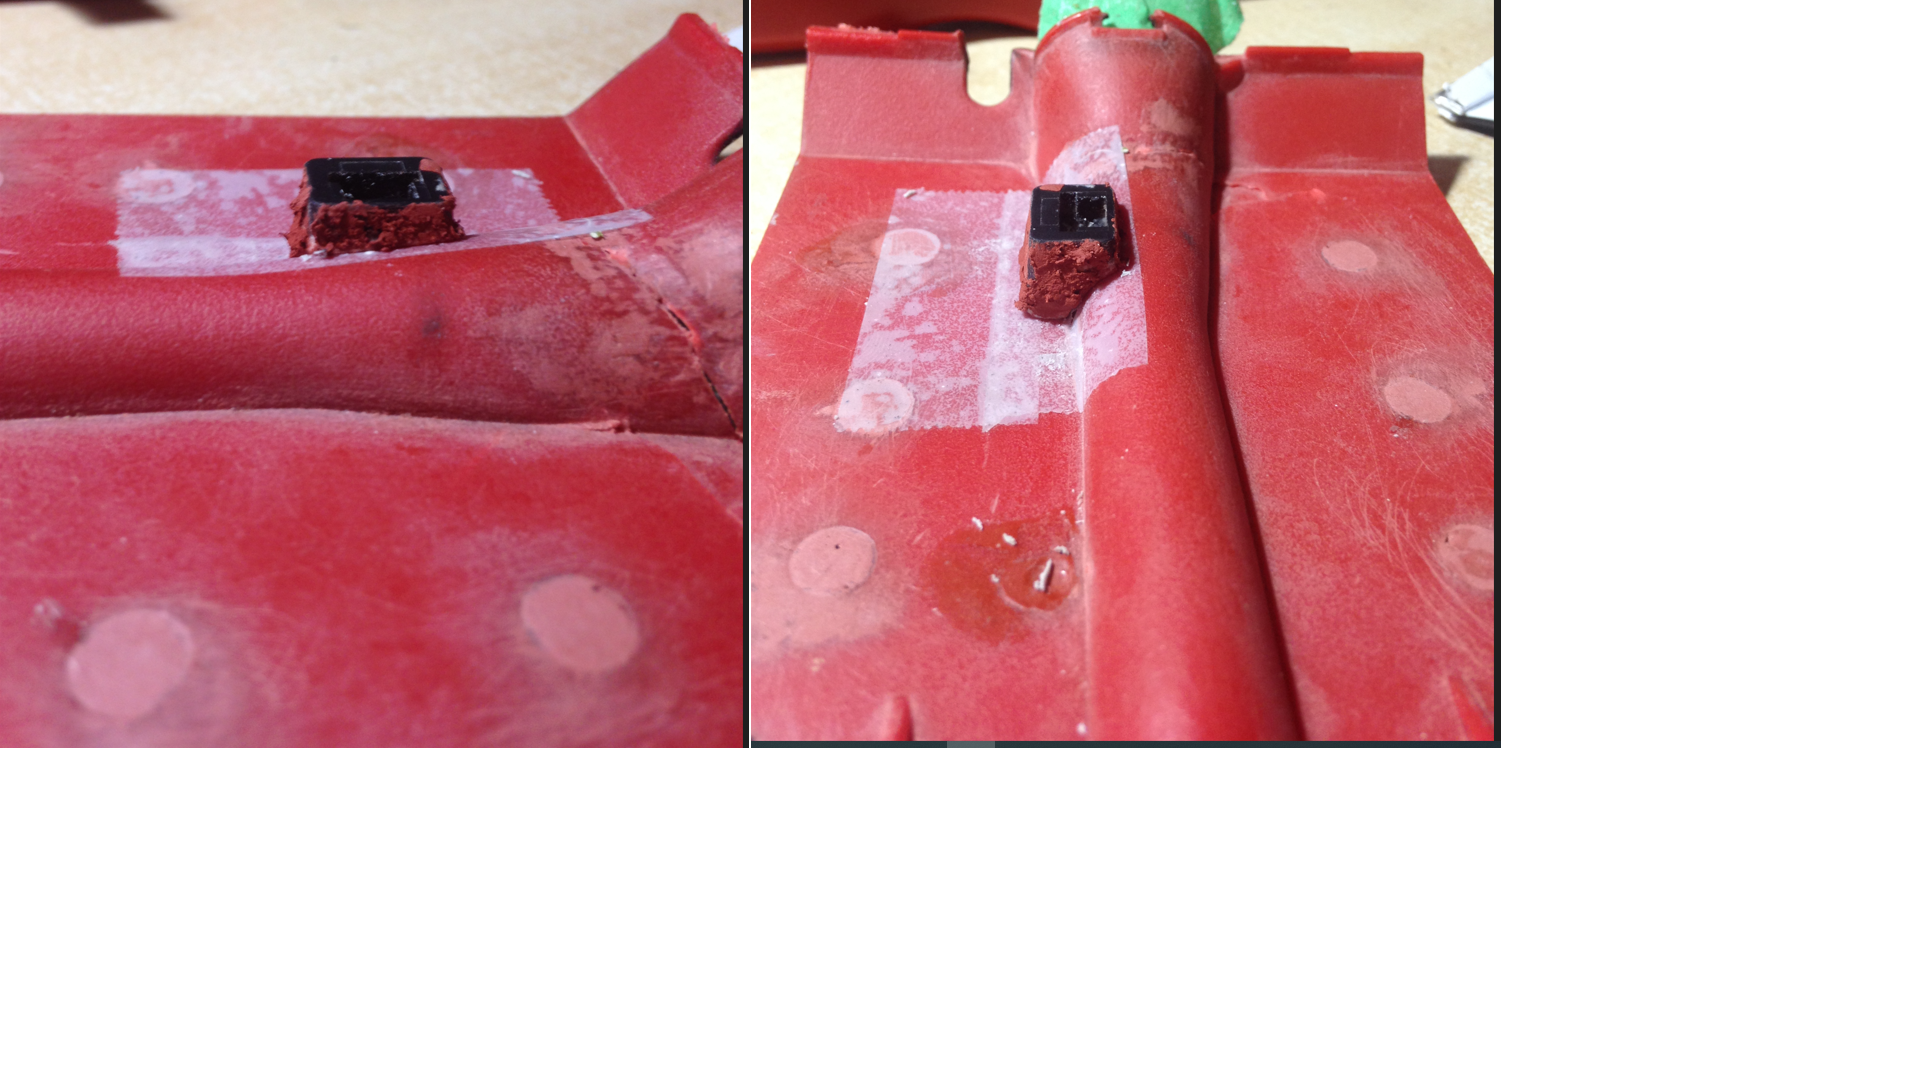
Different shapes because each company has its own specific shape, their own copyrights or industrial designs. One of them was some kind of an asymetric oval shape. The one that I had grabbed on the ground had a rectangular shaped head, almost square and all the time also slightly conical, the base of it being slightly wider and the top narrower. I had been looking at this popular type of head so many times through the years and could not relate it to some part with a similar design. Sudenny it was like a lightning that crossed my mind. This piece was exactly what I needed to build a floor shifter hump for my 1/18 scale project. I knew already that I had to build one, some day. I didn’t know what to use exactly, or shaping one with body filler from scratch.
This tie wrap head was exactly what I needed as a start. It was exactly the right size. I would have to build the rest of the shape with some body filler, and in another area I would have to remove some material to fit the transmission tunnel of the car.
For this day, I had planned to work on building realistic walls for my race tires. In fact I would have to build only one and make 8 copies of it into resin cast… Well, it changed my plans. I want to customize this tie wrap and turn it into my shifter, hump. I got fascinated by the idea, very motivated, so I jumped on it and started the work on this new part of the project.

This is the type of tie wrap head that I used for this floor shifter hump, improvised project of this day.
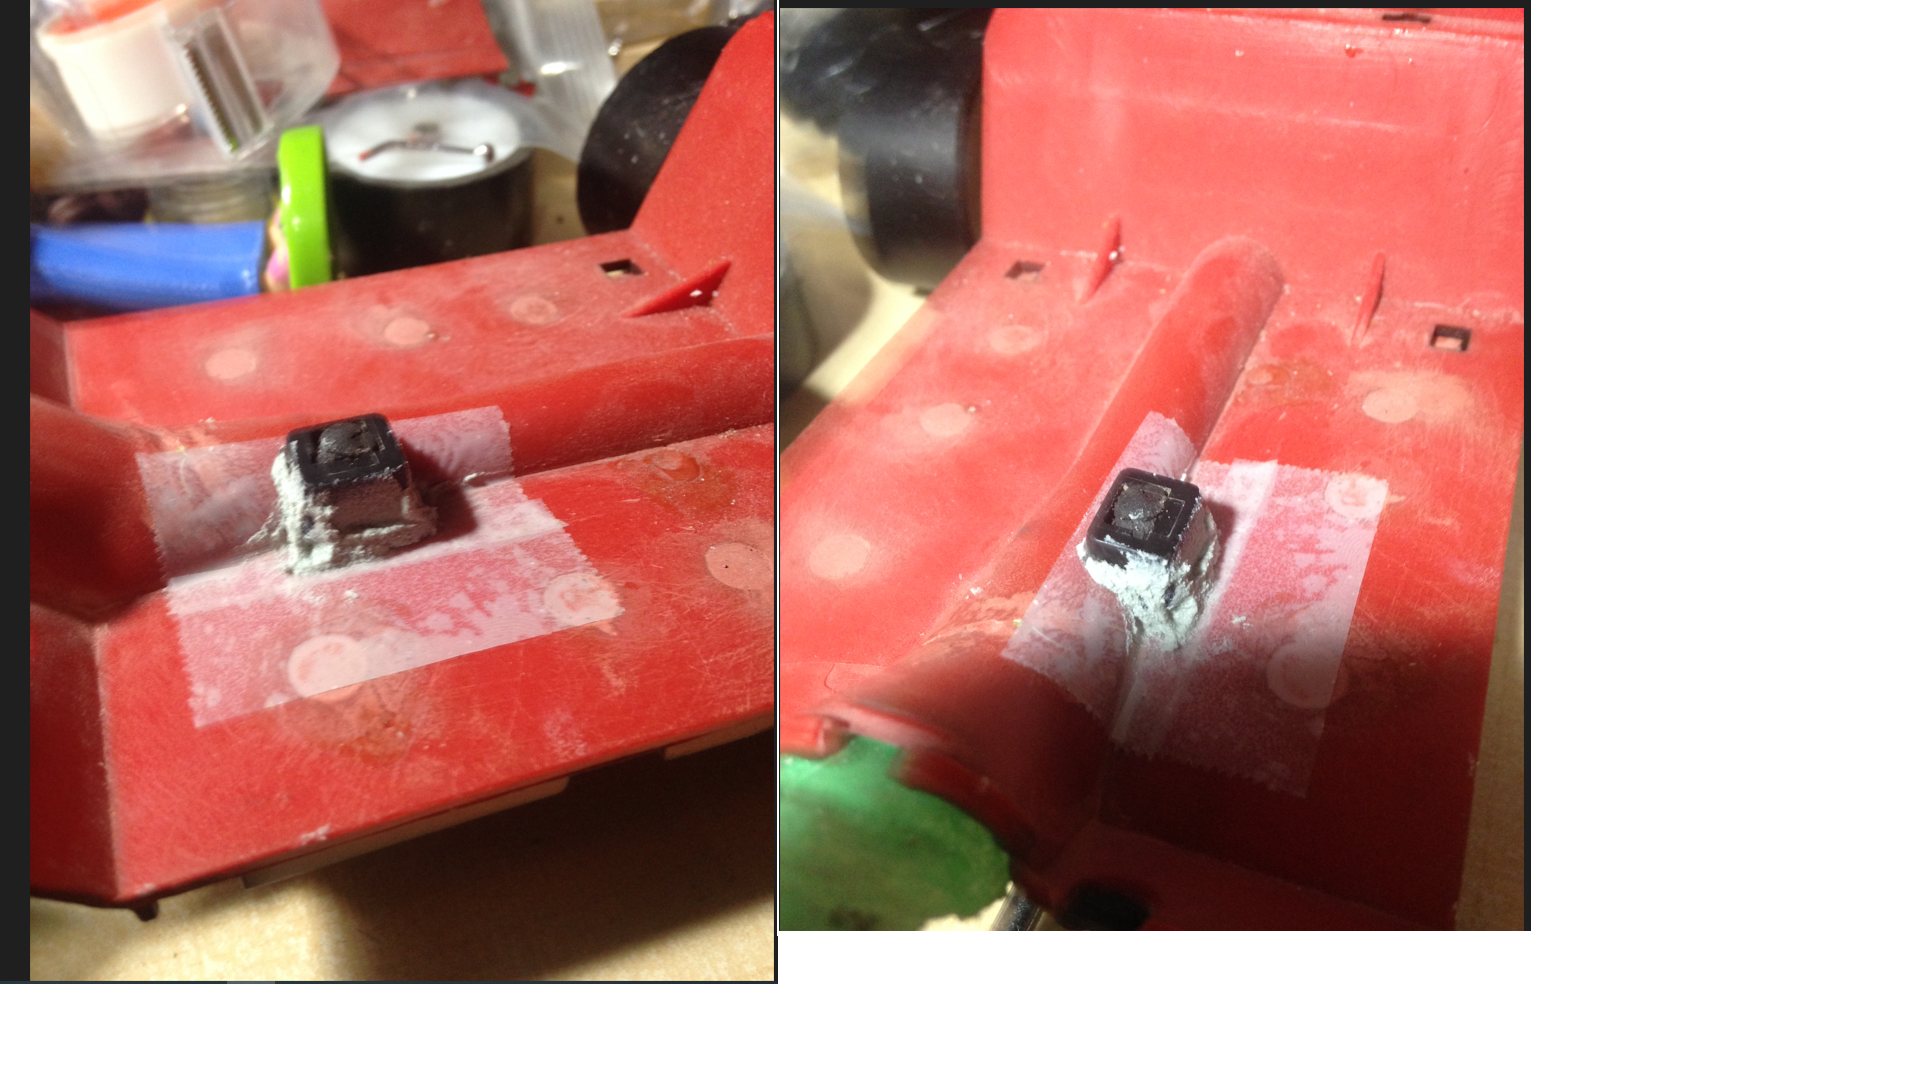
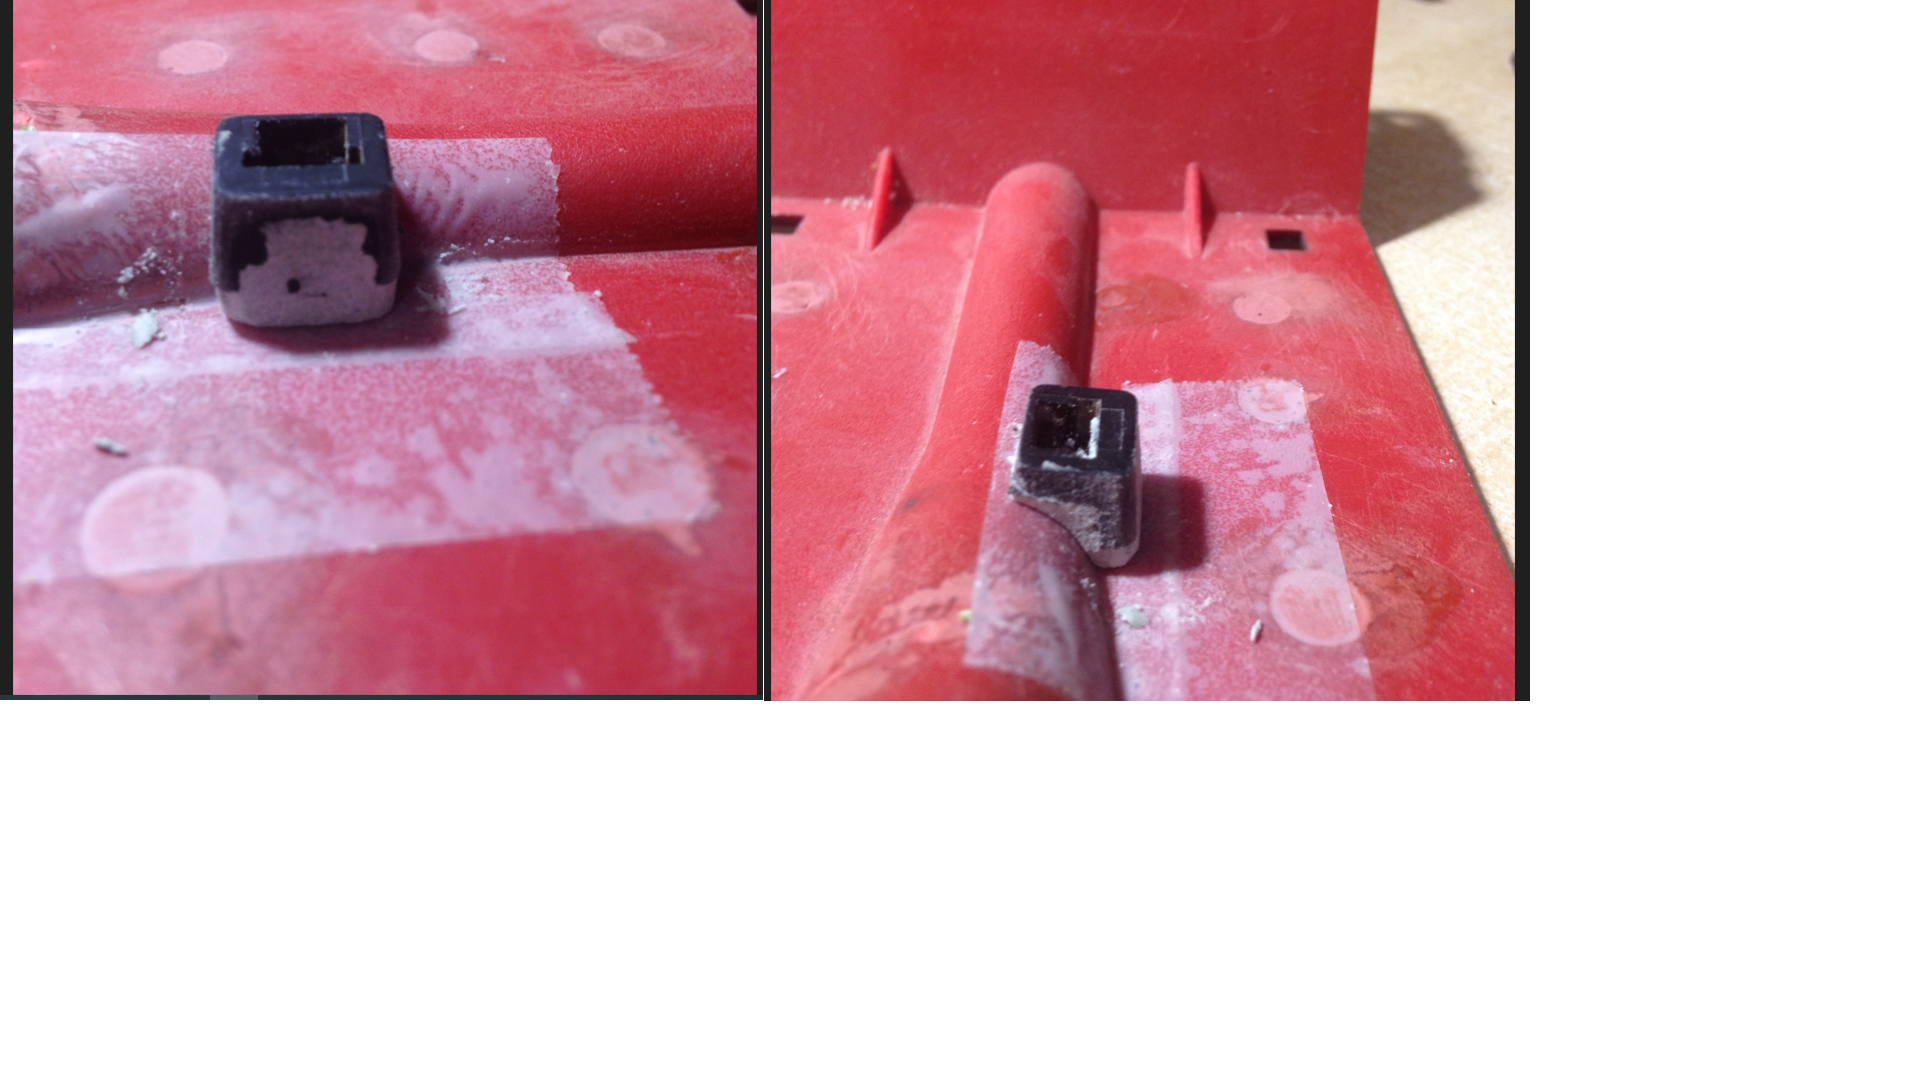
I knew that I would have to put some sticky body filler under my piece and I did not want the filler to harden on the floor panel of my model, so I have installed 2 strips of scotch tape along the transmission tunnel and the floor. It would prevent the filler to stick strongly to these surfaces. Prior installing the putty under the piece I have made cuts in it and removed an area of the hump. It was what I calculated as the part of it to be removed if I wanted the item to suit the side of the transmssion tunnel, going conical in this area, so the cut had to be in angle.
I had increased the size of the hole on top of the head of the tie wrap, more clearance for the shifter to go in. To prevent the body filler to go in this cavity, I inserted some black doe in there. I gave only one coat of body filler. I would cut the extra material with a scale modeler knife, before the putty becomes too hard and difficult to cut. It is better to cut the extra materieal when it is still partially soft, during the hardening time. After that, I gave some sanding on each surfaces, and then I applied some glazing (finishing compound, or spot putty). That would require more sanding once dried.

The body filler sanded and the piece getting into shape.
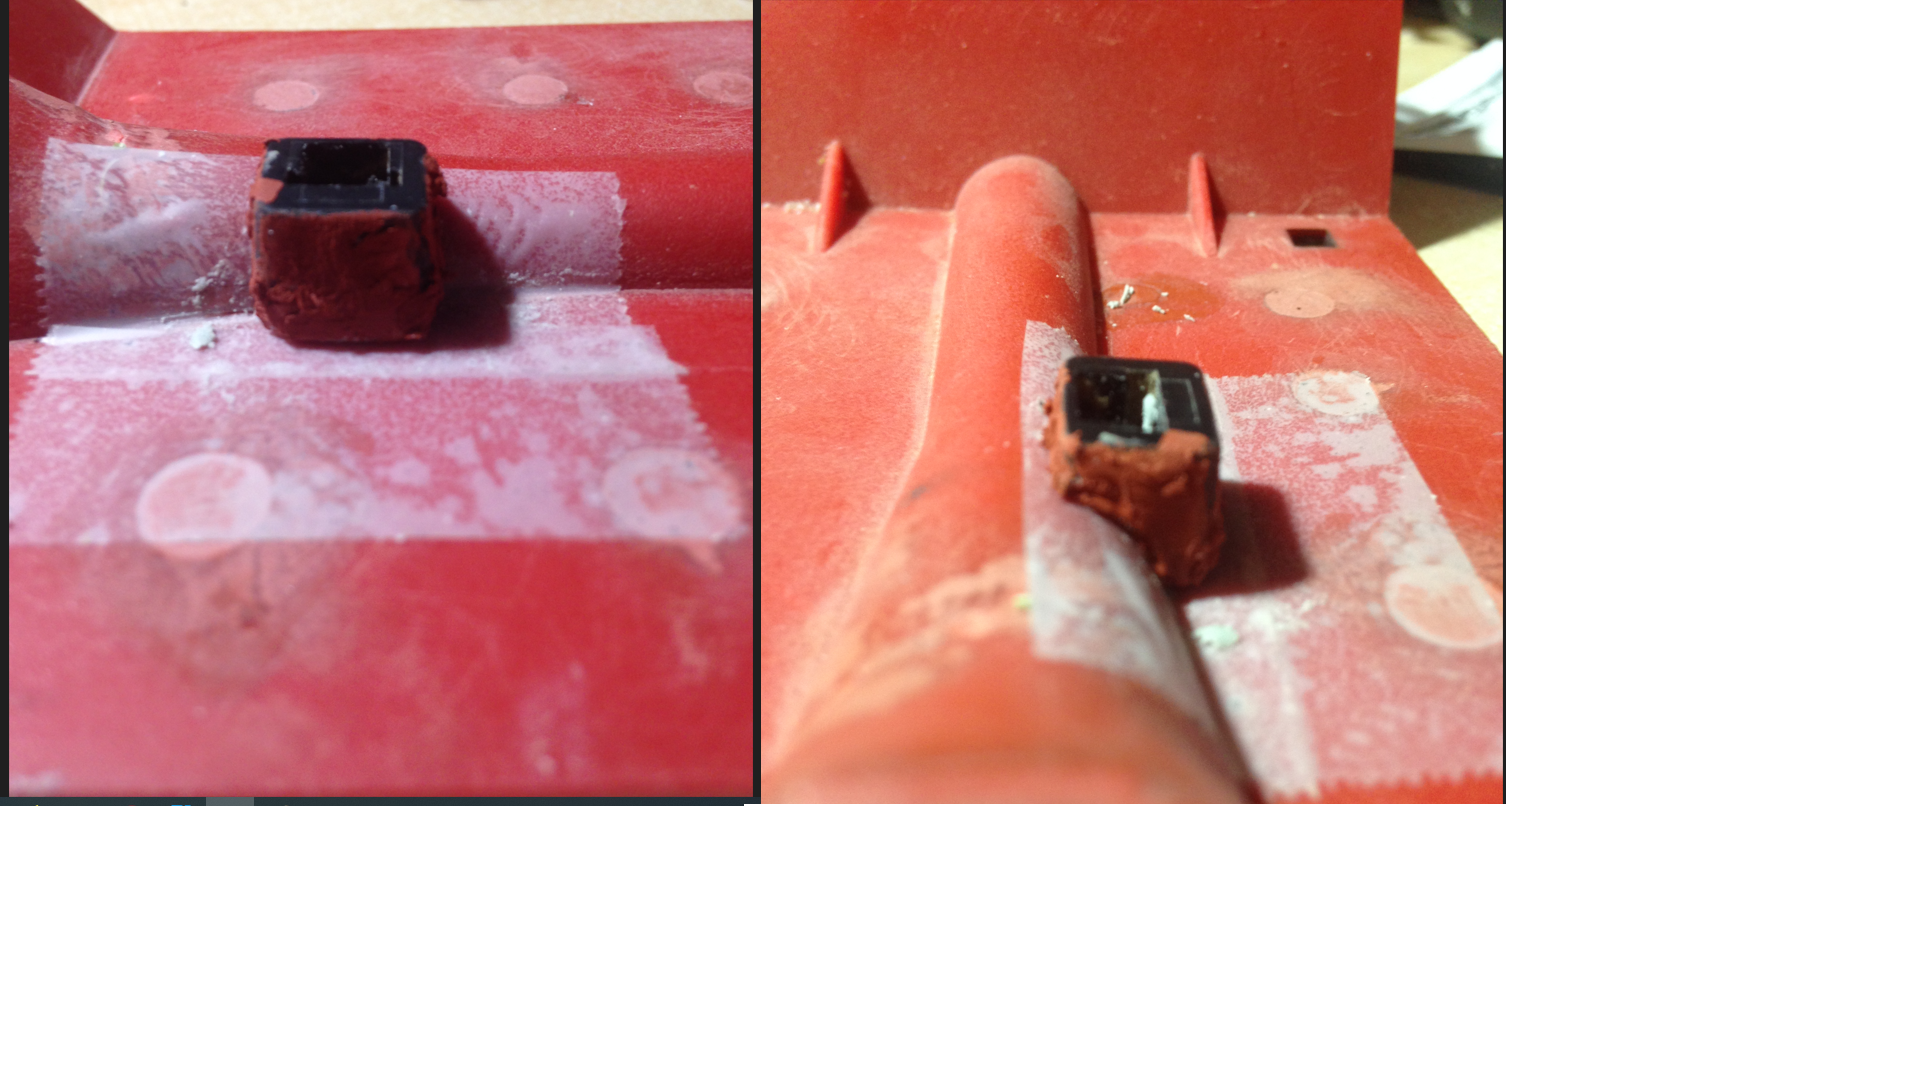
The body filler sanded and the piece getting into shape.
First coat of glazing prior sanding.

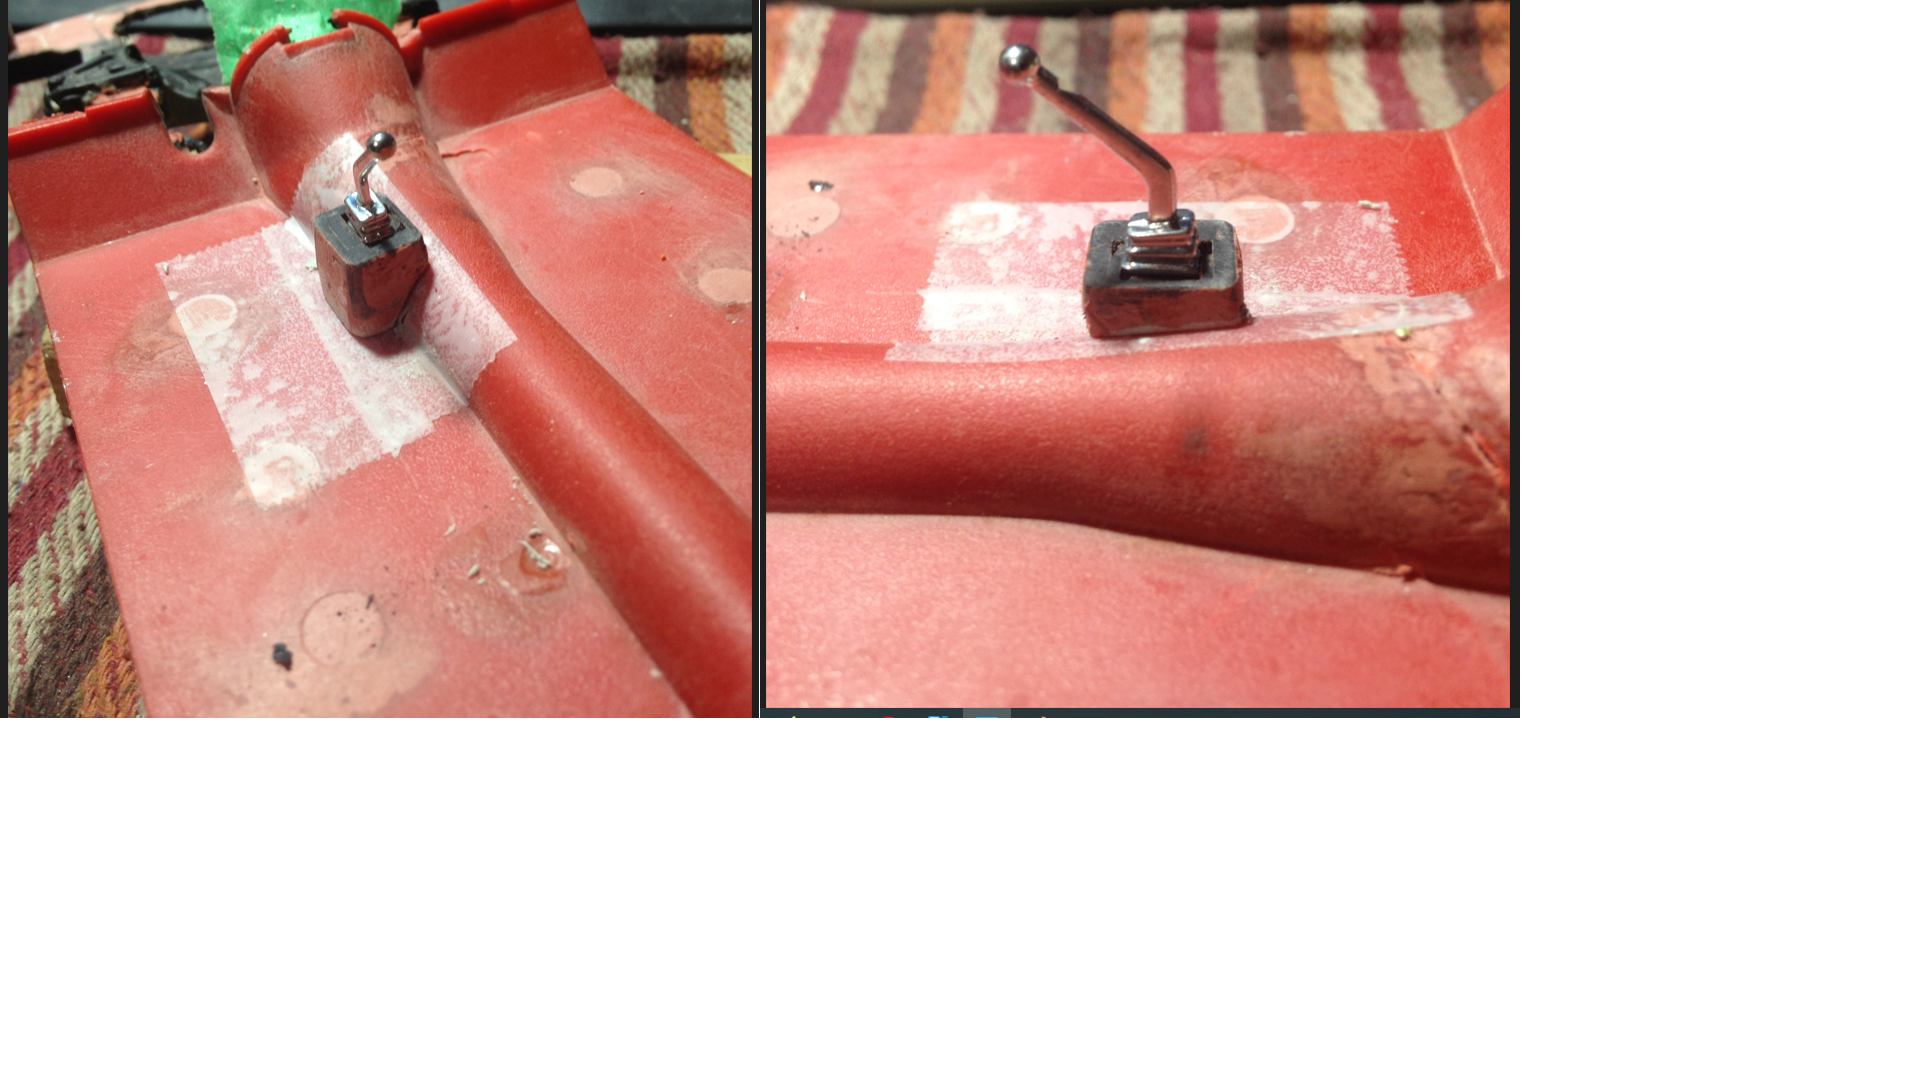
With some more sanding, and a shifter and boot on it. Despite it won’t be the final shifter. I will probably craft a lever out of aluminum… and a more adequate shifter boot. You get the idea bout this model of tie wrap head. I shared this new idea with you.
Race Tire, Race wheel Rim, ¾ Ton Pickup Truck Wheel Hub
In the last 3 days I decided to work on my race tires. I needed to build new tools to do the different steps that I had in mind. Some tools did not need mofifications or to be fabricated, some others needed to be built. Sometimes I spend hours building a tool and at the end it doesn’t give the results expected. It was the case 3 days ago, many hours of extensive work and at the end, the tool did not work properly. I had to stop and have a lot of thinking, and try something else. This is far to be the first time that I build some race tires and wheels for my models. I have done it for different scales over the years. As you know, I have done some temporarily wheels for this car, only to give it a stance, but of course they look too rudimentary to be the finishing touch on this race car project. There are investments of time, work and material to spend if I want the project fo go forward in quality.
Some basic tools needed for the start. same as I used for my basic mockup tires:
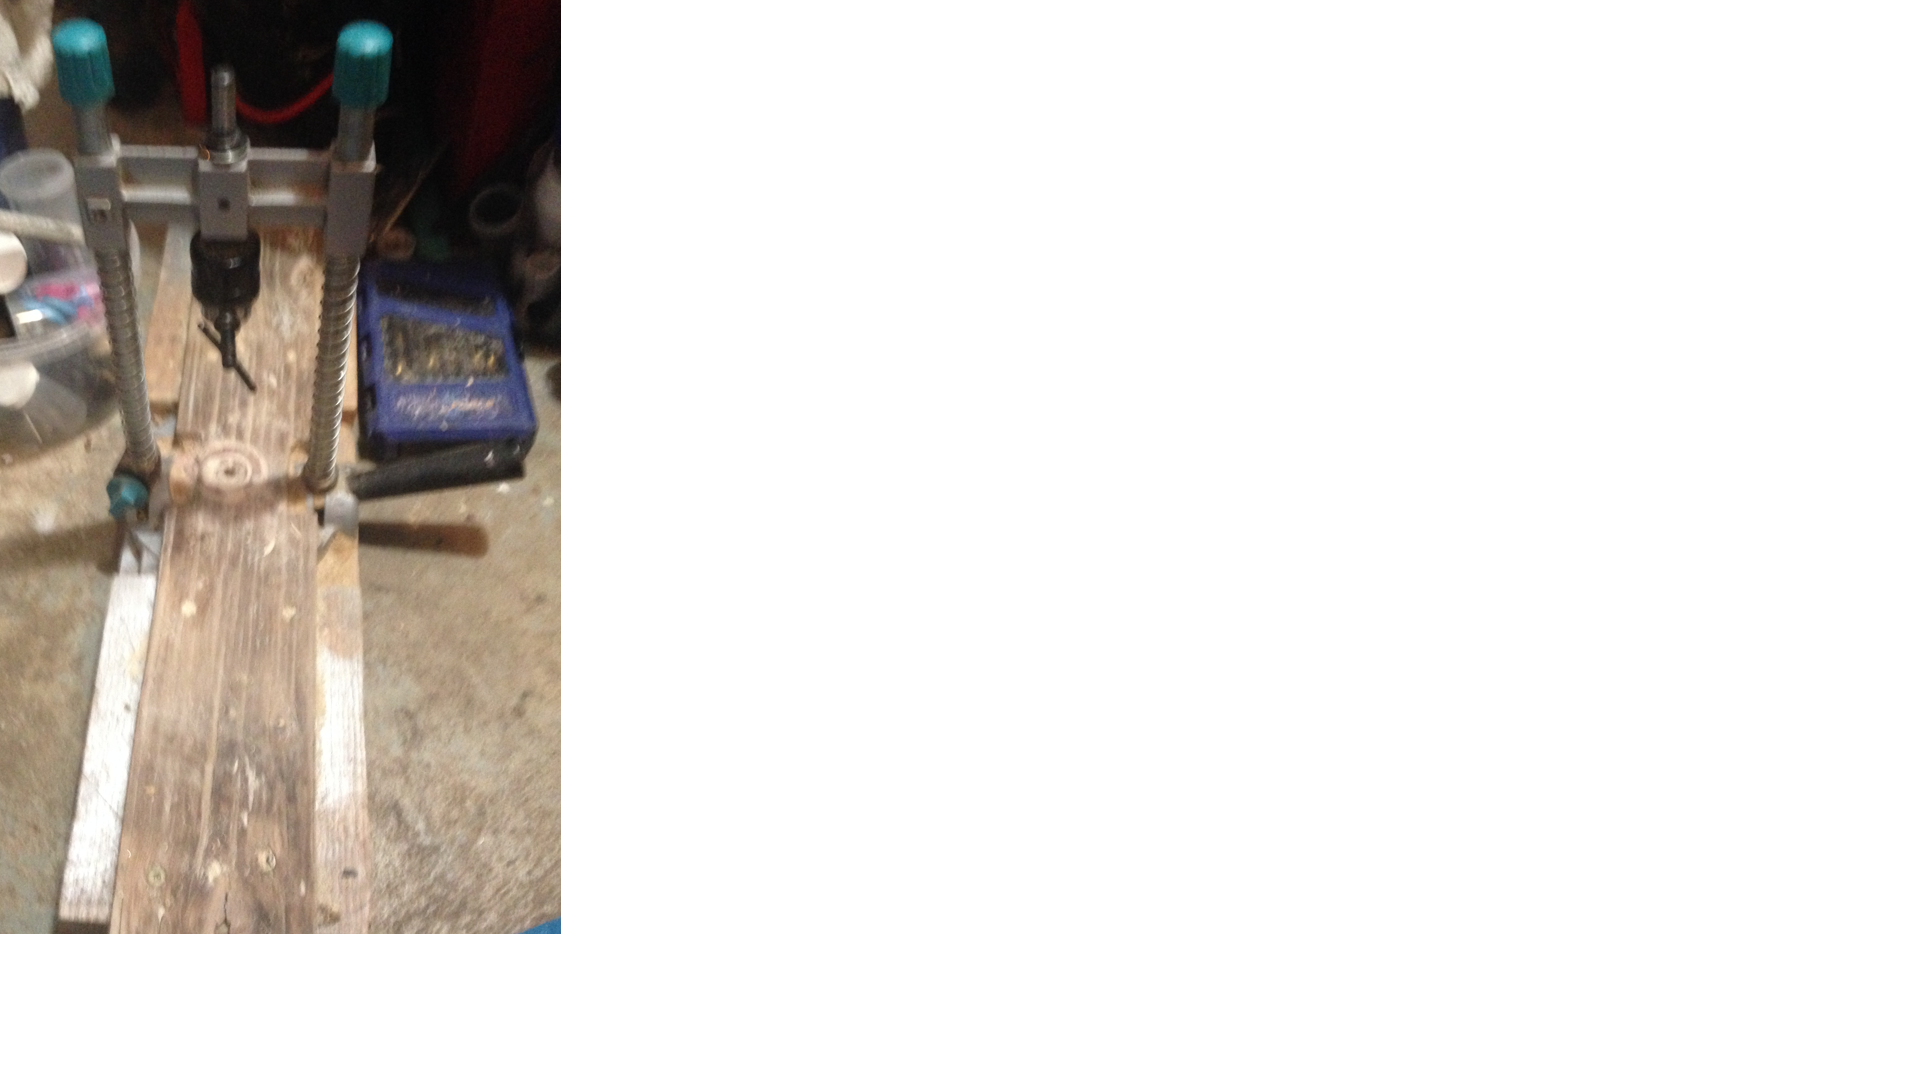
This is a guide that we use when we want to drill a hole at a perfect 90° from the ground. If you try do the job without a guide or without a drill press, you will never get the perfect angle of what ever you are trying to puncture or cut with a drill. I modified this guide, screwing a long plank on it. The down side of this guide is that it can not puncture holes in very large objects, unless ou put it under the guide. In some cases it can work. At first, I had to cut multiple kinds of plexiglass washers, so, I had to cut a narrow but long strip of plexi so I could be able to put it in this narrow guide and cut several holes in this piece. I also use sometimes my 24 inch table drill press but the regular drill on the guide is performing faster. I use a spray gun with water on the plexiglass while cutting it with a hole saw because the plexiglass is melting because the cutting tool generates too much heat on plastic materials. If we need to make precise pieces, we need a minimum of adequate tooling. So a drill guide and / or a drill press are a must to do jobs like that.

This is the strip of white plexiglass that I used to cut my pieces for my mockup side walls on the wheels.

The white circular piece was cut from a sheet of plexiglass using these 2 hole saws. Better cutting the biggest diameter first, then the smallest one after, because the pilot hole remains for the alignement of the second cutting, (the big hole in the center). Ths white piece is also a practice for building the final wall of the tire. In fact, the final piece, I will cut it in a ¾ of an inch plank of wood. I prefer this material for the finishing. It is easier to work on this kind of material, and also it is easier to make corrections on wood because putty and even paint, stick better on wood than on plexyglass.
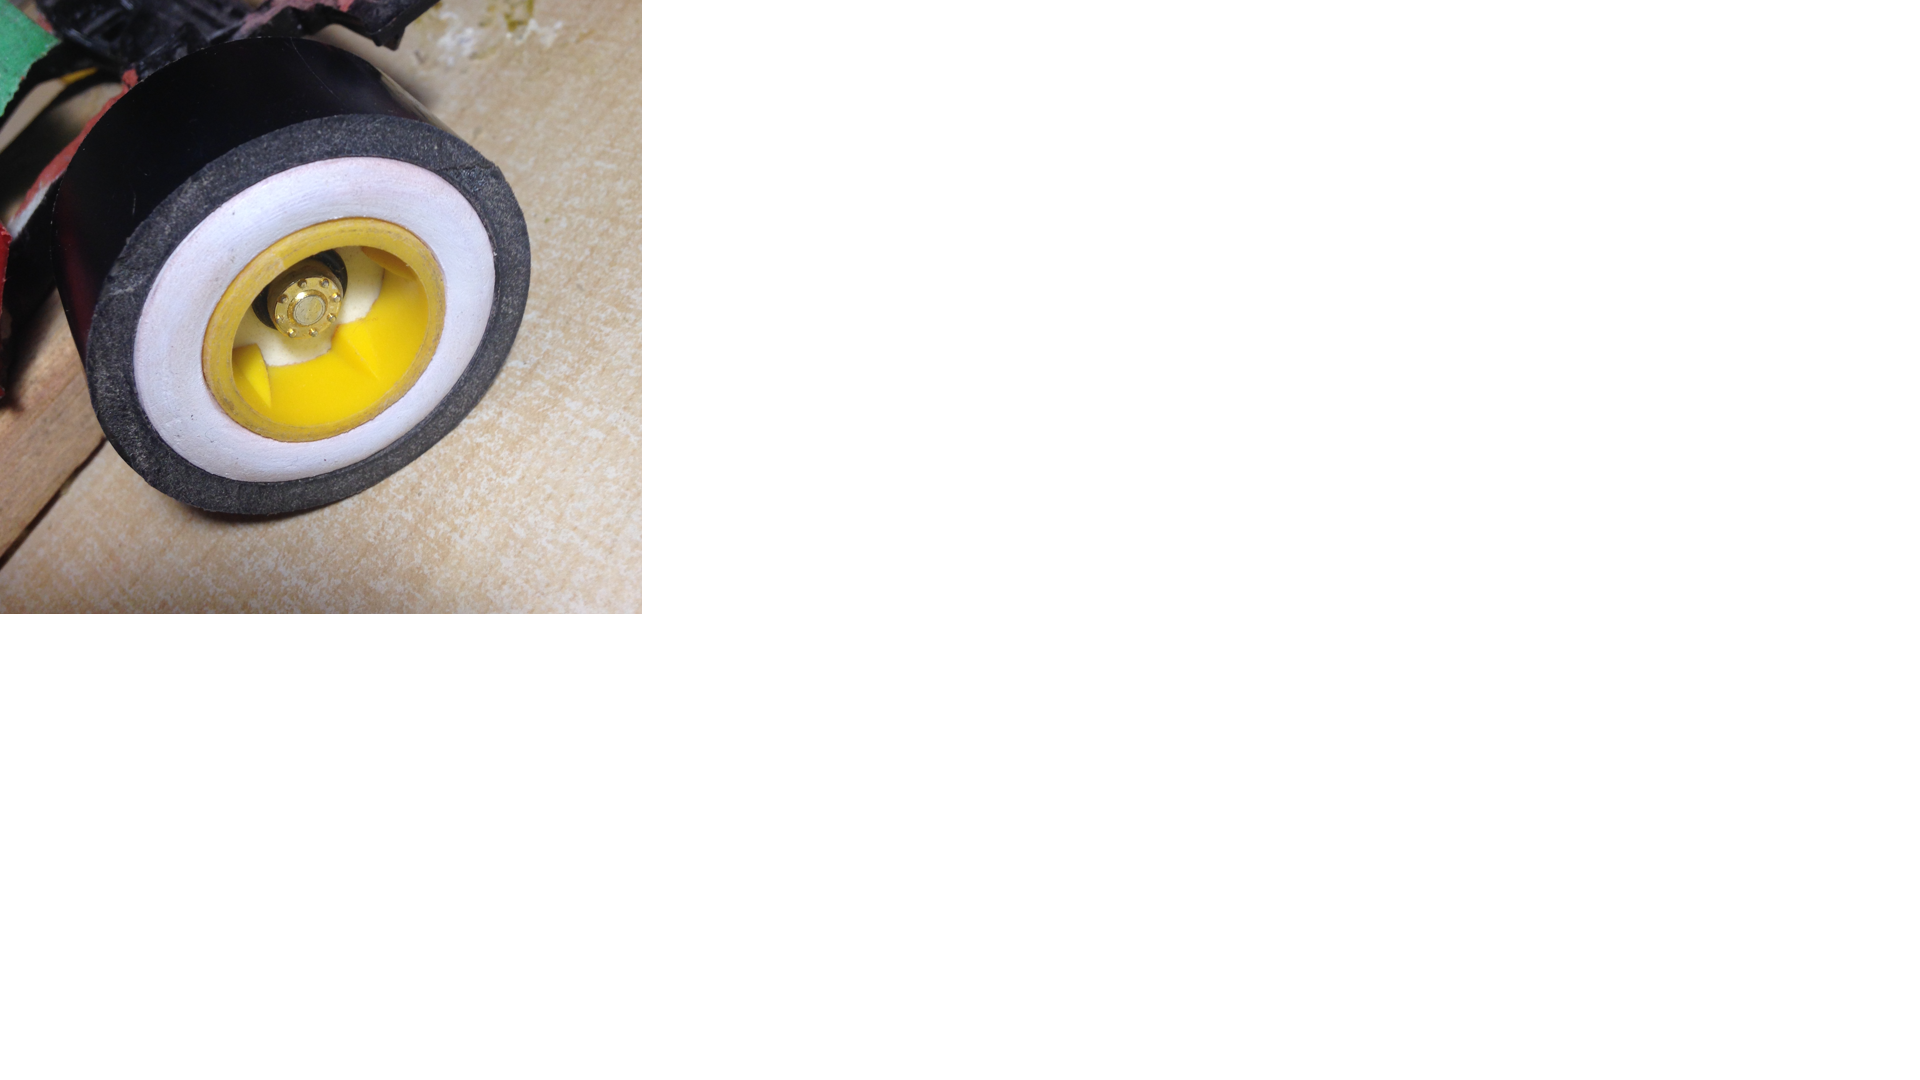
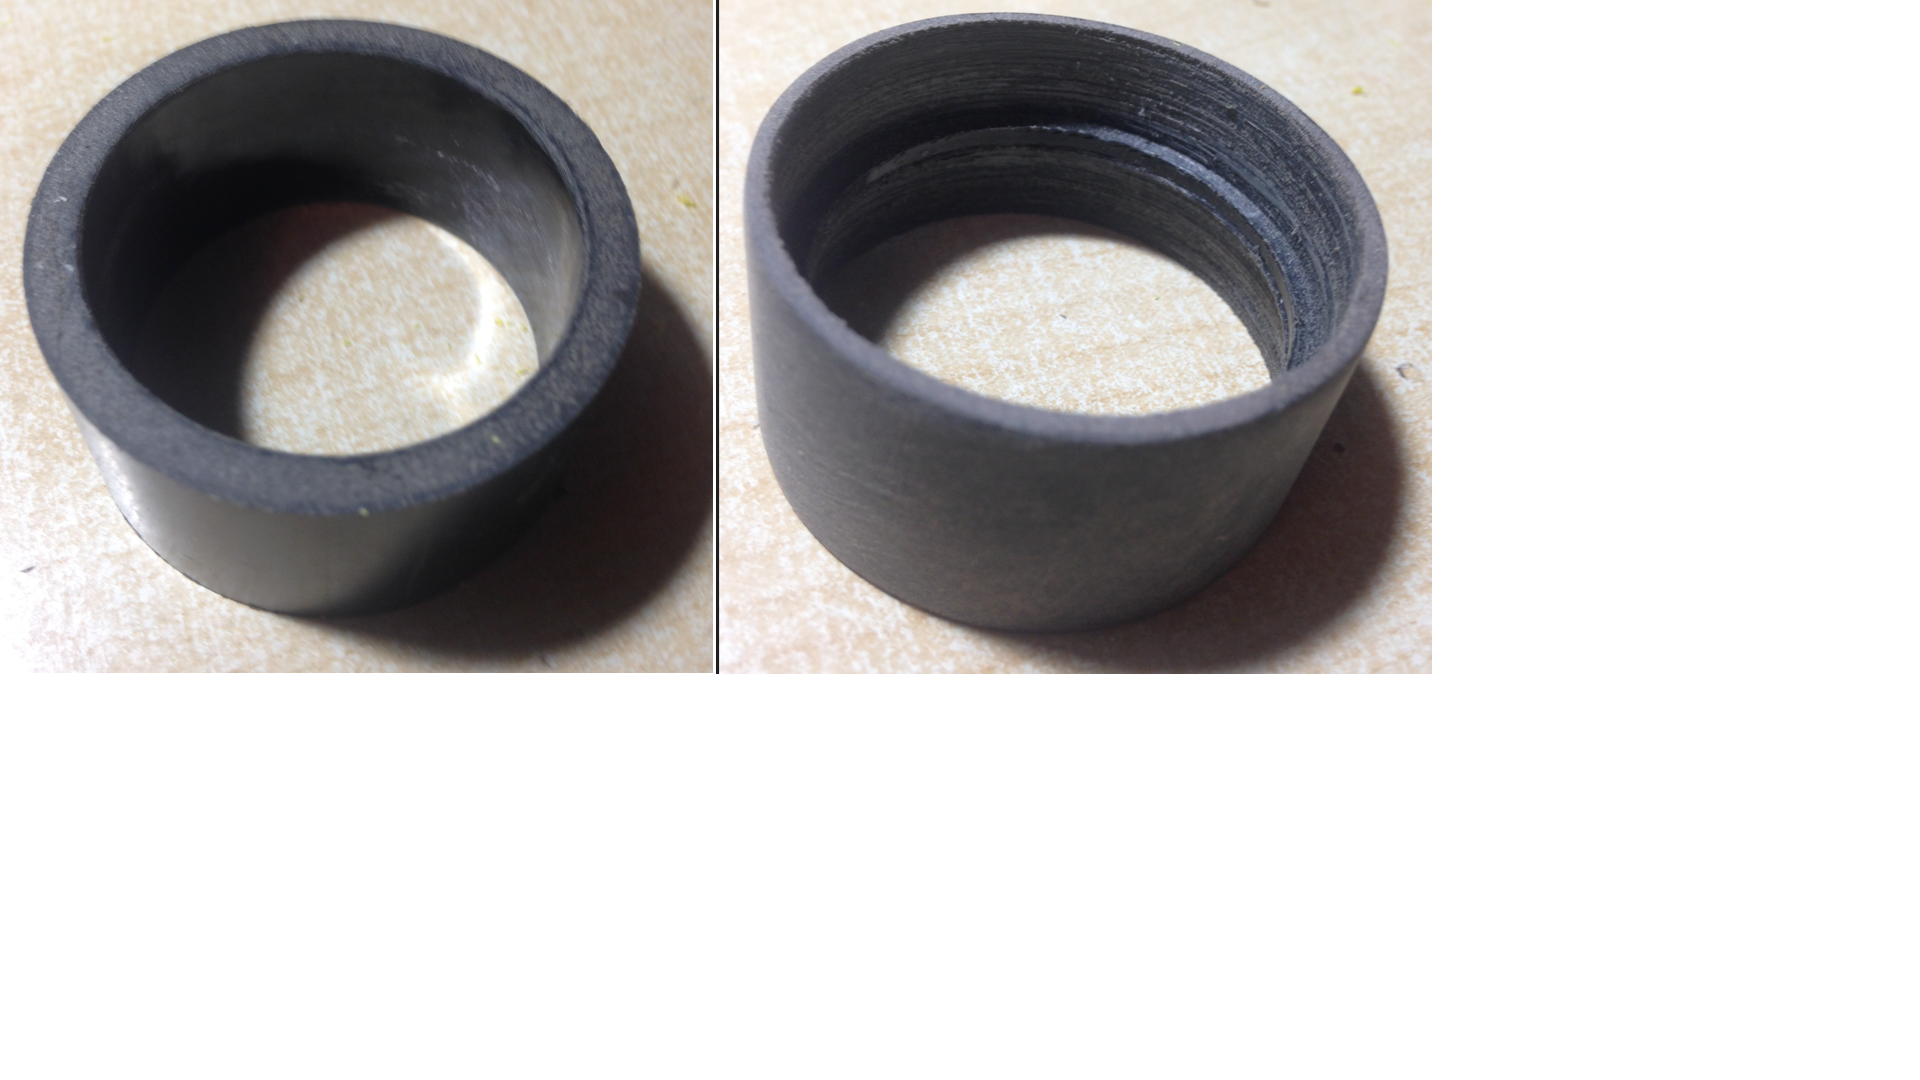
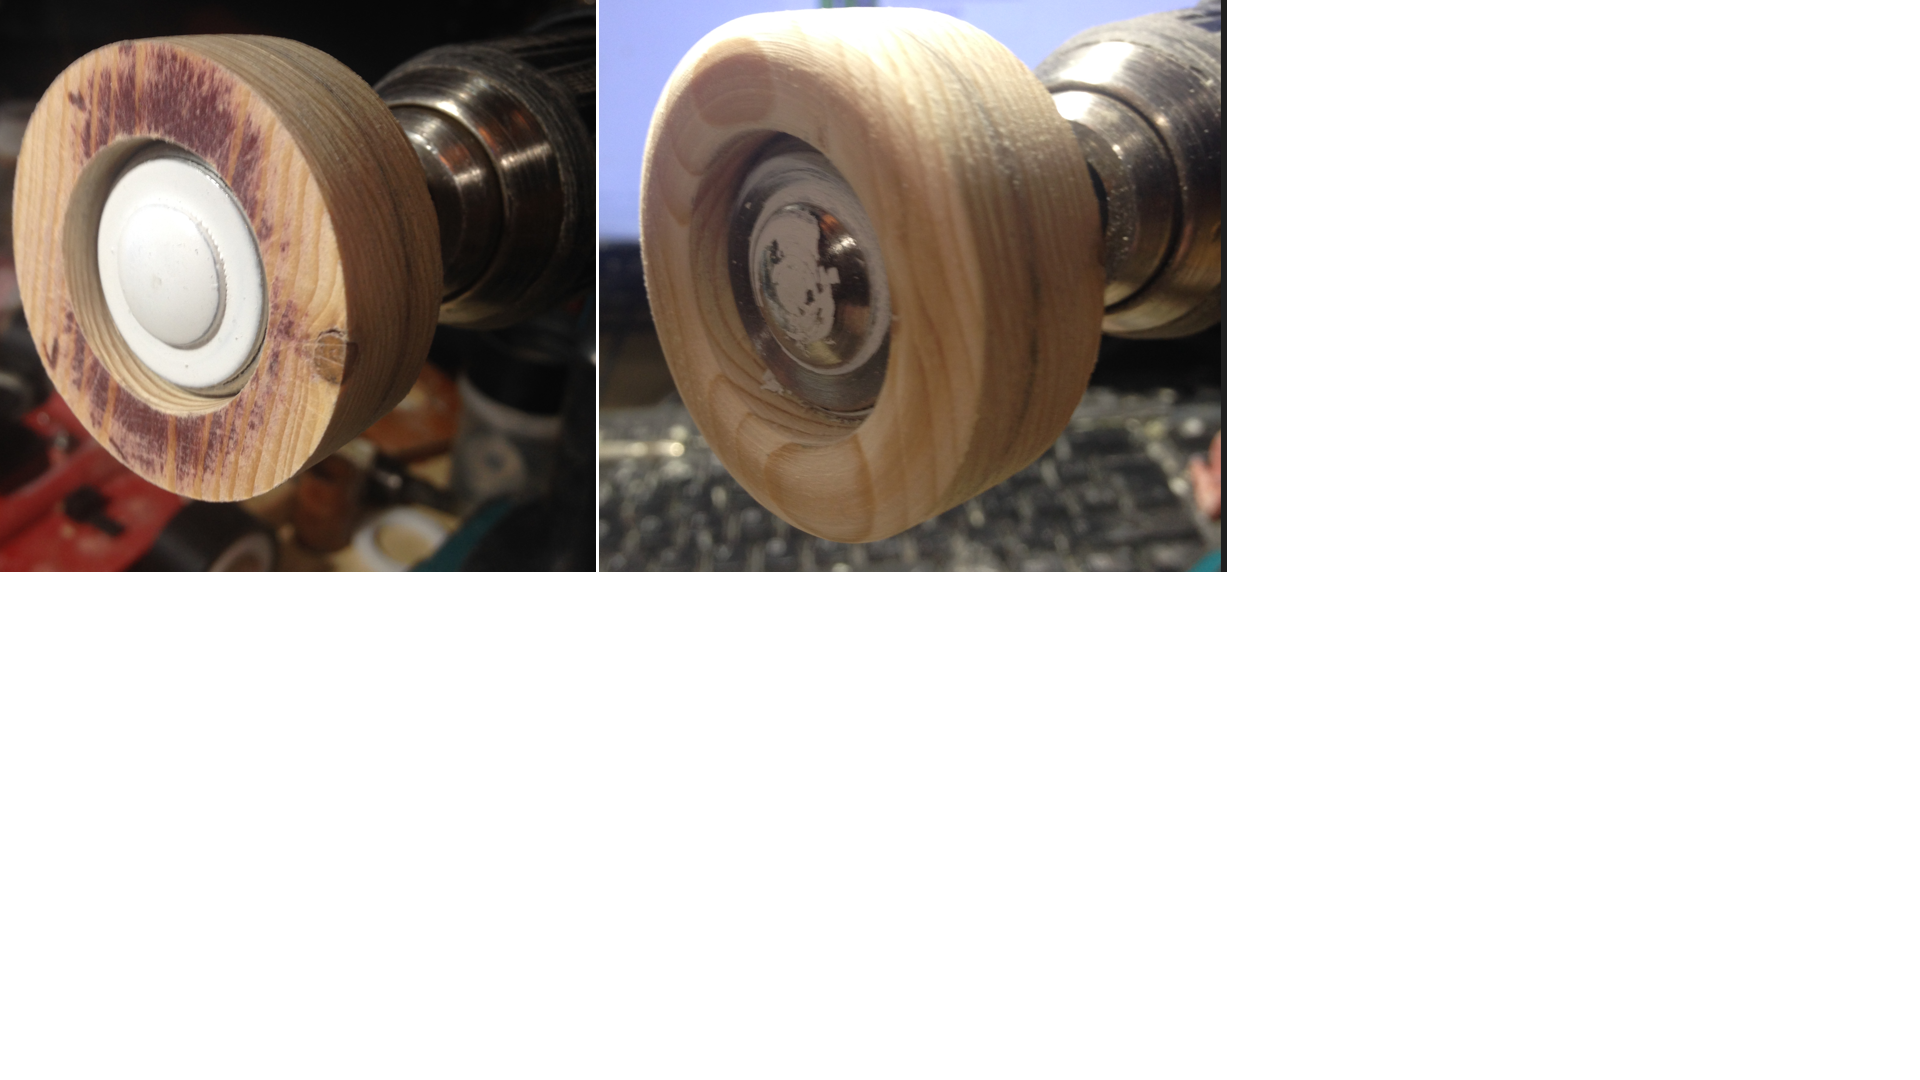
Using a ¾ of an inch plank, once roundished on both sides, I can cut the piece of wood in the center (3/8 of an inch) and make the 2 walls of a tire, one for each side, exterior and interior. I needed precise measurements on my 2 circles because everything has to fit tight, one piece into the other. I mean real tight with no loose at all, so I chose to make a smaller hole for the center hole and the outside diameter of the piece had to be bigger. With a mandril, I could slowly reduce the outside diameter of my piece till it fits just tight in the plastic black tube that I had chosen to be the sole of my tire. The next step would be to build a tool that I would use to radius the hole in the center of my piece because this is the space where my wheel rim will have to fit very tightly.
So, my ideal for this new tool was to use a piece of wood, a 2” X 3”, on its thickest side and cut a piece with a long hole saw (2½ inch long). Then, I would remove the piece of wood inside the hole saw, put a long bol, 2 flat washers and a nut inside the pilot hole, This would make a mandril and I could grind one end of the round piece of wood on a coarse sanging paper by rotating the tool on it. The idea is to build a slightly conical tool. Once at the expected dimensions, I managed to cut a coare sanding paper and glue it around the piece of wood with contact cement. You have to give a first coat of glue on the piece of wood, then waiting for it to dry. Then it is necessary to give a second coat because the glue will sink in the wood and if you try to give only one coat, whatever you will want to glue on it won’t stick firmly. It really takes 2 coats of glue on wood.
Finally I applied some electric tape around the sanding paper sticked on the wood. I taped it very tightly and left it to dry. The new tool would allow me to slowly increase the inside diameter of my hole where the wheel rim has to go. It worked perfectly but you have to grind a bit and try the rim in it very frequently. If you remove too much material, then you are back to square one and have to start over a new piece. I don’t give the dimensions of my hole saws and from the tube that I used because all depends on your choice as dimensions of the tires that you want, the dimensions and models of the rims that you want to use. From my part, I was so lucky to find a toy that had a magnificient kind of reinforcments, like 5 pointed and triangular bars in the inside of the rims. It is similar to what we can see on modified race wheels on vintage stock car racers. Similar, also, to some race wheels that we found on some models of the AMT Modified Stocker series into 1/25 scale, like the ’64 Galaxie and other models. I wanted a center disk with 5 studs around the ¾ ton wheel hub that I have, so the 5 reinforcement pieces on this rim. It’s a very neat piece. Perfect for my race car, and the dimension is also excellent.

This was my first trial at building a domed wall on my tire, with the race rim and ¾ ton truck hub. I was not satisfied of the tire wall because the outside diameter was too small and the sole of the tire was too thick for my taste. It looked like a low profile tire of some kind. I wanted the exterior diameter of the sole to remain the same (same tire height),but would have to narrow the interior diameter of the sole. This is how I worked in vain to fabricate a tool that finally did not work properly.
I finally found a solution that worked fine and this time, I spent a minimal time on a more simple tool… and it worked. Irony of life. These things happen. It is very tricky and it takes a hell of a time only to do a single tire… but finally it works.
On the above picture, on the left hand side, the sole with his full thickness, on the right hand side, the sole has been thinned from the interior, this is allowing a bigger outside diameter for the wall of the tire. * Then I needed to keep the original tools for my hole where I will fit the wheel rim (same measurements, same hole saw, same conical sanding tool. The outside diameter of my new wall will have to be higher now, so I have to choose a bigger hole saw for this dimension. Needless to say that I have to cut a new piece of wood from a plank. This is basic machining.
On the picture at the left, the first step of the job. The wall is completely flat. On the picture on the right hand side, I made the embossed or domed surface of the tire wall using a coarse sanding paper and turning the piece of wood on a mandril. I am used to do these kinds of things. Then I can fill the little imperfections with glazing and turning it again on the mandril installed on a drill. For this, I don’t really need a lathe. It is not very difficult to do. A lot easier, in fact than many other steps done precedently. I wanted to make white widewalls. Unusual for a stock car racer. Well… the ones that we sometimes see in showrooms as historic race cars in pristine condition, have sometimes wide whitewalls. I happen to create logos, and graphics as another one of my passions. A few years back, I created a logo for a fictitious tire shop. The tire on my logo is a wide whitewall tire. I might install this graphic as a sponsor on this race car. Why not after all. It will be driven by a very talented girl. She deserves the best equipment and the most beautiful race car too!
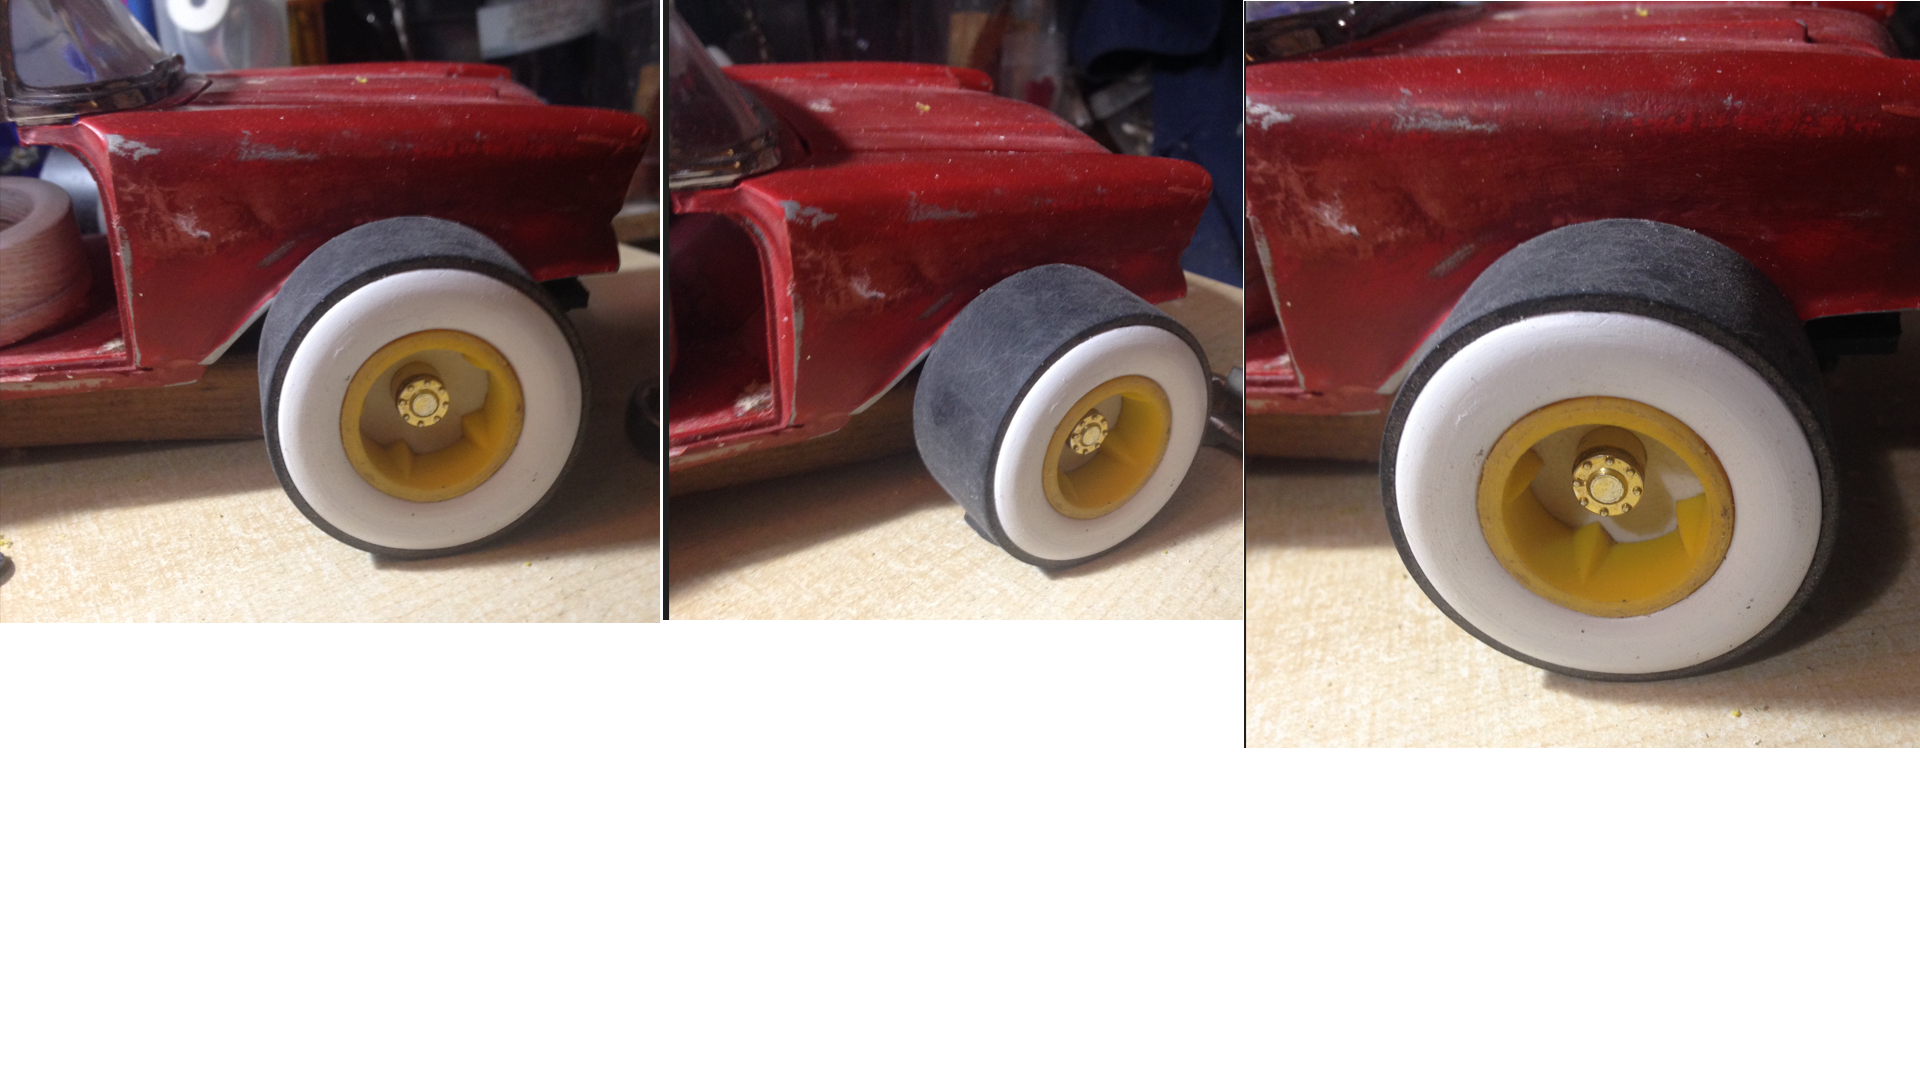
Not bad, really. The rim is missing a round plate around the hub (I call it a crown) with 5 studs. I have done a part of the tooling to be able to puncture the 5 holes. No hand job for me. I prefer the precision of tools. Still more work to do… all the time. So many time. I don’t work on a fast pace.

Here is the hyperlink to see this picture taken from The Drive. Com
On the above picture, this is the Modified of Gerry Cook, that I have seen running at least once on a race track back in the day. Probably in Plattsburg N.Y. If you look inside the front rim, it has the same type of wheel reinforcements (half spear type) as my scale model rims. This is a sophisticated style of steel reinforcement pieces. It is a rare style as most car builders would just add flat bars or pieces of steel plates to strenghten their race wheels. In the late 60s and early 70s, no Modified or Late Model were running chrome wheels. They appeared later on the race tracks.
< href=”http://montrealminiatures.com/wp-content/uploads/2022/07/Laval-Tire-Shop.png”>
And here is the graphic that I have created a while ago for an imaginary Tire Shop. Laval is a city on the North shore of the Montréal island. There was located the defunct Riverside Speedway, our local stock car track. So much memories, a nostalgic era of my childhood, as a teenager, and later as a young adult.
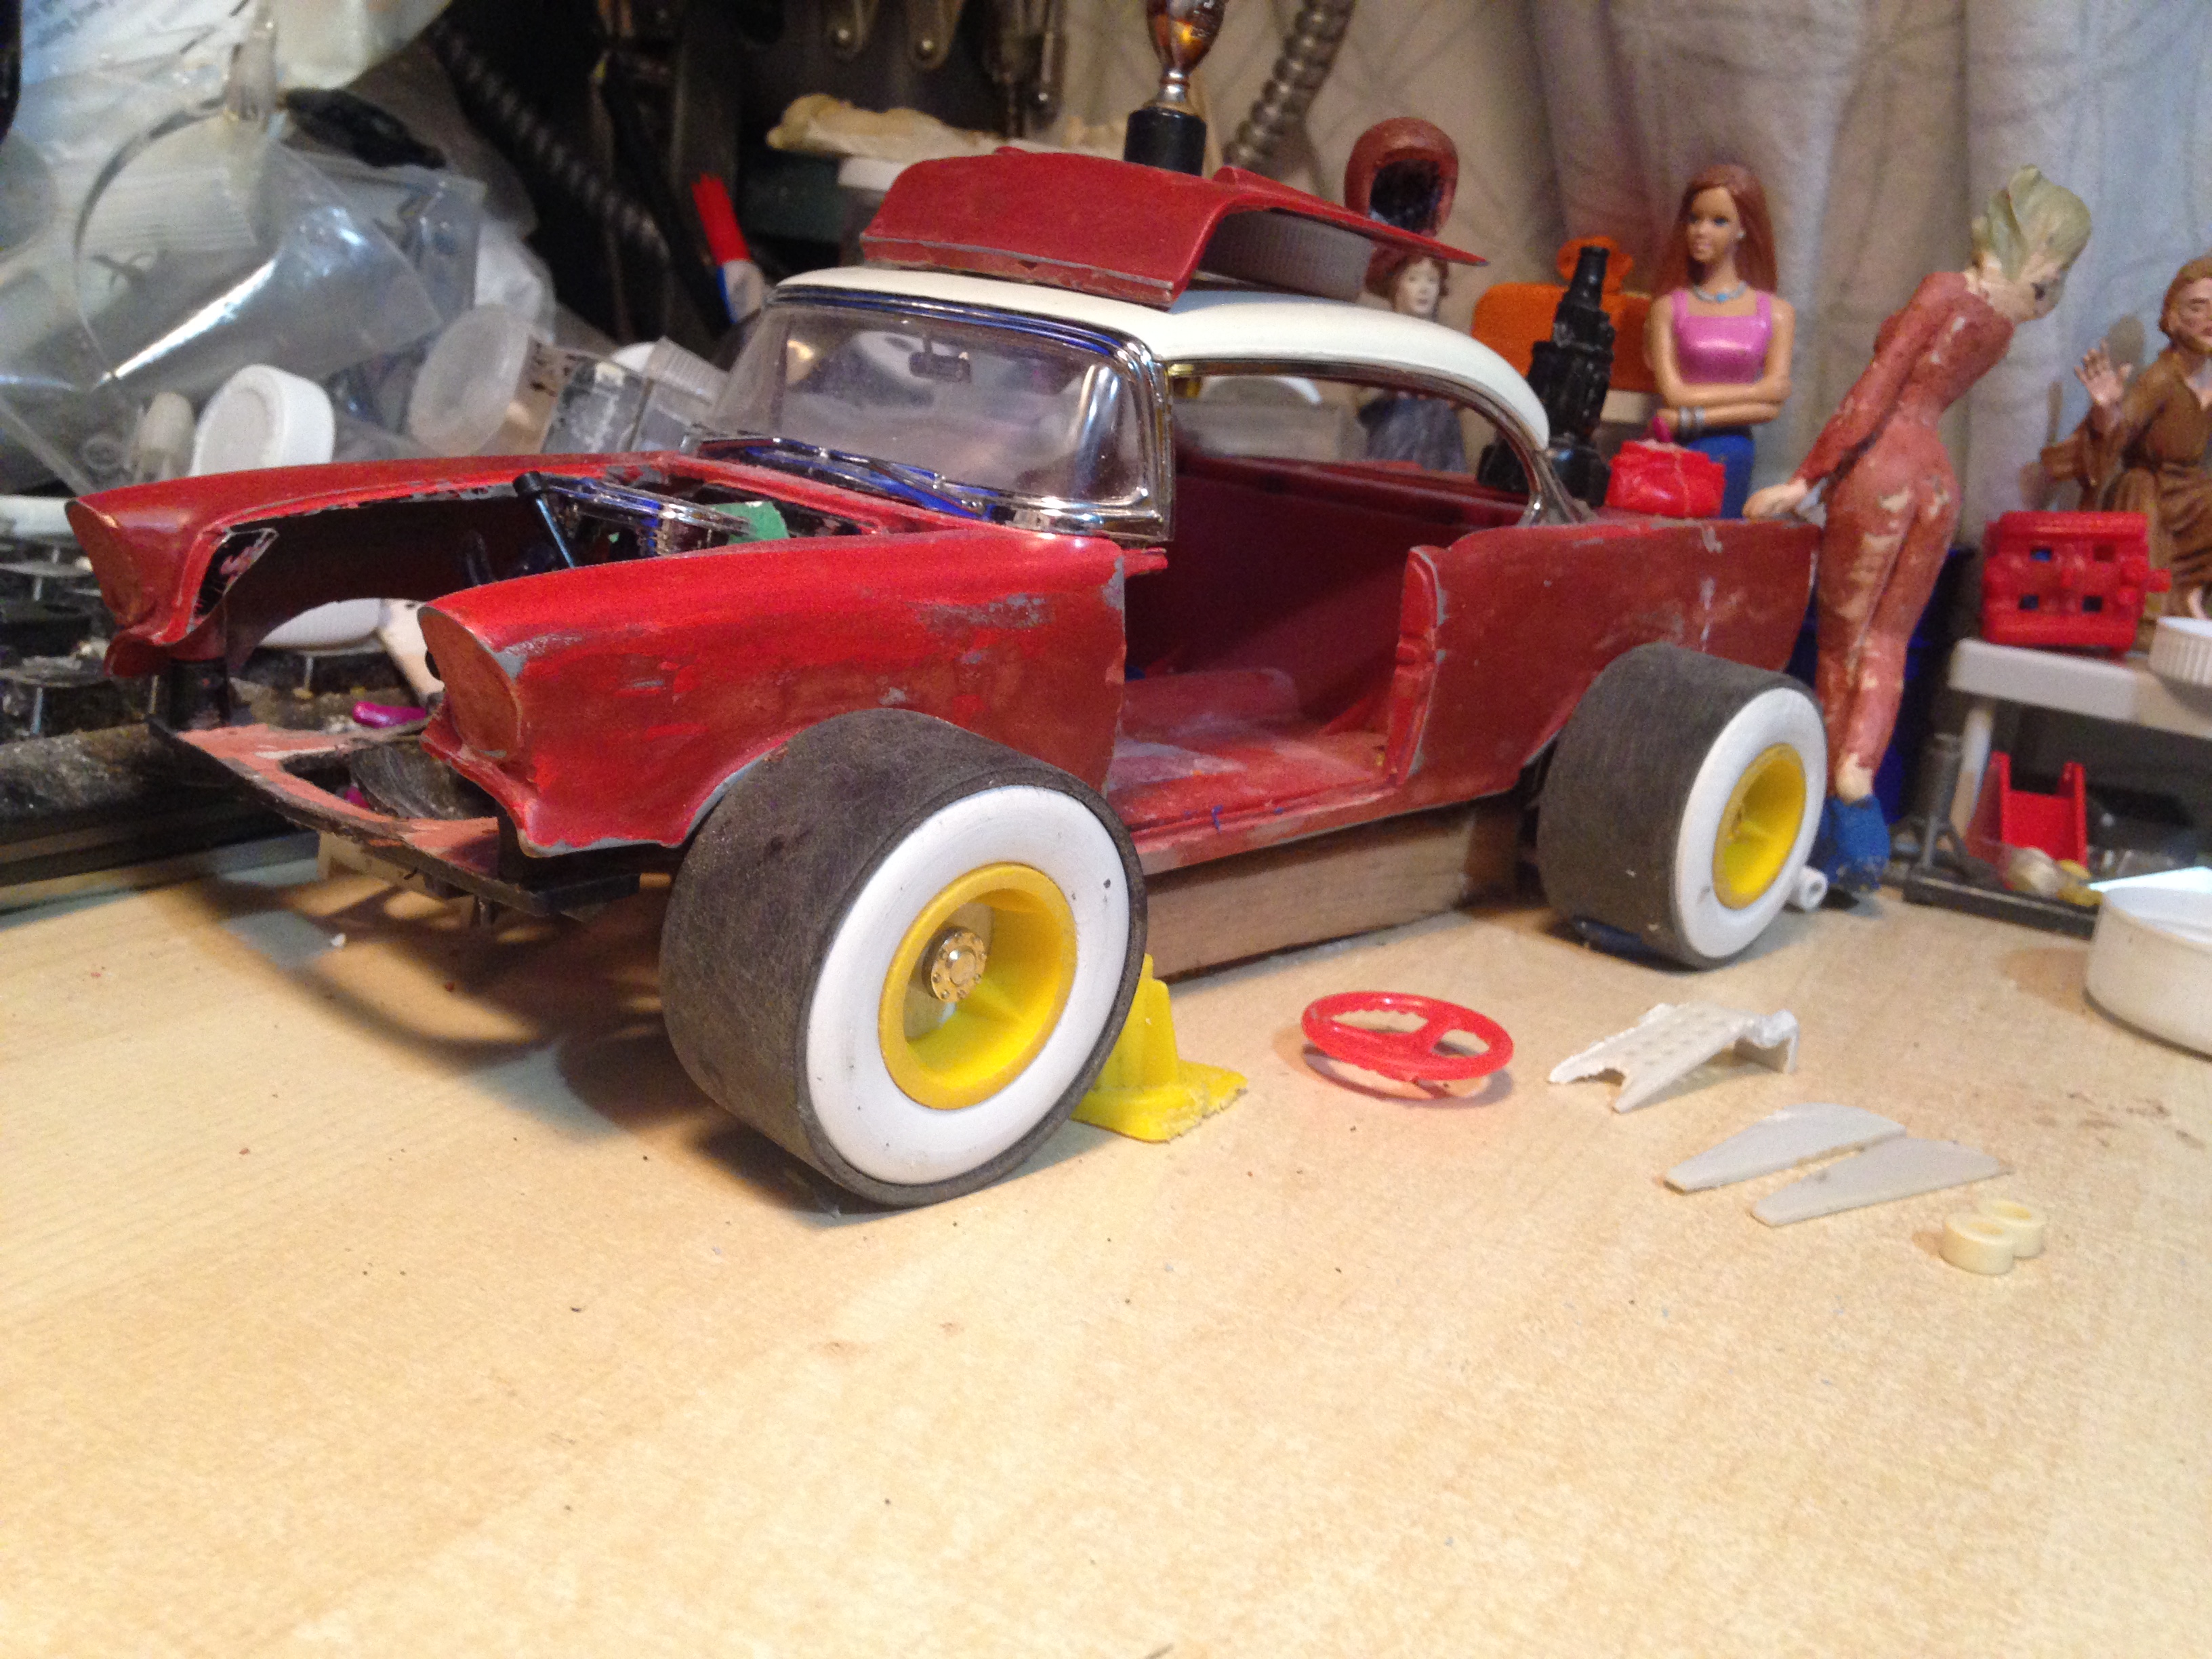
Here comes my baby, talking to her best friend. I love when they come sneeking in my garage and look at the improvements on the race car project. Fortunately for me, they seem not to care too much about the mess in the shop.
The Drifters : There Goes my Baby
https://www.youtube.com/watch?v=i3HXy9mGPpI
I worked on this project again a couple of days back ,on a friday by the end of the afternoon, and several hours on sunday. I passed many hours again working on a second tire and rim (tire sole, wall and the rim and hub, made of 4 pieces, up to date but missing another 6 pieces in the front and another 4 pieces on the interior side, or if you prefer, the back of the wheel. At least, for the moment, the race car looks more realistic since I removed the temporarily mockup tire at the back and made a second tire and rim like the one that I made lately for the front of the car.
Of course, I put them on the same side, depending if I want to take pictures of the left or the right side of the model. It gives me courage to go further in this project. Boy! It takes so many hours and require so much energy and complicated steps to finally reach the goal expected, and sometimes, in a single part. I worked also on a new girl figurine and other diorama items for this project… and not to forget, researches on the Internet.
I was looking for a GM 4 speed manual transmission for this ’57 Chevy race car. Originally, the car had a 3 speed manual, but I wanted a 4 speed. This reminds me of my first ’64 Chevy Impala (real car) that I had, back in the late 70s. It was an ex-manual, 3 at the tree, as we uses to say, converted with a race shifter at the floor. I have been buying a Saginaw 4 speed for it, then a Muncie 4 speed, then another Muncie from a Corvette. This shows how we are crazy when we are young.
I didn’t think about it but I have a couple of other 1/18 vintage GM cars here. I looked and found the tranny that I wanted under a 1956 Chevy Belair convertible. Curiously, the car is all original, nothing aftermarket, no performance parts, but has a floor shifter and a 4 speed under the transmission tunnel. It has an original bench seat and a floor shifter and boot, despite the car being all original, even with the 4 hub caps. Like a brand new car coming out of the dealer. That must be a kind of a mild custom car.
I am really not sure that there were manual 4 speed transmissions available for the ’56 Chevy cars back in the day. I made researches but did not find anything on the subject matter. I also took out the original small block Chevy V8, and removed it from the ’56 Chevy. The top of the engine looked liked like a fuel injected version. I want a carburated model, a 4 barrel carb, as it was in the regulations of the Late Model Division. The 3 speed manual, attached to the engine, had an original bell housing used for the V8s and 6 cylinders in line in these years. I had many old Chevy manual cars in my life and also a 1969 GMC manual and they all had this same model of cast iron bell housing and the lower pan was a piece of steel sheetmetal. I am talking about real cars and trucks, not scale models. surprisingly this bell housing is accurate on the scale model. I mean on my ’57 Chevy, but the ’56 chevy did not have the same bell housing. It was rounder and slick. Maybe a scatter shield. Not the aluminum type that GM produced later. They are ribbed or corrogated. I took a very thin hacksaw that I have here and slowly cut the bell housing from the engine as they were molded in. I will have to do the same for the bell housing of the 4 speed transmission, and will make the swap. I am not sure if I will install the small block Chevy of the ’56 in my ’57. I do not like the fact that the angles of the motor heads and valve covers are not correct in these scale models. Or I will have to modify them or to find a small block with the correct heads and valve cover angles. It bothers me. They look almost perfectly horizontal. I had enough of these engines to know well that this is not accurate.
And no… the wheel openings are not radiussed yet on the diecast. No time to resume the work on the machine yet. I am just not in the mood. I mean that there are so many things to do and I always have new ideas, new projects of figurines and garage dioramas are popping in my mind like crazy, and when I do researches in my boxes of parts, I always find something new, some interesting ideas, to build a floor jack, a motor stand, some car stands, or whatever.
I went back to Value Village, I mean their French Canadian branch here (Village des Valeurs), and found several other figurines, and some suitable for this scale. Guys are rare, I mean for this scale. Girls are numerous. I need employees to work on the car and maintain the garage. I will have to hire girls if some of them are interested. I even prefer girls. I am in love with their feminine touch. Looking at some of these figures gave me new ideas to turn them into garage staff or race track peoples. Some partial sculptures ahead, transformation of figures, into something else is so fun. My head is full of new ideas. Sad that I am not super rich, so I could have employees and produce my miniature parts and mini people.
*
And here is a little bonus for you to see. I had this figurine at hand. I think that he was playing socker, as far as I recall. His legs were bent and he was a bit twisted on one side and also bent forward around 45°. I had to cut him in pieces and to straighten him, fill the gaps with body filler and I gave him 3 coats of glazing up to date. I had the idea to place him under the car, working on the direction parts. There is somebody new in the shop. Well, this one too will need more work. Nevertheless, I like him… and he works good!
Fabricating a floor jack
While I was making a research in my part boxes, I fell on a 1/16 scale floor jack from an old Petty ’85 Pontiac Grand Prix kit from AMT. This jack was so ugly. It had no wheels at the front, no casters at the back like regular floor jacks use to have. There was a nice plate on top of it with many symetrical lines of holes but it did not look at all like the upper pieces (several) of a regular floor jack. The other parts of the jack were missing. I mean the long tube that we use as a handel and as a lever and the bottom part connecting it to both sides of the jack. There was no underside panel on this piece, from the bottom, it was hollow.
In fact, I just wanted the 2 side panels of the jack. So I had to cut the top part of it and ended up with the 2 parts that I had in mind.
At least these 2 parts looked OK. I needed to use my imagination and find all the rest to build what I wanted. I found out that having only the 2 side panels for a start was a good thing. I could overlap them perfectly, clamp them together and puncture tiny holes where they needed to be done and would puncture the 2 sides at the same time, so that the holes would be perfectly symetrical and aligned on both sides of the jack.
I had to build an axle for the front and 2 small wheels or rolers too. At the back, I would have to drill tiny holes for the handle socket that connect on both sides and also on the handle. I would need to make other holes for the stabilizer bars, the lifting arm, plus other holes on some other parts, install pins if I want to have the lifting arm functionnal. I am that crazy.

On the above picture, the original Petty 1/16 scale floor jack cut in 3 pieces.

A biginning of the work with potential parts around it. The 2 rollers at the front were taken from a miniature skateboard. They were at a perfect scale for my jack. Between the 2 sides, the white mini tubbing is made with a Q-Tips and inside, I used a mini steel rod as the axle. The rollers can turn. The handle or lever is a styrene tube by Evergreen. The socket and pivot at the base of the handle is functional. It can move to any position. the white piece near the tire of the car came probably from and old electronic machine… not sure, but would fit well with some modifications to to be the lifting arm of the jack. I have some miniature parts to build the casters and also their brackets, the saddle and saddle pad. I believe that I have most of the pieces that I will need for this project. I have been a couple of days looking for parts in boxes, pots, containers of all sorts, ziplocks… I have miniature parts all over the place. Some more pictures will come later on.
More updates when the time allows.
Any questions or comment? Please email me at :
florent@montrealminiatures.com
F.B.