Comment j’ai fabriqué un Baril de 45 gallons à l’échelle 1/12 – How I have built a 1/12th scale barrel of 45 Gallons
 L’échelle 1/12ème, de quoi ça a l’air comme dimension dans notre réalité?
Un homme de 6 pieds, transposé à l’échelle 1/12, donne une figurine d’exactement 6 pouces de haut. (1 pied égale 1 pouce)
 What is the 1/12th scale in our reality? What does it look like? A man 6 feet tall in this scale is 6 inch tall, so 1 inch equals 1 foot.
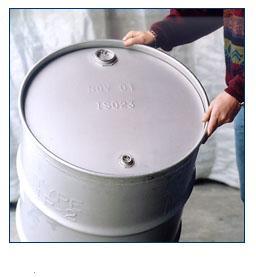
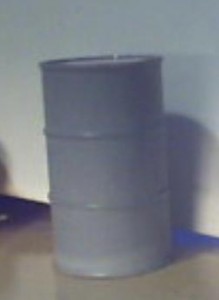
 Photo d’un vrai baril de 45 gallons pris sur le site web ci-bas.
Ce sont ces même couleurs que je veux peindre sur mon baril miniature.
 These are the 2 colors that I want to use to paint my barrel.
Picture of a true barrel of 45-55 gallons taken on the web at this address :
http://morsedrum.com/products/drum-cradle-images.htm#36-SS
 Depuis des années je voulais me fabriquer un baril de 45 gallons à cette échelle (45 gallons impérial ou 55 gallons US) .
 Since many years I wanted to build a 45 gallon barrel at this scale (45 imperial gallons or 55 gallons U.S. are the same).
 Un jour j’étais allé au dépanneur et il y avait un baril métallique de 45 gallons dehors aux poubelles, juste au commerce voisin. J’avais mon ruban à mesurer, crayon et papier dans ma camionnette, alors je suis arrêté pour prendre toutes les dimensions exactes et un moment donné je les ai transcrites dans un dossier de mon ordinateur.
 One day, I went to the convenient store and near by, there was a steel barrel of 45 gallons trown in the snow at the back of the building where I happened to pass by. In my small pickup truck I had a measuring tape, a writing pad and a pencil, so I took them and went at the barrel to take all the measurements. A while after I created a file in my computer and transcribed all the figures in it. I used a calculator and scaled them down to 1/12 and 1/25, my favourite scales.
 Des mois après, probablement en redécouvrant ce dossier, je suis allé vérifier dans tous les tuyaux que j’ai en stock dans mes boîtes pour voir si je pouvais trouver quelque chose de compatible pour fabriquer le corps du baril. J’avais calculé toutes les dimensions et transposé à l’échelle 1/12. Quelque part en lisant mes mesures je me suis trompé et j’ai travaillé une journée entière sur une erreur de calcul, j’ai choisi le mauvais tuyau. Quand je m’en suis rendu compte le tuyau ne semblais pas du bon format pour l’échelle, comparé à ma Chevrolet ’57 à l’échelle 1/12. En vérifiant j’avais lu au mauvais endroit sur mes explications de calculs et il manquait un calcul à additionner qui était écrit juste un peu après. (j’écris tous mes raisonnements et explique mes calculs car une fois j’avais oublié comment calculer une chose compliquée et ça m’a pris du temps et des erreurs avant de retrouver la bonne méthode. Je ne suis pas un as en mathématiques mais j’y arrive quand même par des calculs plus longs et des essais-erreurs fréquents (mais j’ai finalement compris la règle de 3, ce qui m’évite maintenant des tas de calculs approximatif jusqu’à ce que je tombe sur le bon calcul).
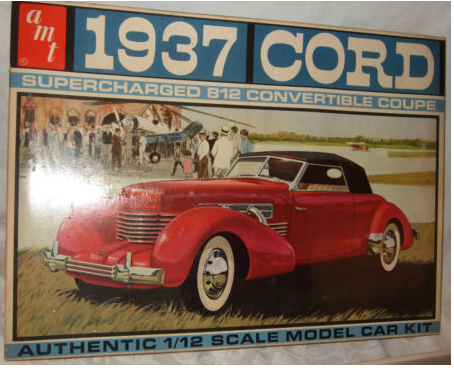
 Months after that, I probably fell on this file by random and I decided to go and have a look in my boxes of tubbings to see if I could find something that would match the dimension of the biggest part of the barrel, this big sheetmetal cylinder. At first I had made a mistake on my calculations and chose a wrong tube and after working on it like a full day, I found out that it was out of scale compared to my 1/12 scale model cars (1957 Chevy, 1969 Camaro and 1937 Cord to name a few) and figurines. The barrel in construction looked too small. I found out where I had made a mistake and corrected it. I went back for another search in my tubes and found one that was almost perfect in dimendion, a few thousands of an inch smaller. It was just even better in fact, the thickness of the primer and paint to apply on the barrel would fill this gap.
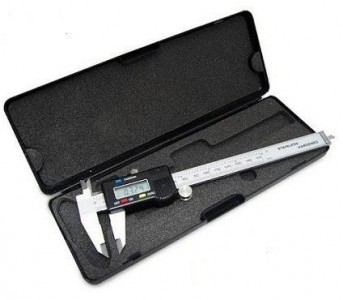
 Un vernier de machiniste. Outil me servant à prendre des mesures très précises (pas aussi précises toutefois qu’un micromètre), en millièmes de pouce ou en Microns, une infime fraction d’un millimètre pour ce qui est du système métrique. Ainsi je peux mesurer tous mes tuyaux pour trouver celui qui fera l’affaire pour construire mon baril.
 This is a tool used by machinists, a Vernier caliper. It takes precise measurements at a few thousands of an inch close, or Microns, a tiny fraction of a millimeter in metric. Not as precise as a micrometer though. With this tool I can find the best pieces possible in my stuff when I want to build something at the right scale.
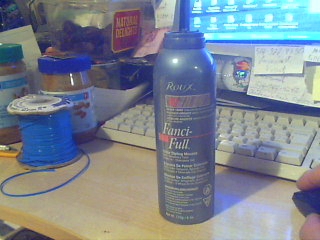
 J’ai donc dû recommencer avec un tuyau plus gros et il faisait bien mieux mon affaire, assez mince, Incroyable, une bouteille de teinture à cheveux ou matériel pour les cheveux, une bouteille en aluminium. Le diamètre exact à quelques millièmes de pouce près. Les couches de peintures feraient l’affaire pour qu’il soit encore plus exact à l’échelle voulue.
 Then, with the new bigger tube, I started over the project. This new find was even a lot better. I was very lucky to find an aluminum tin tube out of a can used for hair care. I would had used what ever I had as material : plastic or metal, What I liked of the aluminum tube is the fact that it had a very tin wall, so even the thickness of the wall of the barrel would look realistic for the ones that I will use like garbage drums with no cover on top (I want to make some rubber molds and cast several of them for different uses in my garage diorama).
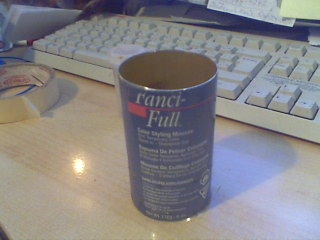
 J’ai utilisé une lame à dents fines au carbure sur ma scie à onglet de 7po¼. J’a coupé le fond de la ”bouteille” ronde en aluminium et j’avais placé un ruban à masquer pour ma coupe de l’autre extrémité. J’ai coupé très très lentement car l’aluminium était assez mince (mais beaucoup plus épais qu’une canette de bière). Ça a bien été, je suis habitué aux travaux périlleux. La bouteille (tuyau) avait été bosselée un peu à quelques endroits donc j’ai dû y mettre du mastic de finition… et évidemment comme 3 fois et sabler chaque fois.
 Here is the picture of the tube that I found in my stuff. I installed the tube on my electric meter saw, and very slowly I lowered the running blade cutting the aluminum ”bottle”. Very, very slowly. I used a carbide blade with finishing teeth. I am used to perilous works, perilous to scrap a unique piece that I have, and perilous to hurt myself sometimes. I had 2 cuts to do, the bottom of the can, and for the second cut I placed a masking tape where I wanted to perform the second task. Cutting along the edge of the tape would be the best I could do in the circumstances with my toolings and would be fine for this application. Juste un peu de sablage ou limage sur le coupes et tout serait très bien pour cette étape.
 Maintenant il fallait une façon de fabriquer les renflements dans la tôle (ondulations), genres de cercles demi-ronds pressés dans la tôle tout le tour d’un vrai baril. Une recherche sur les barils m’a montré que presque tous les barils en acier ont 2 de ces genres d’anneaux pressés dans la tôle et un de plus à chaque extrémité (haut et bas) juste sur les rebords, donc 4 en tout.
 The 2 cuts went OK, just a bit of sanding and the thing would be excellent. I couldn’t use a plumber’s pipe cutter because the metal was too tin and I would had scrapped the barrel. After this operation I had to find a way to fabricate these corrugations that we see around the barrels, these embossed ridges or grooves pressed in the steel when they fabricate them in the factory plants. A research on the Net showed me that most steel barrels have 4 of these corrugations on them. The barrel body is divided in 3 equal spaces or levels and in between each of them is one of these embossed ridges. There is one of these at each 1/3rd of the barrel and one on the top edge and another one at the bottom edge. I was not sure what I would find in my stuff, in my boxes, my drawers or containers of material so I started a research all over the place.
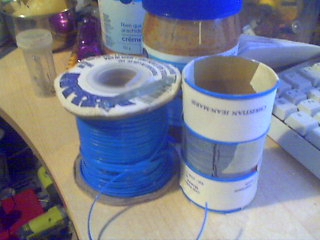
 Il y a environ 7 ans j’étais allé avec Mimi sur la rue St-Hubert au nord de Jean-Talon jusqu’à Villeray (à Montréal). Ce coin est le paradis des gens qui font de la couture, du rembourrage etc. Il y a plein de boutiques qui vendent des boutons, attaches, bordures, tissus à la verge et tout pour la couture, et certains types d’artisanats s’y rattachant. Un magasin avait un rouleau d’un genre de cordon (c’est pas vraiment un cordon) en vinyle bleu, mince et souple de la forme d’un demi-rond, mais un peu plus aplati (dessus arrondi et dessous plat). Je me suis dit que ça me servirait un jour pour faire quelque chose dans le modélisme (ceintures de grosses figurines, bordures, moulures arrondies etc) alors j’ai acheté ce rouleau.
 It was around 7 years ago now, one day I went with Mimi on St-Hubert, a commercial street in Montreal, at the north of rue Jean-Talon and a couple of blocks away going northbound till rue Villeray (street). This place is the paradise for the people who are in the hobby or the business of fashion fabric, upholstery. You find beads by thousands, plastic or metal jewelries, buttons, fringes, trims, borders, laces, sewing machines, airfoams, you name it, they have it. You have stores after stores sellings these things in this area. Mimi is crafting all kind of items, including making figurines ans scale modeling with me. So we went in this area of Montreal to look for some material for her and I was looking at the same time if I could find some interesting material or items for my scale modeling. In my searches I found a roll of an interesting material, a soft and very flexible vinyl. It was completely flat on one side and not really half round, but a bit more flattened on the other one, very narrow, like maybe 1/16 or 3/32 inch wide. At the time, I was not sure what to do with it but I knew that I would be good to build perhaps belst on figurines or to do some moldings of some sort, so I bought it. Up to date I had never used this roll but when I found it lately, this was the item that I needed!
 Ben voilà! j’avais trouvé exactement l’item qu’il me fallait pour faire ce genre de renflements autour du baril et la forme et dimension étaient parfaites pour l’échelle désirée!. Ça a été un enfer de calculer et fabriquer des petits gabarits en carton mince pour espacer les moulures en vinyle, également et symétriquement tout le tour du cylindre. J’ai collé ces bandes étroites à la supercolle, puis j’ai vite enlevé l’excédent .
 So, I divided the height of the barrel by 3 and removed the equivalent of 4 width of these vinyl strips in my calculations, and made 2 templates of thin cardboards (business cards), no need of a template in the middle section as this space would be automaticly ok if my 2 other templates were exact. The middle space had to be the same as the 2 other ones. The 2 templates were cut on my slicer. It was a bit a hell to cut all this precisely but I ended up doing it well. I glued the 2 strips of blue vinyl at the top and bottom first (with superglue, and I removed the exceedent fast), then I placed the strips of thin cardboards along the strips, tight on their edges all around, and finally I glued the 2 other strips of vinyl at the other ends of each cardboards, aligning them along the edges of the cardboard once again. The cardboards were glued with double sided tapes, as far as I may recall. It was not a very easy task but I succeeded with a lot of patience.
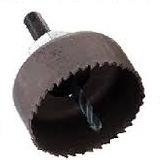
 Pour faire le dessus et dessous du baril, j’ai pris une feuille de styrène et j’ai choisi une cloche emporte-pièce qui se trouvait à être presque juste, à peine trop grosse pour l’intérieur du cylindre.
 To cut the 2 round pieces used for the top and bottom of the barrel I used a hole saw and a piece of a sheet of styrene. I had to choose a hole saw and it was better to use a tool cutting a piece a bit bigger than smaller to suit the inside of the barrel, so I had no choice that taking a cutter a bit too big in diameter, but I can solve the problem easily. As the pilot drill bit makes a hole in the center, my trick in these cases is to use this hole. I just install a bolt in this hole, or a treaded rod and I put a flat washer on both sides of the disk. with a tightened screw on both sides. Once it is done, I install the shaft of the rod or bolt in my drill chuck and I tighten it. Using the drill, I turn the disk on its circumference, on a very rough sanding paper or a file in a vice. This way, the diameter of the disk is slowly decreasing. I stop and make test fits once in a while till everythying fits well together. After that I fill the pilot hole of the center with body filler or glazing.
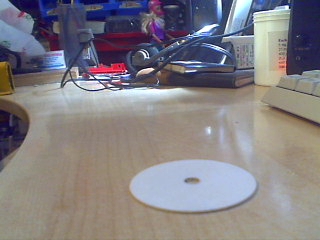
 Ma première pièce découpée. Il en reste une autre identique à faire.
 My first cut disk sanded. I have to make the second one.
 Comme la mèche-pilote de l’emporte-pièce fait un trou au centre de la pièce, ma technique habituelle, quand le diamètre de ma pièce découpée, est un peu trop gros, est de placer un long boulon ou une tige filetée, avec 2 rondelles plates et un ou deux écrous (selon le cas que ce soit un boulon ou une tige filetée) dans le trou au centre du disque de plastique en ayant mis de chaque côté du disque une rondelle plate et un écrou, et serrer le tout, puis je met la tige de la vis ou du boulon dans le mandrin de ma perceuse et je fait tourner le disque sur sa circonférence sur un papier sablé très rugueux. J’arrête parfois pour essayer la pièce dans le cylindre jusqu’à ce que ça s’emboîte bien ensemble. Il me restait à boucher les trous pilotes au centre de ces disques au mastic de finition. J’ai donné une grosse couche d’apprêt gris sur mon baril mais je n’ai donné sur mon couvercle et le fond du baril que des couches minces (Quand je les emboîte dans le cylindre ils sont si serrés qu’ils ne bougent pas sans collage. Sur le disque du haut (dessus du baril), en traçant une ligne fine au crayon en plein centre du disque, pour identifier le diamètre, une ligne-guide ou j’ai aussi identifié deux points de repaire près des deux rebords du disque. Ainsi j’ai déterminé les deux trous des bouchons près des rebords.
 I gave a first coat of grey primer on my barrel. I needed to give an heavy coat to fill the little gaps between the cylinder and the blue moldings, letting no line in between them because I wanted to make it look like there is no part added but the corrugation is really a part of the barrel, smooth and even. It ended up a bit like a hell to sand as some primer drips occured. I had to send them very even and smooth.
 Le dessus d’un vrai baril métallique montrant les bouchons, le trous filetés où se vissent la pompe (gros trou) et l’évent (petit trou). Photo prise sur ce site : http://www.holocene.biz/fr/page2.html
 The top part of a true steel barrel showing the 2 plugs. Notice that one of them is bigger than the other one. The big hole is usually used for installing a pump and the small hole il used as a vent. A breather/vent can be screwed in this hole. The 2 holes are treaded. The above picture was taken on this website : http://www.holocene.biz/fr/page2.html
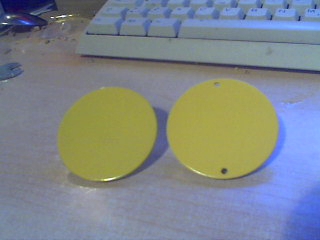
 As seen on the picture, I painted the 2 covers. I drilled 2 holes along the edges. Previously, I had cut a paper all around the disk and folded it in 2 by its middle, so this was my diameter line crossing the center, my template made of a paper. Then sticked a masking tape on the disk, dividing it in 2 and I draw a line on it using my piece of paper folded in 2. Now I could drill my 2 holes in straight line with the center of the disk and nothing would look misaligned.
 Bon… Le baril était au séchage avec son épasisse couche d’apprêt gris, et il en avait pour longtemps car je lui ai donné une couche d’apprêt assez épaisse pour boucher les petites fentes entre le cylindre qui constitue le corps du baril et les 4 moulures en vinyle afin que le tout ait l’air d’être fabriqué d’une seule pièce, comme une ondulation de la tôle faite sur un vrai baril.
 Well… the primer coat on the barrel was drying and as it was a thick coat it would take a long time to dry. It had been necessary to give this thick coat because I wanted to fill the little lines between the cylinder and the vinyl blue moldings with primer, so that the glued pieces would look like the embossed ridges on a real barrel. It had to look like if the tube and the moldings would be made of one piece, so by giving a thick coat it would fill these tiny gaps and make the joints completely filled and smooth like the corrugations on a real barrel.
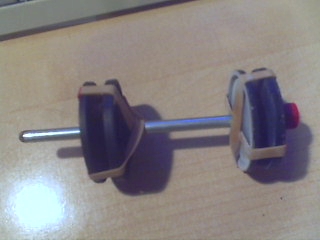
 J’ai dû me fabriquer un mandrin spécial pour y installer mon baril sur une perceuse et le faire tourner lentement pendant que je le sablais (conçu avec de vieilles roulettes provenant d’un gros caisson en plastique avec petites roues doubles à chaque coin [Voir photo ci-bas]. Je n’ai eu qu’à perforer le reste du centre et y installer une tige métallique juste serrée et deux gros élastiques installées en croix, qui ont comblé le manque s’espace et en même temps ont donné de la résistance, de la poigne à l’outil à l’intérieur du cylindre). Puis il y avait des coulisses à sabler et une couche d’apprêt très épaisse. Du courage et encore du courage. Il n’est vraiment pas rare qu’il faut que je me fabrique des outils pour pouvoir passer une étape de projet.
 I had to built this tool to put inside my barrel and hold it. It is just tight enough with the crossed rubber bands. I used 2 plastic wheels at each end (they come in pairs, molded together). They come from one of these big plastic containers with wheels at each corners (non directionnal). I drilled the middle and slid a steel shaft trough them and it was just tight enough. I had to force the rod in the holes. Then I installed the steel shaft in my drill chuck and turned it slowly enouth. This way, I could sand the barrel more evenly and get a smoother result.
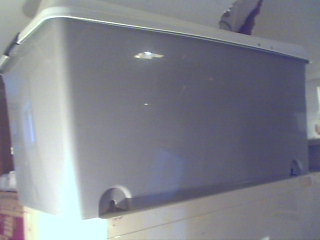
 C’est le caisson d’où proviennent mes roues de plastique avec lesquelles j’ai conçu mon outil. Il repose sur mon classeur et les roues n’étaient pas utiles où il se trouve. Je conserve toujours plein de bric-à-brac de toutes sortes car je suis un as bricoleur. J’ai plein d’idées mais pour les réaliser j’ai besoin d’un tas de matériel et de matériaux… sans oublier tout l’outillage.
 This is the big plastic container where I took the plastic wheels. It is lying on my file cabinet. The casters or wheels were not useful in this case so I had removed them. I always keep a lot of bric-a-brac of all kinds because I am an excellent handyman. It is good to have a lot of ideas, but I need a lot of material… and of course , a lot of tools.
 J’en suis venu finalement à l’étape de la peinture finale sur le corps du baril (en rouge comme je le voulais). Les couvercles du dessus et du dessous sont déjà peints en jaune depuis des jours. Aucune pièce n’a besoin d’être collée sauf une très petite sur l’évent. Elles sont toutes ”tight fit”. Donc ce sera un assemblage sans colle pour la plus grande partie du baril. J’aime quand ça se démonte sans colle car si je veux défaire pour en mouler les pièces séparément c’est vraiment super, et je veux en mouler plusieurs dont certains sans couvercle pour en faire des grosses poubelles de garage. Pour donner une idée, le baril que j’ai fabriqué mesure très près de 3 ½ pouces de haut (je n’afficherai pas les mesures en millièmes de pouces).
 Then, came the time if the final coat of paint. (red as I wanted). The yellow covers are already painted since a long time. The 2 disks don’t have to be glued, they are just tight enough without glue. This is a very good thing because I want to make copies of my barrel and I like to cast the parts of my items separatly. So, if I want, I just dont’ put the cover on top and I can make a big garage garbage can with one of my barrel. The result is very satisfying, but I would apply a dull coat on the paint because I find it a bit too glossy, just a bit. But I could also make some weathering to the item.
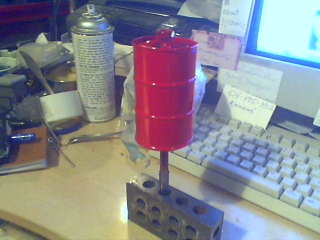
 Le baril peint sur le mandrin que j’ai fabriqué et qui m’a permis de le faire tourner lentement sur ma perceuse pour le sabler. Il m’a aussi facilité la tâche pour peindre le baril de sa couche finale sur les rebords du dessus et sous les rebords au bas du baril.
 The barrel on the mandrel that I fabricated. Very useful because I was able to paint the barrel also on the top edge and under the bottom edge. To hold the barrel into place, I just installed the shaft in a machinist steel block, given to me by a friend. It makes a good base to hold the tool while the barrel is drying. Otherwise I could had used a vice to secure the shaft or a hole in a piece of 2 X 4 or a plank.
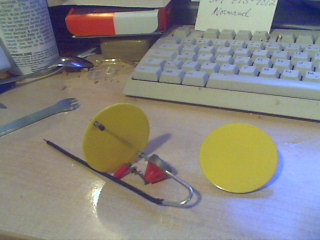
 Les couvercles… et… oups! de petits extras que j’ai fabriqués… voir plus bas.
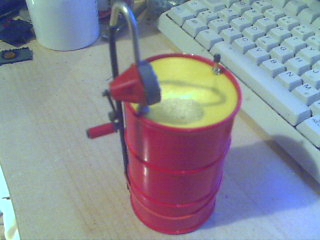
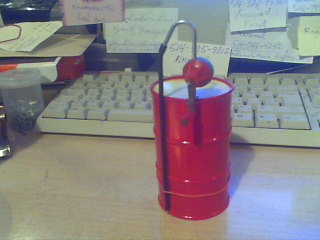
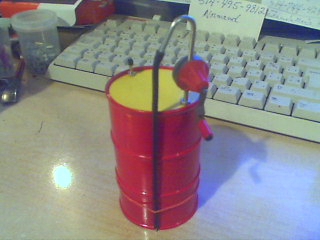
La couche finale a séché plus vite que prévu. Alors je l’ai assemblé. Il fait maintenant partie de mon projet diorama de garage à l’échelle 1/12. Je lui ai aussi installé son tuyau en caoutchouc au bout du coude de la pompe. Je trouve mon baril un peu trop lustré mais enfin… un jour peut-être que je lui appliquerai un ”dull coat”(peinture transparente qui rend plus mat). Très bel item pour mon gros garage. Il ne passe pas inaperçu.Comme je reconstruis aussi d’anciens logos de pétrolières d’autrefois, il est possible que je lui en installe un de mon choix dans un avenir plus ou moins rapproché, mais comme je vais en faire un moule, je pourrai m’en fabriquer plusieurs peints de différentes couleurs et avec de différents logos de pétrolières ou d’huiles de performance ou autres liquides. De plus, fouinant dans mon matériel Je lui ai même trouvé une palette en bois à la bonne échelle, de celles qui sont transportées par les chariots-élévateurs. je viens de me souvenir que j’ai aussi commencé à fabriquer un sceau pour installer au bout du tuyau de caoutchouc. Étant plus jeune, lorsque je travaillais pour la voirie provinciale, au Ministère des Transports, j’étais Préposé au Matériel, un cran au-dessous des Magasiniers, nous avions des barils contenant différents liquides, comme si ma mémoire est bonne, des huiles à moteur pour la machinerie, de l’antigel, de l’alcool ou autres, barils de 45-55 gallons avec pompes manuelles et le cliché du long tuyau de caoutchouc et de du sceau par terre au bout du tuyau me vient peut-être de cet endroit, quoi que j’ai travaillé dans deux garages et deux concessionnaires automobiles, ainsi qu’un tas d’ateliers dans ma vie où nous avions des barils de 45-55 gallons dont je me souviens aussi d’une compagnie où nous fabriquions des bateaux en fibre de verre et nous avions de la résine de polyester en barils de 45 gallons. Donc il y a une multitude de liquides pétro-chimiques différents qui peuvent se retrouver dans ces barils.
 The 2 covers… and.. oups! Some little extras that I fabricated… see below.
The final coat has dried faster than I was thinking previously. Then I assembled the item. It is now part of my project of 1/12 scale garage diorama. I also installed a rubber hose at the end of the goose neck of the manual pump. Very nice and unusual item for this scale. I’ve never seen any up to date in this particular scale. In my material I even found a real wood pallet that suits good with this scale, not shown on the pictures.
 Il y a des années que je voulais aussi fabriquer une pompe manuelle pour baril et là j’ai décidé que c’était l’occasion. Cette fois-ci j’ai été chanceux car je me suis adonné à trouver toutes les pièces compatibles en un temps record, à comparer à mes autres projets que je fais d’habitude… et j’ai trouvé de très belles pièces détaillées dans mon stock. Deux d’entre elles étaient exactement du même diamètre, on aurait cru qu’elles allaient ensemble mais elle provenaient de sources totalement différentes. J’ai poussé le détail jusqu’à trouver un minuscule écrou (nut) pour le tuyau métallique de la pompe, vissant ordinairement dans le filage du gros trou sur le dessus du baril (sur les vrais 1:1). J’avais une tige en aluminium provenant d’un hobby shop, que j’ai courbée pour faire le cou arrondi du tuyau en aluminium de la pompe. J’ai encore poussé plus loin jusqu’à même fabriquer un évent qui s’installe à l’opposé de la pompe. Il est fait d’une pièce d’aluminium, d’une en laiton et d’un minuscule couvercle en plastique noir. Ça donne un effet super réaliste. Par la suite, comme petit extra, j’ai vidé une gaine de fil électrique noir pour faire le boyau en caoutchouc qui va du coude de la pompe à un sceau. Puis j’ai sablé la gaine, ce qui donne toujours un aspect de caoutchouc.
 For years, I had also the desire to build a manual pump for barrel. Another thing that I have never seen in a 1/12 scale diorama. Because I decided to build this barrel, I thought that it was the right time to fabricate the pump also. This time in my search of parts to build the pump, I was very lucky. I found all the parts in my stuff in a record time. Usually, it is a long process finding all the material that I need when I want to build something. I found very nice pieces and most of my items matched together without extensive modifications. 2 parts did fit together like they had been built to fit perfectly, but they came from different sources. I pushed the detail and found a miniature nut to put around the aluminum tube that we slip inside the barrel and screw in the treaded hole.
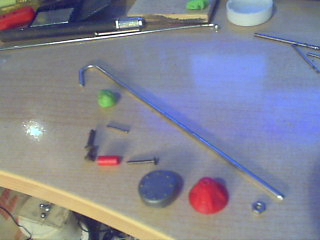
 Les différentes pièces que j’ai réunies, modifiées, adaptées pour fabriquer ma pompe manuelle.
J’ai aussi cherché dans mon matériel et j’ai trouvé des pièces pour me fabriquer un sceau. Il est même déjà assez avancé. Le tuyau de caoutchouc est visible sur les trois photos du baril montrées ci-haut. La pompe a de superbes détails, des boulons tout le tour du diamètre d’un côté de son boîtier circulaire. L’autre côté a des lignes en relief, genre d’ailettes ou renforts qu’on voit sur les pièces de fonte (j’ai vu des pompes comme ça dans mes recherches). La manivelle provient d’un outils bien détaillé découpé sur un jouet mais la poignée n’est qu’un tuyau rouge (rebut de pièce de jouet, un genre de support, un épaulement où on plante une vis), La poignée et manivelle peuvent tourner (les deux tiges sont deux très petits clous, un clou de finition et un clou ordinaire.
Les photos ne sont pas super (prises avec une webcam sans focus ajustable) et elles ne rendent pas justice à mon travail.
 The different pieces that I gathered, modified and adapted together to fabricate my pump. A little while after, I fabricated as a little extra, a tiny rubber tube (a small black electric wire stripped from its inside and sanded. Any black surface sanded looks like rubber. It comes like a dark grey color, exactly like rubber.
This is reminding me that I also started to build a 1/12th scale pail that I want to put at the end of the rubber tube, on the floor. Depending on what kind of liquid is in the 45 gallons barrel, sometimes we use a pail, or in some other situations we use an empty plastic gallon. I remember working for the provincial government being young, and I was a store keeper in a highway maintenance facility. We used to have different kinds of liquids in our 45 gallons. Some had motor oil for machineries, some had prestone, some had windshield washer fluid, some had industrial alcohol that our crew used to mix in water and winshield washer in winter to wash the road signs. In the bed of a crewcab pickup truck, the crew used to carry an opened barrel half full of water mixed with windshield washer and I believe alcohol by very cold times, they were using brushes with very long poles and were cleanigh all the road signs dirtied by the wind, the dust and the slush of the highways. The crews were pooring and mixing pails of windshield washer and pails of alcohol in their barrels of water. I am sorry if the pictures are not at their best. I have only a webcam with no adjustable focus on it.
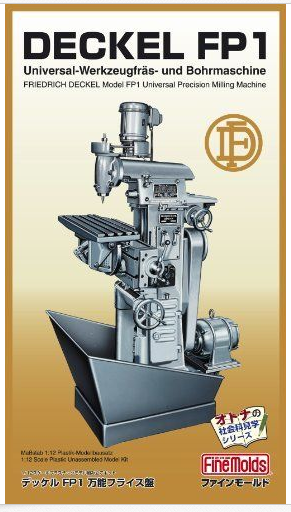

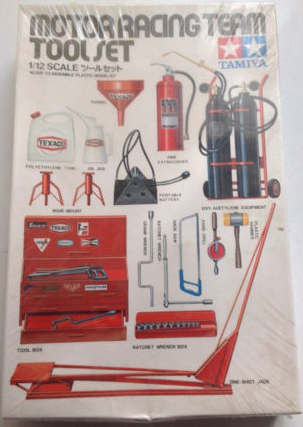
Pour mon garage-atelier à l’échelle 1/12, j’ai déjà construit un établi, des armoires, divers outils et équipements de garage. J’ai aussi en kit neuf encore non monté, une fraiseuse Deckel d’atelier d’usinage, et un kit d’outils et coffre d’outils de Tamiya. J’ai aussi des figurines modifiées et un tas d’autres items incluant des voitures, dont une déjà montée, une partiellement montée et d’autres encore non construites.
 For my garage-workshop I already crafted in 1/12 scale, a work bench, armoires, different tools and garage equipments. I also have some unbuilt kits like a machine shop Deckel milling machine, a kit of Motor Racing Team Tool set from Tamiya and other material, including cars, one of them built, other started or unbuilt.

Autre construction à l’échelle 1/12 à cette page : http://montrealminiatures.com/?page_id=904
 Another related 1/12 scale topic at this page : http://montrealminiatures.com/?page_id=904
 If you have any comment or question :
 Si vous aves des commentaires ou questions:
florent@montrealminiatures.com

