1/6 scale Project of a wide race tire (slick style) & its rim

*
To give you an idea, the above picture shows where I am up to now in this new project of a 1/6th scale race tire and rim. The race tire above is 5 1/8 inch high and almost 3 inch wide. The hole for the rim is very close to 2 3/8 inch. The original tires on my race car project (street car) were a lot smaller in width and in height. The original tires on the scale model that I have are 4 inch and 1/16 high and 1 inch and ¾ of an inch wide, as a reference. If you are looking for a car scale model into the 1/6th range, something faithful to a real 1: 1 car model on the streets, they are rare, not many models were produced, even less are accurate, totally ”in scale” in every aspect of their body components and the rest, very few of them are very well done.
Please keep in mind that it is a wip (work in progress) and more work still has to be done on my tire and rim. The next pictures will bring you back to the biginning of this new venture in my life of scale modeler.
*
The story starts like this : Last spring I started a project of building a race car 1/6 scale. I had to take a street car, factory stock, and at first start to modify the body and I knew that I would need race tires to put on it. Looking everywhere on Internet and in the stores around for weeks did not give the result that I wanted. I didn’t want to build an off road racing vehicule nor things looking like toys as some radio control vehicules that we see everywhere . I am building what we call a ”static” model, meaning a shelf model, not anything moving with batteries or gas engines. Instead of this kind of stuff, I build scale models with the look from evevry angle of a real 1:1 race car with a 1/6 scale replica of a real racing engine and same for suspensions and every detail on, in, or under the car. It is not a toy but a scale model. A reproduction of a real thing, but in a precise scale, 6 times smaller than the real thing. So I was saying that I could not find the race tires that I wanted, so I have to build them myself.
*
*
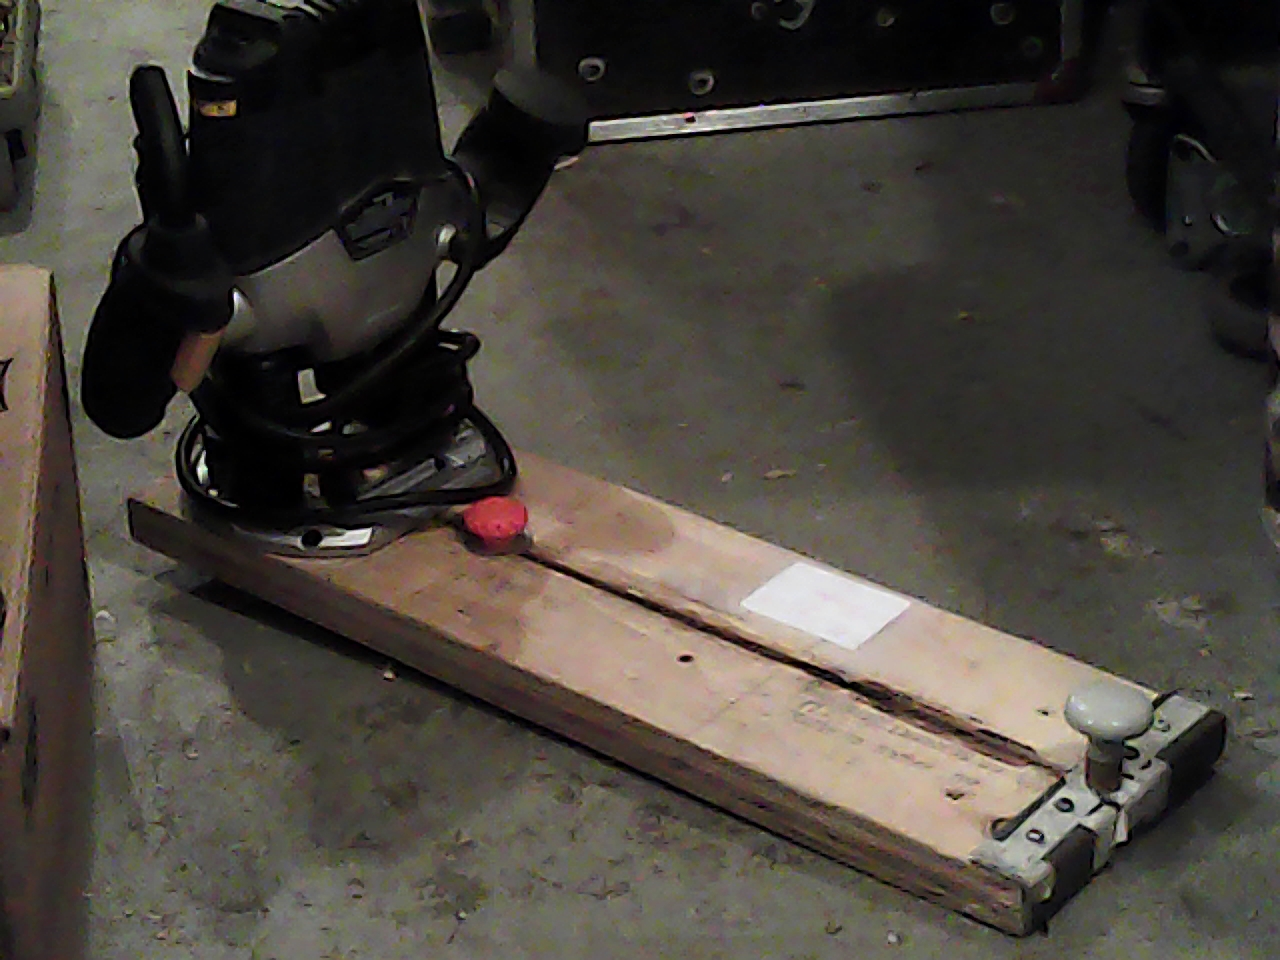
It is really not rare that when I am working on a project I have to build a special tool for a particular part that I have to craft. The tool that you see above has been inspired from a guy on Youtube who has built one similar. I just made my own version on the same principals, using parts and materials that I had already in my little shop. As far as I remember, I only went to the hardware store to buy 3 longer bolts to screw the router on the tool. The bolts had to have the same tread as the original ones to screw in the base of the router. Notice that these kinds of tools exist already since a long time and Dremel makes one for their tool competitionning the Roto Zip. I had boutht it years ago thinking that it would fit on the regular Dremel rotating tool but no, it did not fit this one. So I kept it here for years in its box and lately, I discovered it again. I took it and decided that I will make an adapter and use it on a regular dremel machine to do some smaller projects but it would probably be able to make the thing that I have done with my bigger home made tool here, If I could find a long enough straight cutting bit that fits a Dremel (1/8 diameter shaft).
I had to cut a bit more than ¾ inch deep in my layers of plywood. Nevertheless, I used the one on the picture above, since it was finally built and ready to work. to make the parts that you will see below. I built this tool in my spare times and it took me 2 or 3 months to achieve the construction and solve all the problems that I encountered during the construction. During that time the race car project stayed on a shelf and I did not work on it. This tool is connected to a router and It cuts circles in the wood. It is adjustable to cut circles any size between around 1 inch to 35 inch. (It depends on how long that you build your tool).
*
*
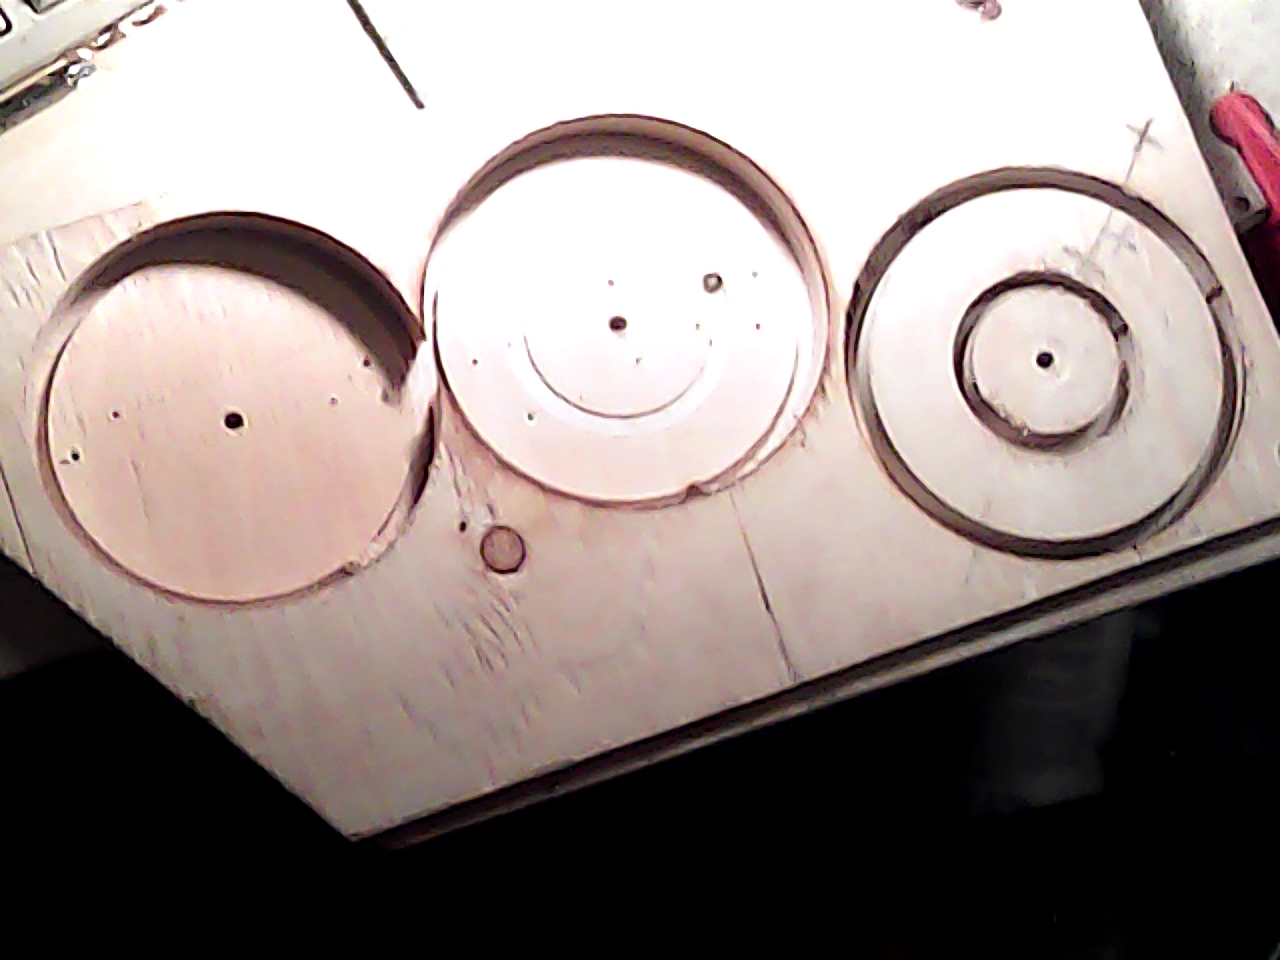
This is an assembly of 2 thicknesses of ¾ of an inch plywoods screwed together in 2 corners diagonally. I needed to cut a piece of wood and build a wall of a tire. It needed to be of precise measurement to fit into a big tube. The tube being the surface that touch the ground on all its circumference when it rolls. The circle of the biggest diameter on the picture on the right side was the one that I took to make a wall of the tire. The little circle inside won’t be used. It has been cut with the router bit to make the opening where we insert the wheel rim. 3 wood pieces of the biggest diameters have been cut because the first one on the left hand side was just a bit too small in diameter to fit tight in the pipe. The one in the middle was ok but when I adjusted my touter bit for the smaller hole in the middle I measured the wrong way because the cutting bit had to be inside the line that I had drawn with a pensil instead of outside. , so my hole for the rim was too big because I had cut on the wrong side. So my third trial was the good one.
*
*
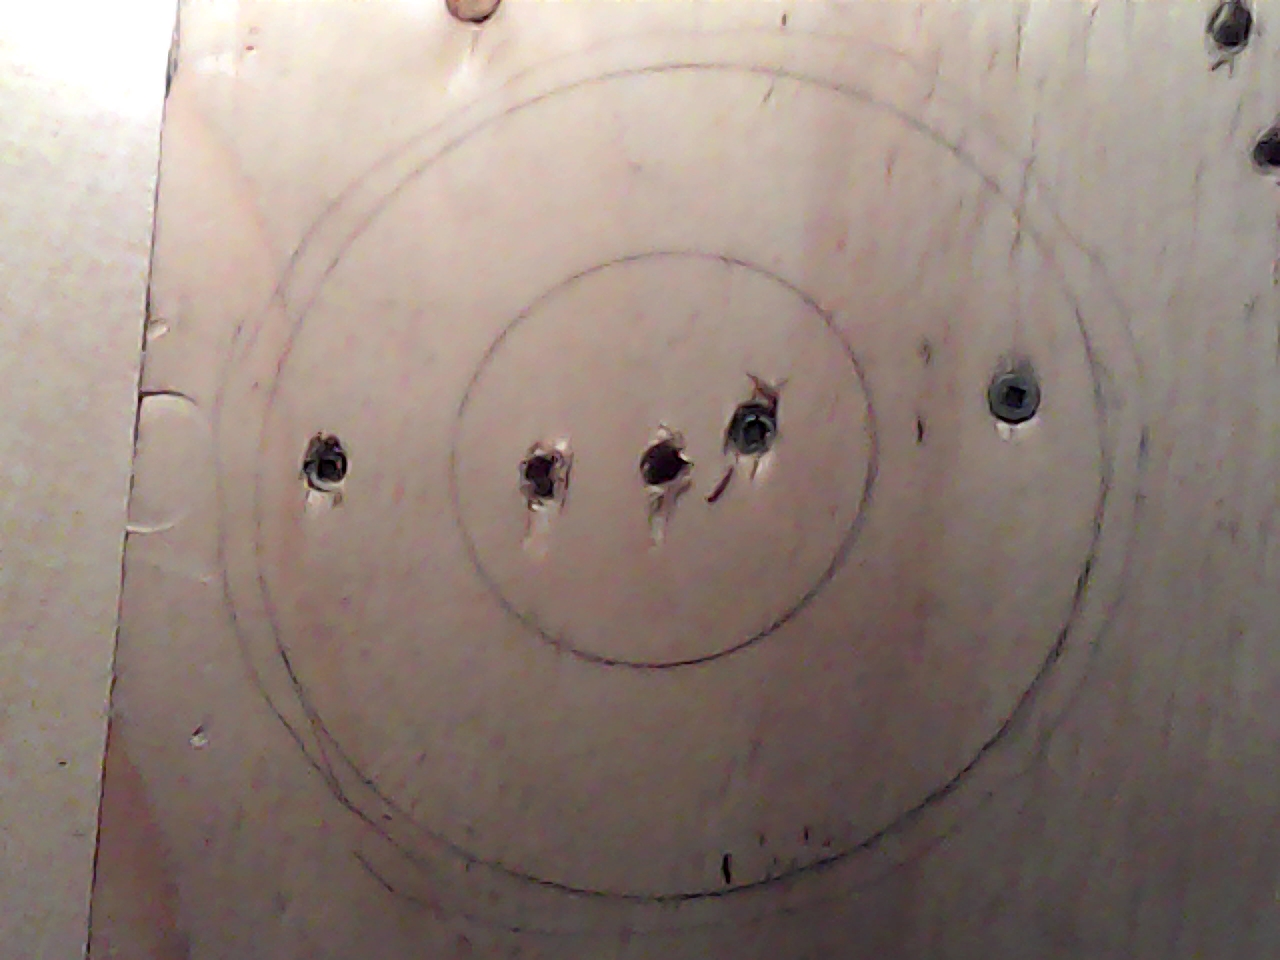
This is a view of the undersurface of the lower piece of plywood. I had the idea to use 2 thicknesses of plywood because the one on the bottom would be used to secure the 2 circles to be cut, so that they will remain at the same place when the router bit would had done the complete travel around the piece of wood. Then the piece of wood comes completely loose and can move tower the router bit and be damaged by it. Being screwed from the lower plywood , these pieces can not move at all. The router bit must be adjusted to go trouht the first plywood and even in a small surface of the plywood in the bottom to make sure that I will cut the first thickness completely. Once we remove the screws, the upper parts (circles) fall free and are not damaged. There are 5 holes. The one in the center is the pivot hole drilled on a drill press prior to using the router and its accessory. The tool has a pin on its underside This pin is the center pivot that keeps the tool and router in place on the work piece. We turn slowly the knob at the end of the tool and the router makes slowly a 360° in the piece of wood. That cuts a circle. The drawing of the circles on the undersurface is just a reference to calculate precisely where to install the screws. It is extremely important tha they are not screwed in the trajectory of the router bit when it is cutting trouth the thickness of the plywoods<They must be calculated to be outside of the way of the router bit. Otherwise you will scrap the router bit… and also your piece of wood… and maybe breaking your home-made tool too. So everything went OK and I got my circular piece of wood that looked more or less like a flat donut.
*
*
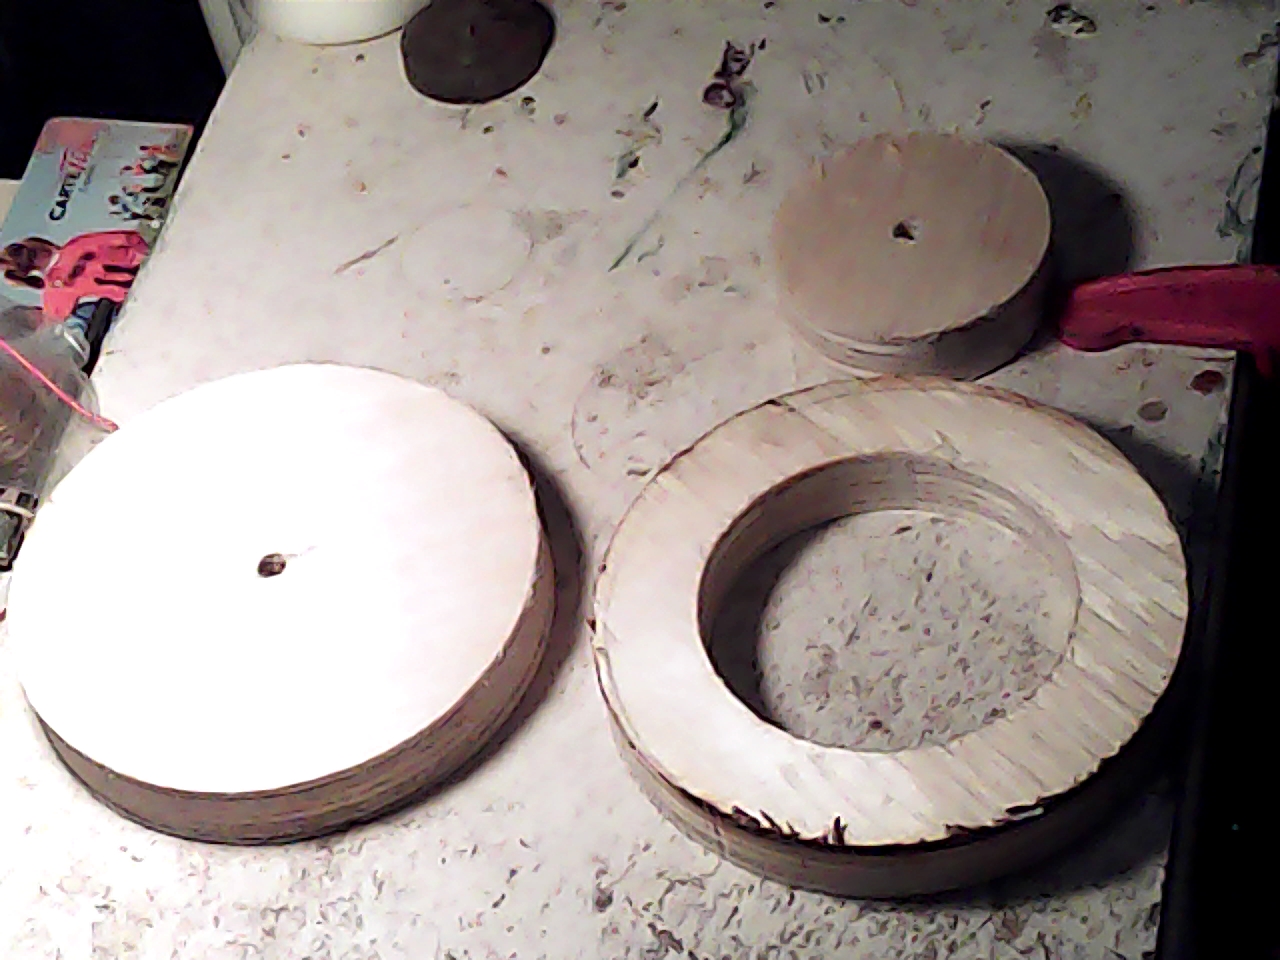
So the the big piece on the right side is the one that I will use for my tire wall. It takes a bit of sanding before trying it in the tube.
*
*
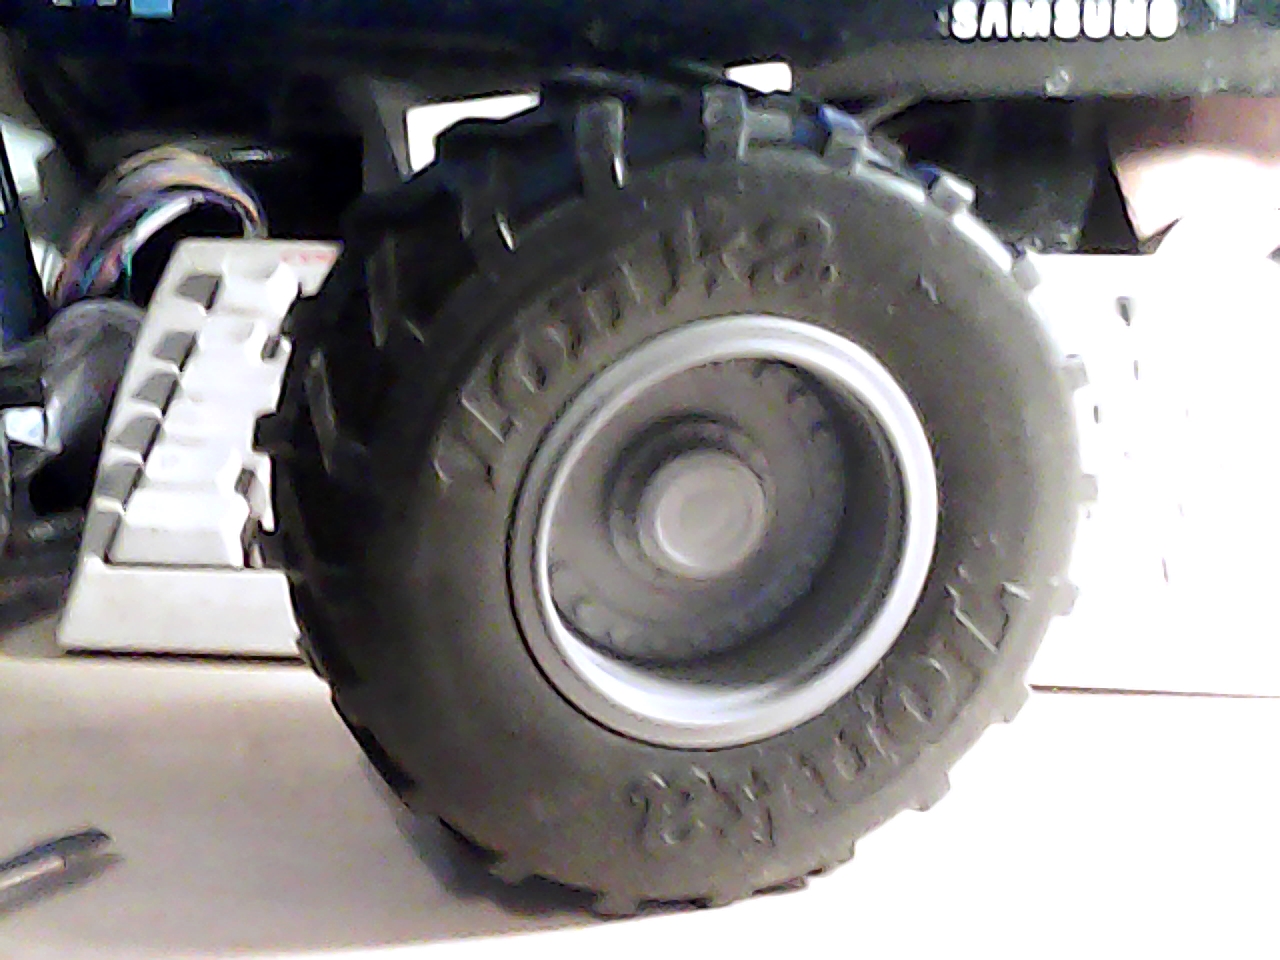
By the way, the rim on this radio control off road truck is what I chose to put on my race tire. I have to cut the disk inside the rim. I won’t use this one. I am going to build one of my own. I could not use the walls of these tires. They are made of a more or less soft vinyl. They are slightly weavy, the walls are also almost flat and they have big treads and big embossed ”Tonka” letters too. It would be too much work and maybe that it wouldn’t work to try to transform them into what I want, finally. So I had decided to build my own walls.
*
*
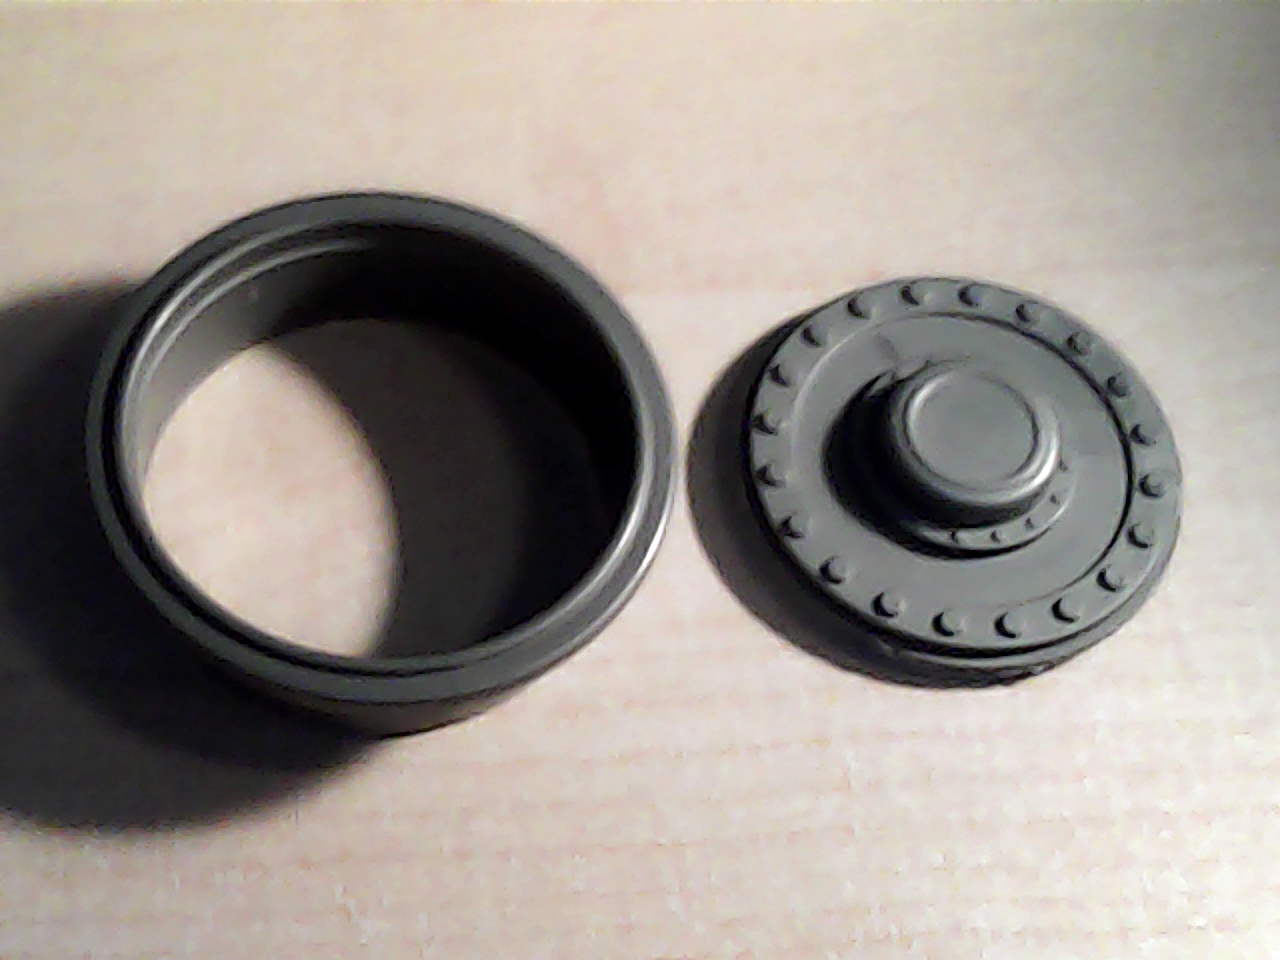
So, like I wrote previously, I removed the disks and will fabricate my own model of this piece too.
*
*
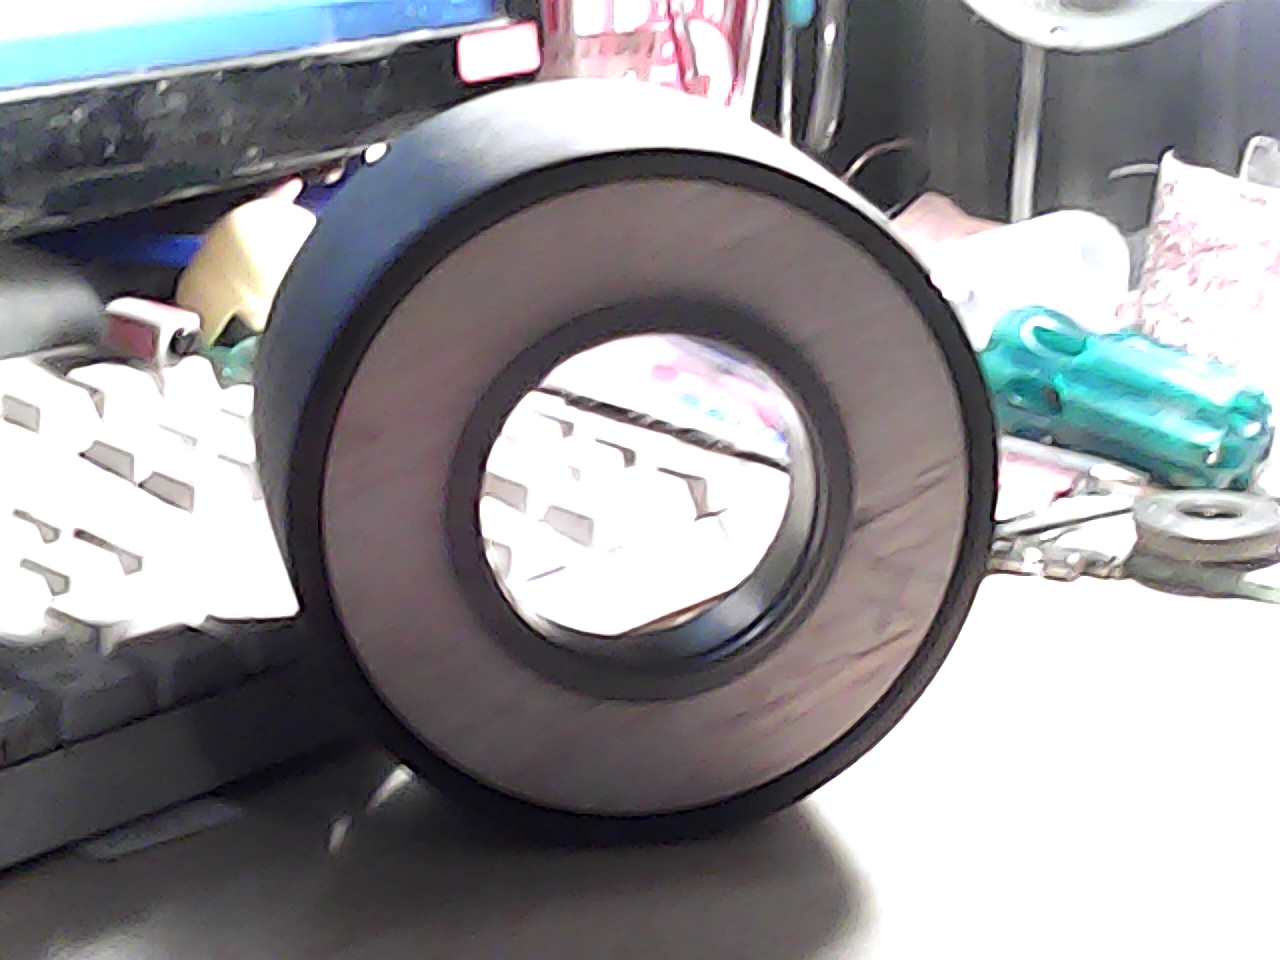
A test fit of the wood wall in the tire and one piece of rim in the wall . Still a lot of work to do on the wall of the tire. The wall fits tight in the tube and the rim fits tight too in the wall. This is how I like it.
*
*
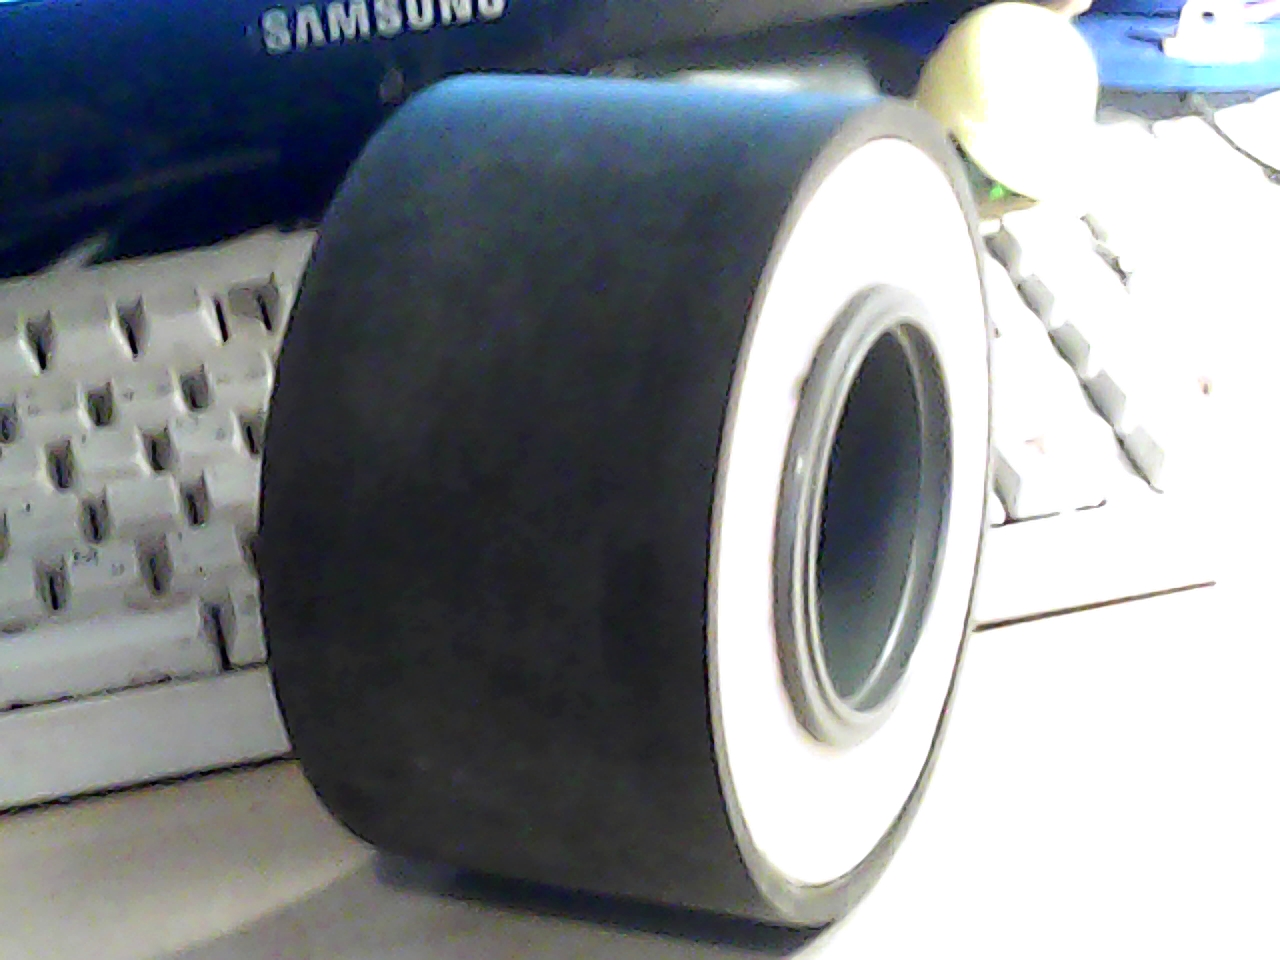
View from another angle. I did not paint the wall white. It is just overexposed to the light. I will have also to dig the wall where the lip of the rim sits on it to be a bit recessed in the wall. I will do it prior starting to modify the wall in a dome shape by the outside.
*

*
I could had used my router to dig a circular groove in the wood, along the rim side . It is a bit difficult to screw my router on the tool that I fabricated so I decided to apply my rim on the back of a very coarse sanding paper (#36) and cut around both sides of the edge of the rim (interior and exterior) . I used a very pointed X-acto style blade to do the job, cutting from the back of the sanding paper (paper side). The narrow sanding paper would fit tight around the rim. The back of the edge of my rim was sticky because I had filled a recessed groove with epoxy and it remained sticky. The sticky surface was just helping the paper not so slip on the rim so the coarse surface on the other side would grind the woood when the rim would be turned by hand. I didn’t take the time to build a mandril to fit in the rim and connect it to a drill. I just turned the rim by hand… so many times| ”Turn, turn turn” as an old song in my memories. Many times, during the process, I removed the rim and I had to blow on both surfaces to remove the fine wood dust and clean the sanding paper and the wood surface. So in the same time I was looking at the progress of my digging in the wood. It was making a fine line, exactly what I wanted.
Slowly the rim digged in the wall and made its own cavity.
*
*
I decided to try a crazy solution to make a domed surface on my tire wall. Simply apply what I call sometimes ”cake glazing” but ”donut glazing” in this particular case (Ha! Ha!). I applied spot putty on one side of the tire wall. Not too nice looking, but this is only the first coat. I had installed the ugly wall on a pile of wood disks under a 60 watts regular light bulb. It was near the bulb so the eat accelerated the time of drying exponentially by 10 or 20, and here we have cold winters so the heat of the lights are not a loss of energy, they warm up the rooms too at the same time. I am good at making shapes with plaster on walls and also sculpturing, shaping with car body filer, epoxy or polymer pastes, so I took the challenge of making the shape only with a flat piece cut fom a bank card that I regularly use as a spatule to spread the putty. This is what I use usually to apply putties and even sometimes plaster on all kinds of surfaces. Progressively, along the different coats, I give it more shape and I gradually correct the imperfections, rework it till it comes symetrical, even, nice looking. No work on a lathe, no work on a drill press or a customized stationary drill of some kind or improvised rotary table. I just wanted to try it this way and see the results.
*

*
After a couple of coats of finishing compound and sandings between each coat, it is taking shape. It is comming better. Of course, more coats and sandings are needed.
*
*
Notice the groove that I had digged in the wood for the edge of the tire rim.
Yes! It is comming even better and smoother with new coats.
*
*
My first coat of black primer, and then I gave anoter thick one but I did not take a picture of it. It gives more strenght to the glazing and spot putty. Even if it is supposed to be a flat black, there is a little shine on its surface and it helps to see a lot better the imperfections and see where we have to give more work.
*
* 
Each time that I give a coat of putty or a coat of primer, I reinstall the wheel rim into place. The rim is covered with masking tape. The rim protect the circular groove under its surrounding lip. I don’t want this cavity to be filled by coats of putty or primer. There is still some work to be done on the wall. The imperfections are slowly desapearing. When I will be finished, I will have to make a mold and cast copies out of polyester resin. I will have the option to make white wide walls too if I want. In the past, I have built some other ones like that in other scales (1/12 & 1/8). In these scales too, I was not able to find what I wanted, so I crafted the tires. I was lucky to find some tires with nice walls that I used (only the walls) but one of them into 1/12 scale had grooves like teeth that I filled with glazing till I got a smooth edge. For the rims I have done similar jobs as the one that you will see in the next new pictures.
*
*
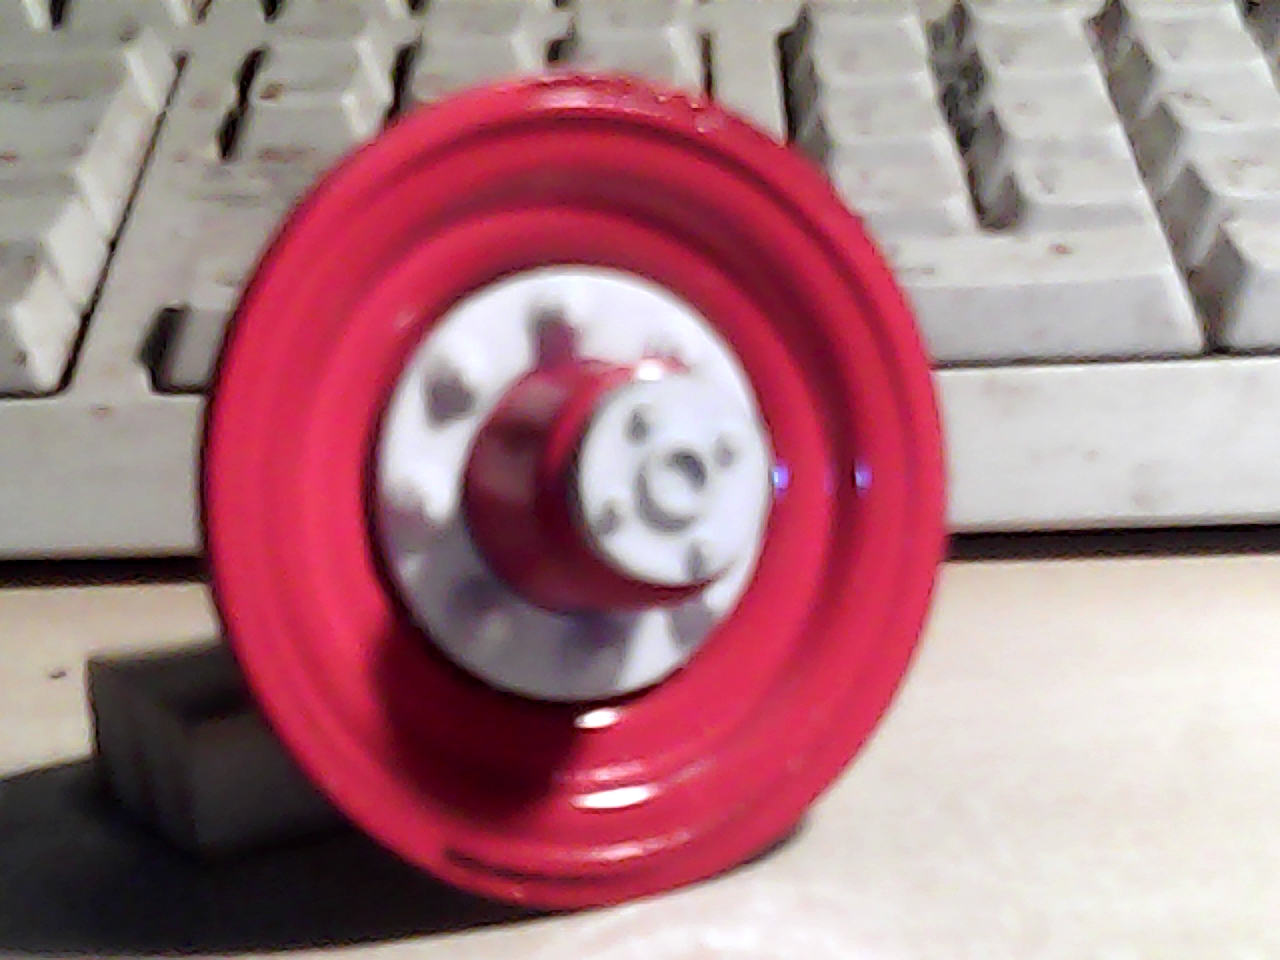
I could not make a better picture with this webcam. I moved the lighting all around. It is just too close for its focus but on other pictures we could not see the bolt patterns. The biggest red part is the disk that I found to put in the center of my race rim. I collect parts from toys, scale model kits or any other sources since a good 20 years, so I must have accumulated thousands of parts since that time. Boxes, drawers, bags, cans, containers are full of it. So the 2 red parts and the 2 white parts are the result of my searches trhough my stuff. On the other hand, if I don’t find the part needed, I have to craft it myself. Every one of these 4 parts fit very well one in the other. I had to do only little work on my drill press to fit the white crown with 8 wheel bolts into the disk. it fits right there with no play at all. the red hub fits tight in a circular groove too.
About the white crown with the 8 bolts pattern. I’d like to change the 8 bolts for a 5 bolts crown. I am working spare time on a tool to be able to make it. I want to paint all the bolts red to make a perfect contrast with the white color. I have done the same paint scheme on a 1/8 scake project and I like the result very much. These are classic colors.
*

*
*
*
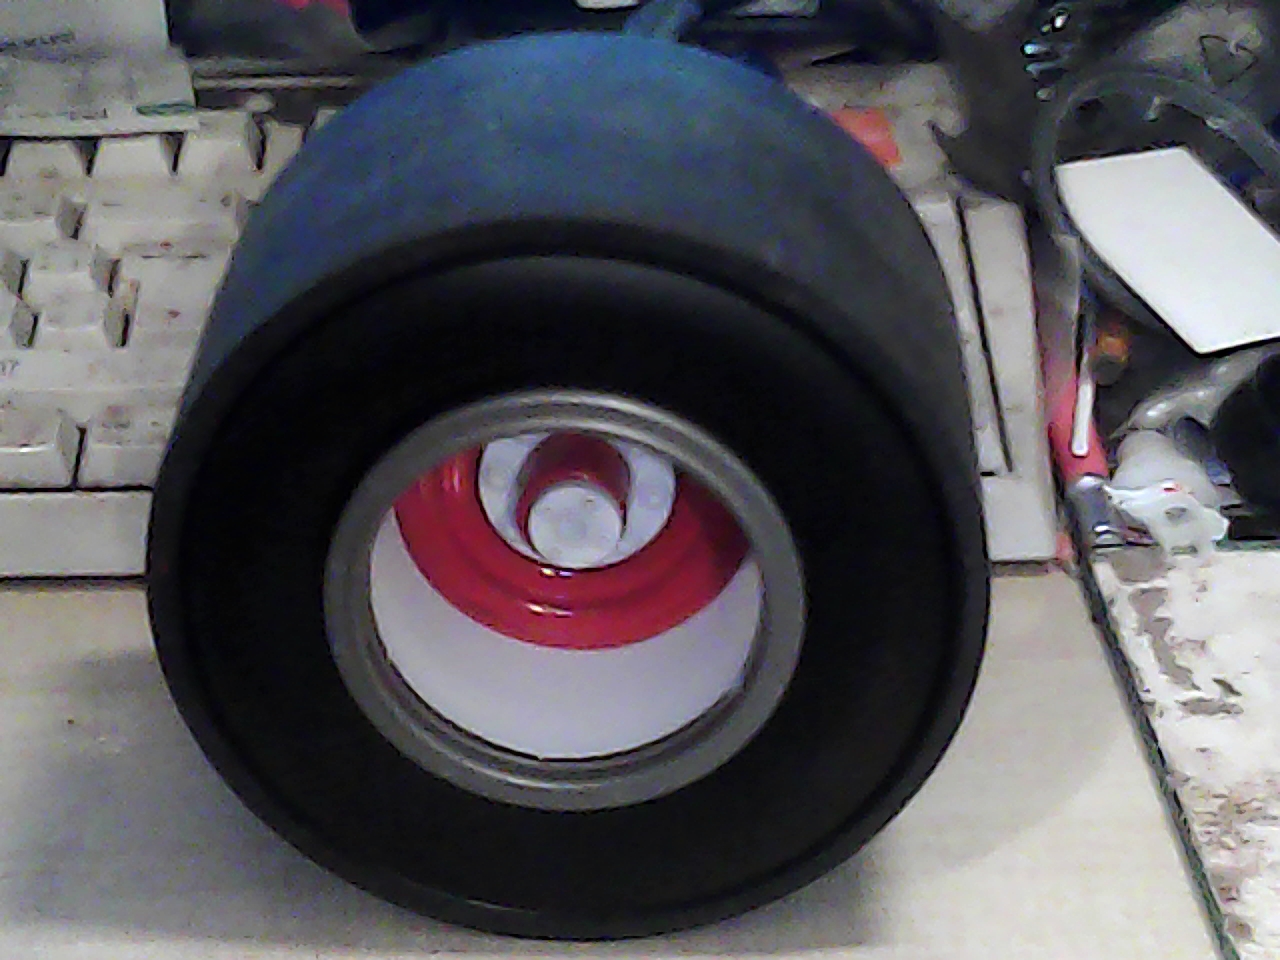
About the tire rim, I took 2 of them from the toy truck to make this one. It is funny because around 40 years ago a racing driver from the Late Model Sportsman division in stock car racing told me that he was brigning 2 wheels from a ¾ ton truck to a machine shop and from the 2 pieces they woud make a wide one for his 1965 Chevelle. So, many times up to date on different projects I have done the same thing on several different scale projects . On this one in particular, I have cut the back edges, glued the rims together back to back with a guide, and then I filled the joint with a few coats of spot putty and a few coats of white primer. Then I calculated the center of the tire and cut a little strip of the widen rim as I wanted my disk and hub to be right in the center of the width of the race tire. Then, I will have to cast the front half of my race rim to make the other half part for the back. The disk in the center of the wheel is not glued. It doesn’t have to be glued. It fits very tight at the end of the rim. By accident I found a way to secure the part very firmly and no glue is needed. I can remove the parts and reinstall them easily. It is press fit and perfectly centered and aligned. I did not say what was my 1/6 scale race car project. It is a stock car Modified.
With these tires and wheels I would be tempted to build also a drag racing car, a Rat Rod or an Hot Rod. I never have been building something this big as a car scale model up to date. 1/6 scale is something really big.
Please notice : This race tire is not finished yet even if there is not much work to be done on it. I still have some little corrections to bring on it and will have also to make some molds and cast parts. I was just thinking that I also have to make a tire valve on the rim People need to put compressed air in tires.
I have another wip into 1/6th scale, a beauty girl, coming near completion too. I work on both projects and I skip to one another. This one involves more sculpturing and up to date I am very proud of it. It is on this very website at this page :
http://montrealminiatures.com/?page_id=1893
I still have to work to make a living, so I may be sometimes several days without working on a project or I am also working on graphics in my computer as this is also another passion that I have, plus also my passion for figurines… and other stuff.
*
Any question or any comment?
*
Please feel free to contact me.
*
florent@montrealminiatures.com
*