1/6 scale new female hybrid body for a racing driver project
New 1/6 scale female hybrid body for a racing driver project
In the last days I met on the Internet a very nice lady by the name of Pia, living in Sweden. We share the same hobby. I was writing to her about this foolish project that I have and told her that I was going to make a new post on Montréal Mini and send the link to her. I have to keep my word, so here I am, working on this new page.
I started this new project of mine a few months back or took it back for a brand new step, I must say instead. As usual I work on many projects at the same time or I alternate from one to the other. If I end up having frustrations working on some very difficult steps of a project, it is better to leave it beside for a time and skip on something else instead of breaking everything, throwing it to the wall and then having some regrets. I guess that I am like that. Sometimes I am just completely out of energy, so I need to work on something easier… or sit before the computer and make some reseraches.
Last year I had started to work on a couple of hybrid female bodies, at least 3. One of them being a full scratch sculpture started on a wire squeletton and the 2 other ones being modified figurine bodies with some partial sculpture work by areas. I also still craft miniature items of all kinds but since the 2 last years I mostly work on 1/6 scale items.
By exception, lately I worked on a 16 inch tall figurine called FR16 and said to be by some, 1/5th scale. I didn’t really caltulate the ratio, but I could verify. On this exceptional 16 inch I mostly crafted the jewelleries (all metal), plus working on a wide stylished leather belt, fighting to install tiny brass rivets. It turned out a very frustrating experience. This is the last item for the completion of the project. All the rest has been crafted by the talented Mimi.
Coming back to this very topic, this project is out of the ordinary. I use to play outside the usual standards and make the thing my own way, so lets start by some pictures.
*
*
You can click on the pictures to see them full size.
*
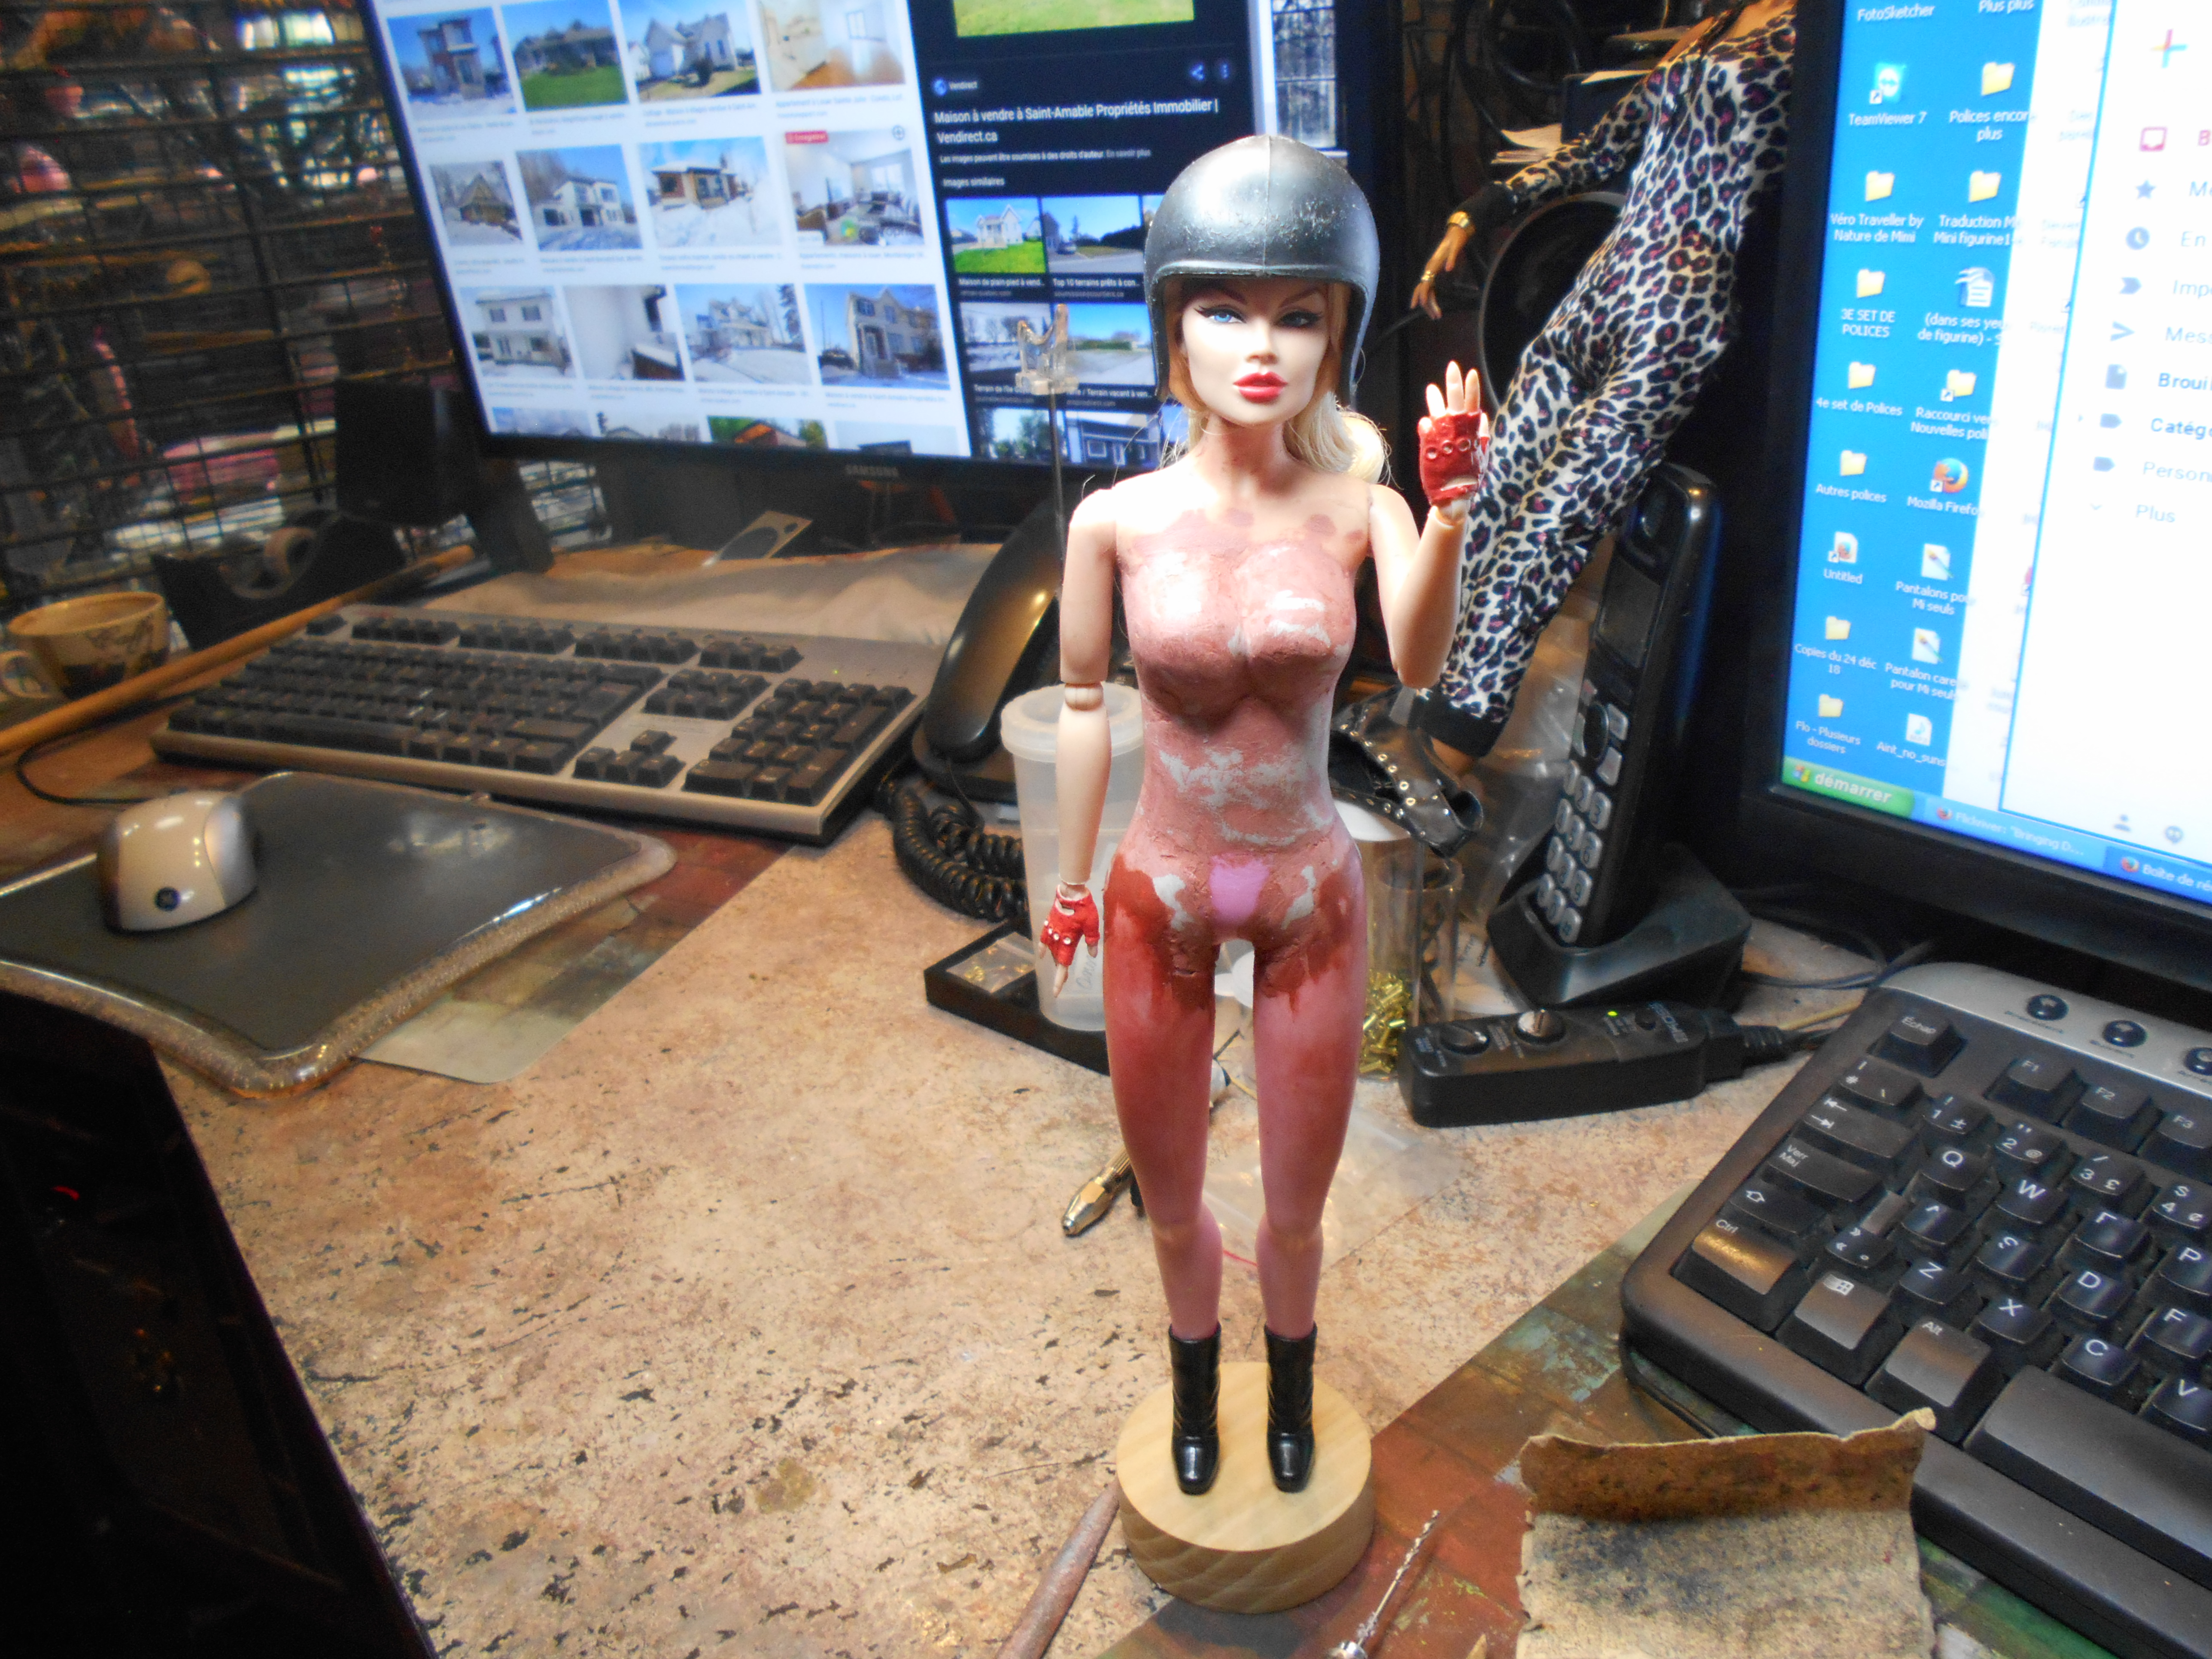
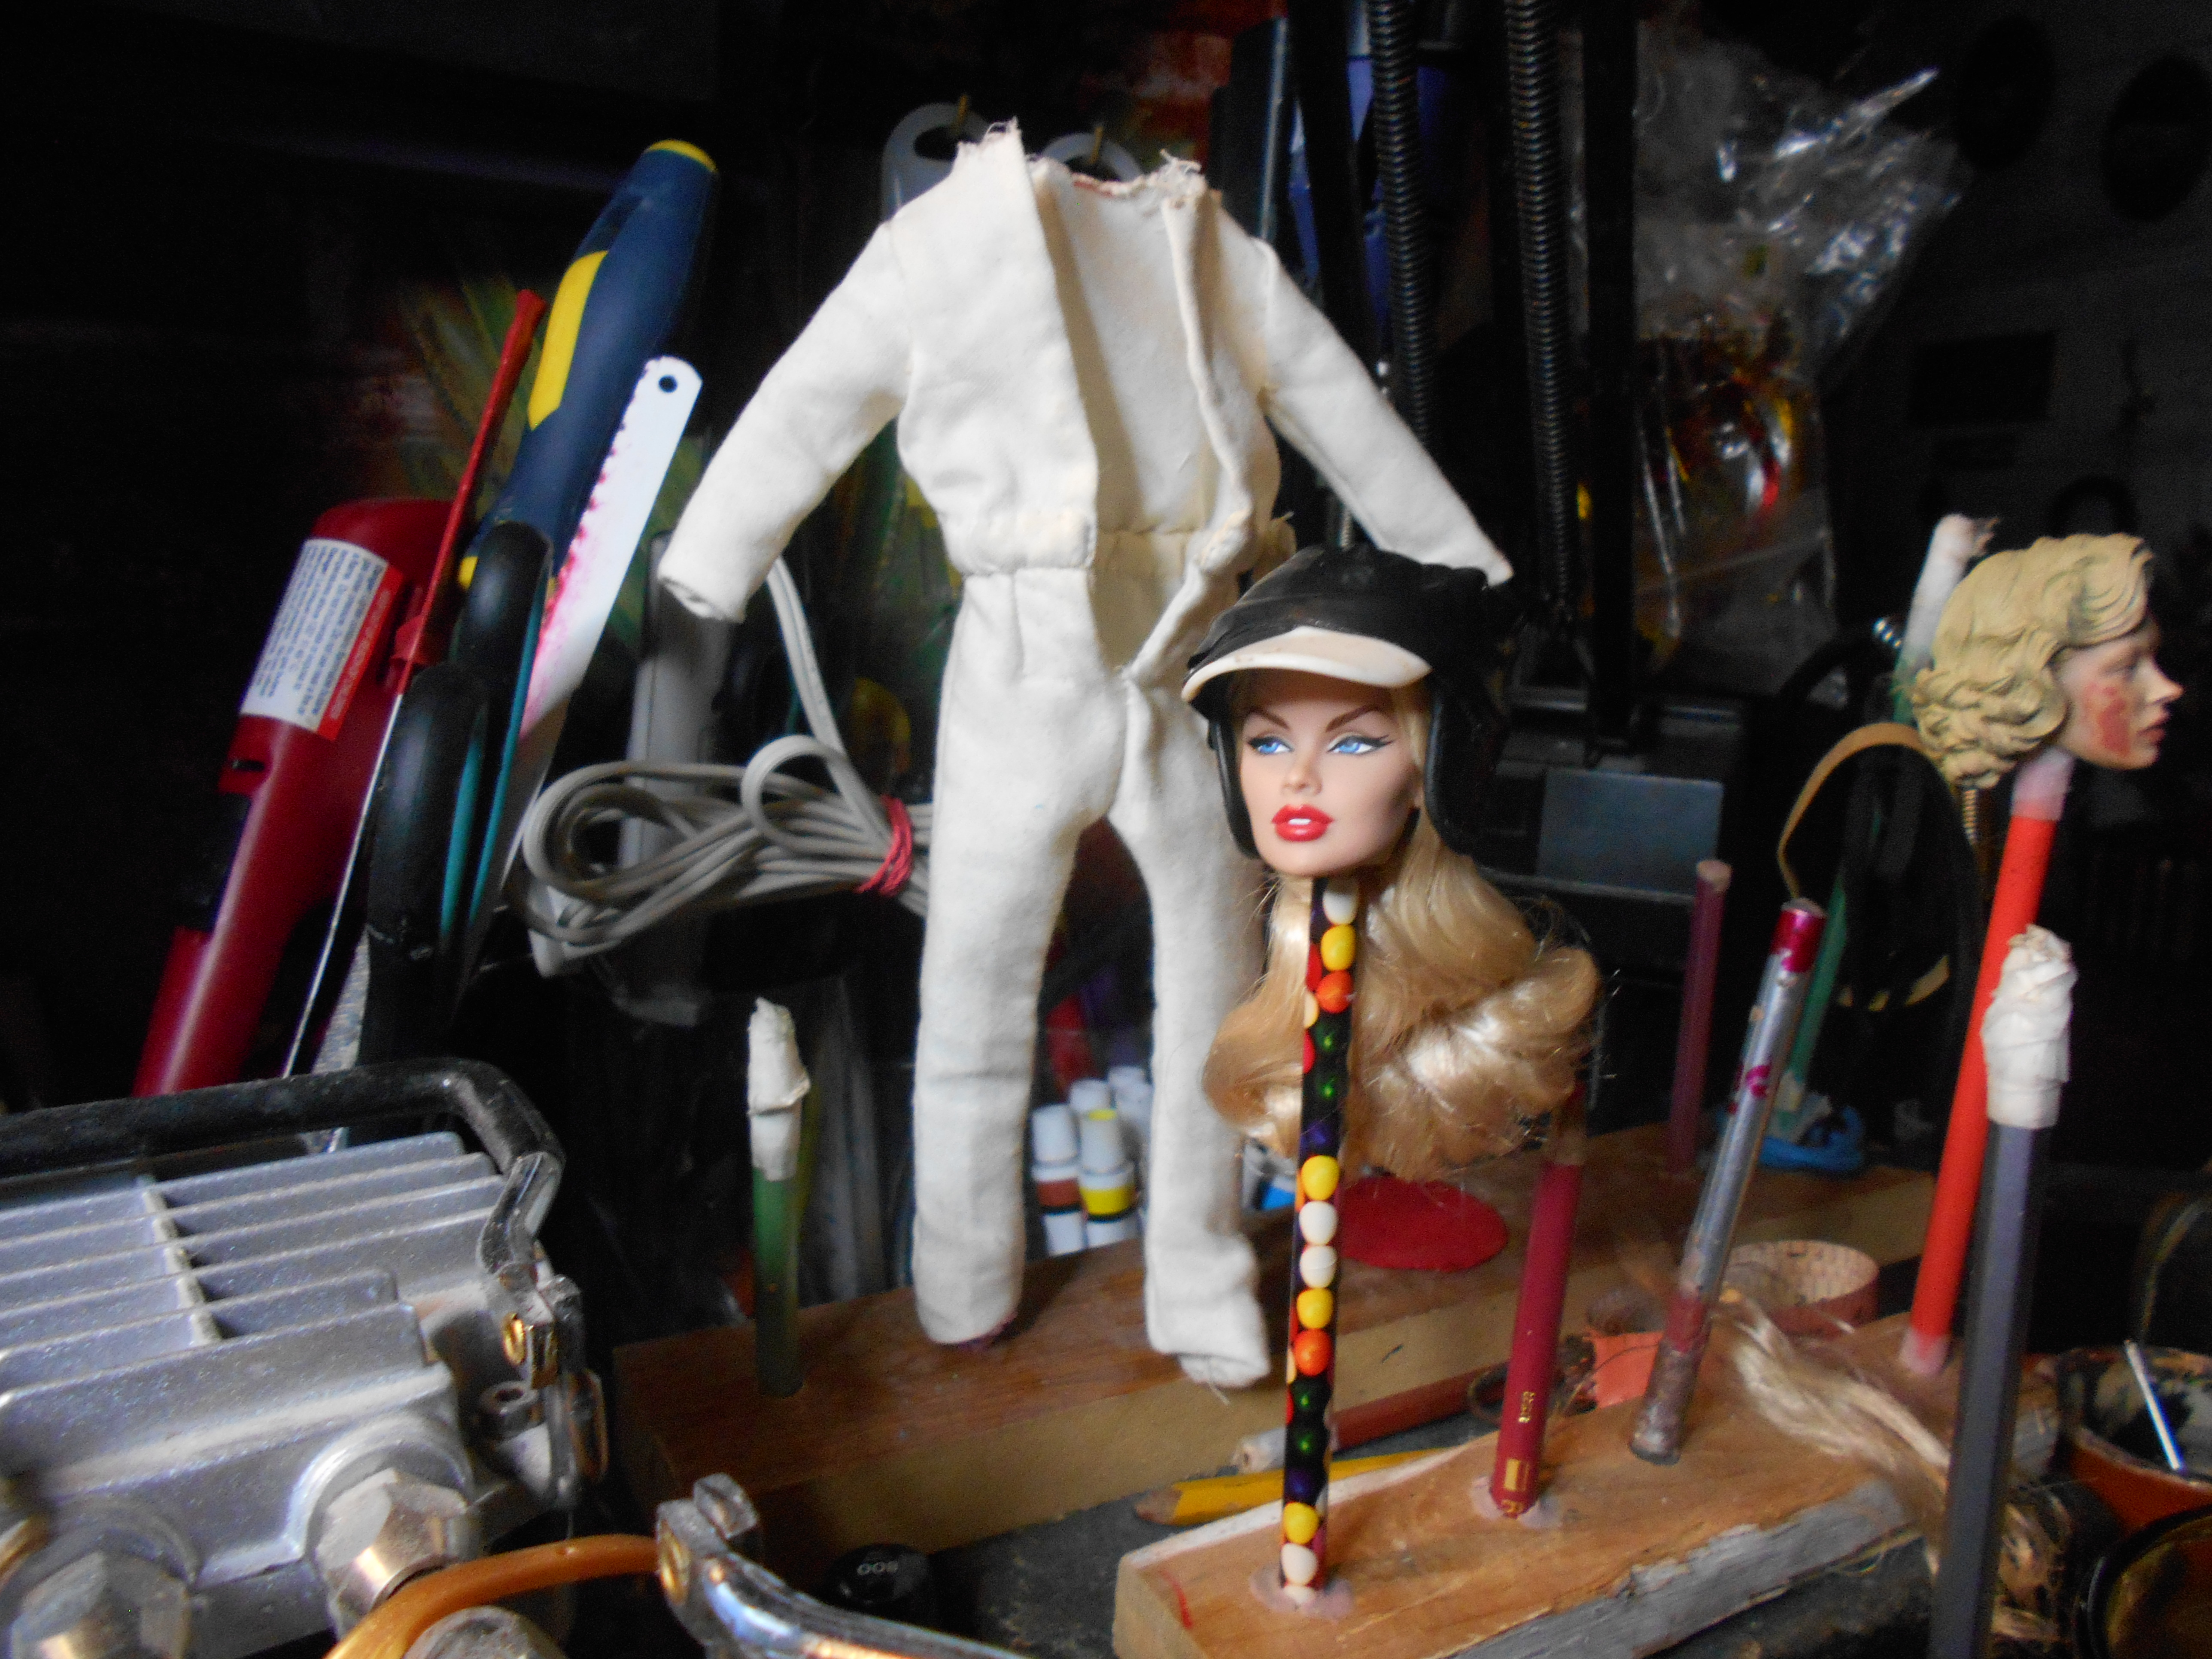
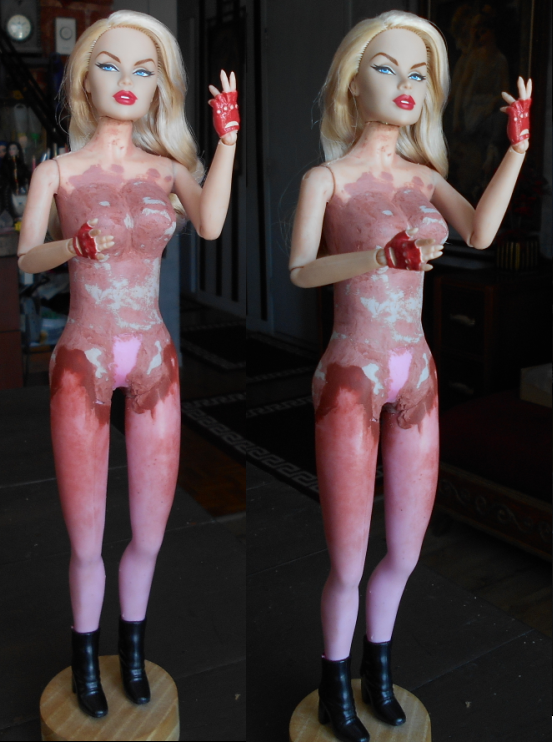
This is up to what I am now in the project, but I will go back in time and show some earlier steps. A few hours back I was batteling to drill holes trough this temporary hardwood base that I crafted. Once again, drilling trough an hardwood piece, a vinyl boot high heel and an ankle and passing a #14 copper wire trough all this, especially the heel and the leg which is made also of some kind of soft vinyl… a pure nightmare. Like a battle with a snake of some sort… or riding on a furious bronco from here to mexico.
Up to date, the figurine is an amalgam of 4 different figurines and polymer paste, car body filler and automotive body glazing. The beautiful head is a Vanessa Perrin, produced by Integrity Toys. The release of this Vanessa is called Star Power. They produce a new version of Vanessa once in a while with a different skin tone, hair color, hair style, new makeup, new outfit and accessories, carrying another convention name and release name (a complicated story). The torso that I used is probably from an old Barbie. Sadly, I didn’t think to look at it for the tiny inscriptions where we find production numbers and the name of the maker. The original bum, pelvis and legs are from a ballerina doll from Mattel (I guess, a secular Barbie). The arms and gloves are from another maker. I installed these arms because they have spherical joints at the wrists, elbows and shoulders.
*
*
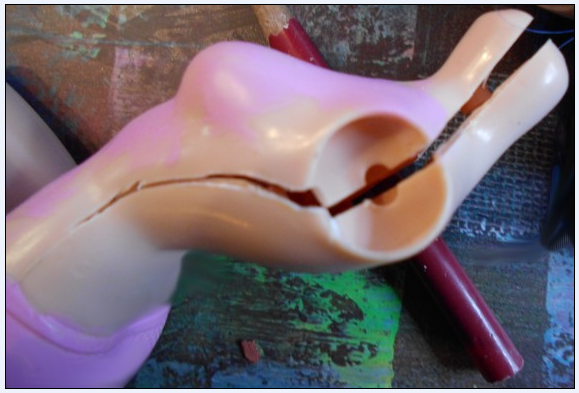
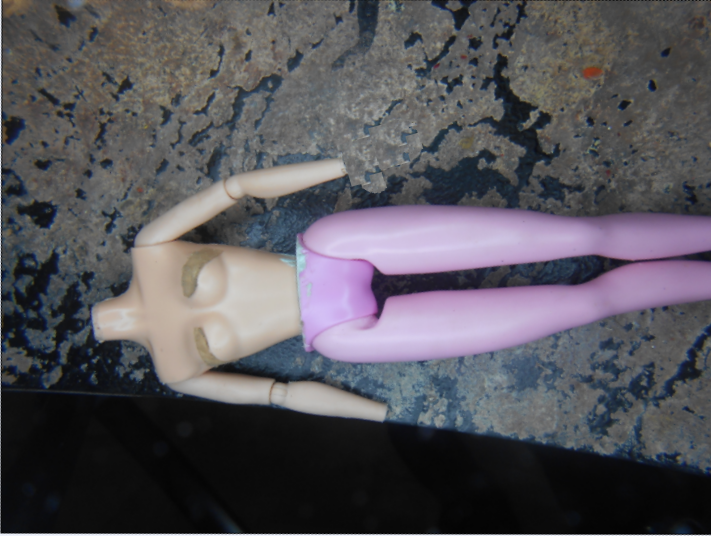
As they were produced by another company and were using a slightly different pattern, I had to split open the body from each sides (front and back halves) with a sharp knife, but did not open it completely. The picture above is the one from the doner body. I didn’t want to break the rotules inside the body by pulling the arms strongly, so I managed to cut the body open till I would be able to remove the parts carefully.
I left the bottom of the chest / waist still glued together. I decided to remove the original arms because they were only rotating from the shoulders but could not pivot sideways and did not had pivots at the elbows they were not practical, so I changed them for something more sophisticated. I had to drill the inside molded in retainers, housings or stoppers (2 halves parts looking like a cut down flat washer inside the hole of the arm) because the deepness of these patterns was not the same as the one of the new arms. I installed both arms in the open body and put some polymer paste around the spherical joints and retainers, glueded the 2 halves of the open chest then sandwitched them between the 2 parts of the neck and chest with some pressure. The excess of polymer paste and superglue went out and I wiped the area cleanly.
A clamp would pressurize the 2 parts of the body for 24 hours and then the plastic paste was hard and solid, the new arms cound rotate and also lift sideways. I had installed a coat of vegetable oil with a small brush around the spherical joint to prevent the plastic paste to seize on the joints. It worked fine. Who woul see the spherical joints trough a vintage style racing jumpsuit made of fabric?
I love these hands, especially with their figerless sport gloves. They are very nicely detailed and they have also a spherical joint at the wrist so that the hand cand turn and also tilt.
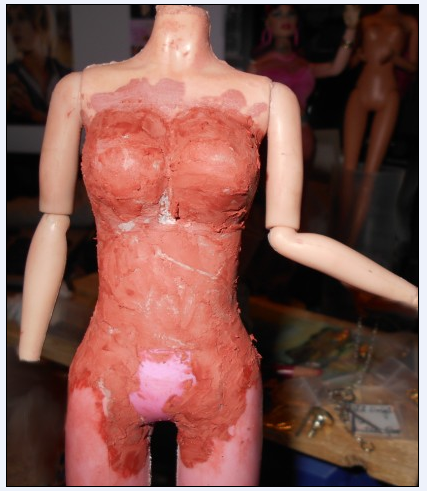
I truncated the bottom of the chest. I found it too long… then I found that I had removed too much material so I corrected the situation by adding some po;ymer paste to fill the gap. I reshaped the hips, added more plastic paste and increased the volume of the buttock, made it rounder, reworked the waist. carved the line in the middle of the back, I also increased the volume of the breast and shortened the neck (they are always too long, even on the pricy Fashion Royalty figurines). I took a measuring tape from the top of the base (bottom of ankle boots) till the top of the head of the figurine. It stands 11 inch high. 11 inches equals 5 feet and 6 inches high with the heels of the boot that I roughly estimate to 4 inch high to our 1:1 real life scale. So she would stand around 5 feet and 2 inch high in our scale without high heels. I prefer that instead of the figurines of the Fashion Royalty rated to 12 ½ inches high for the 1/6 scale. That means 6 feet and 4 inches tall if they would be in our scale!!!!. They are beautiful but awfully skinny and tall. Oh yes, I could modify my body again and make her a bit taller. I will make a copy of this body and make one taller… and another one shorter. Real life is not about only women 6 foot and 4 inch tall. No one is exactly the same.
I really liked the shape of these legs. They really look ”in scale”. They are not too long, not too short and not too skinny. I had a reflexion about the ballerinas. They for sure have more powerful legs, bigger muscles the way they dance all the time. I had cut down the ballerina feet and shoes pointing toward the ground… in the profit of ankle boots. I really love these ones.
I
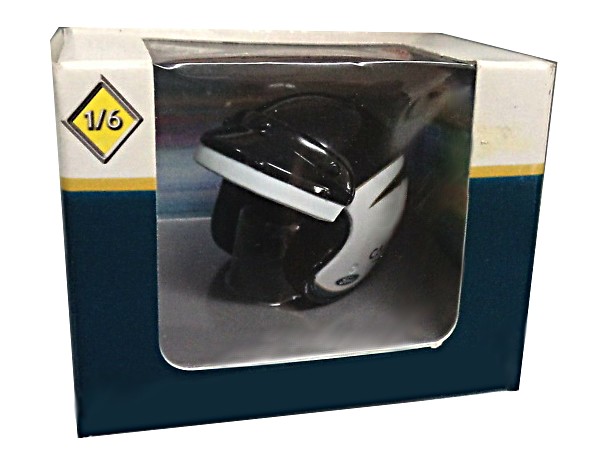
The helmet comes from a vintage J.I. Joe, I believe a jet pilot or something like that. I wanted a vintage style open face helmet. This one is very basic. It will need a bit of work like sanding the seam line between the 2 halves of the hat. I have at least 3 open face 1/6 scale helmets. One of them is a very sophisticated race helmet with a detailed visor with the snap buttons on it, but it is a diecast, made of steel. The thick padding inside is also made of steel. It is very heavy for a small object like that. It would fit very well to my girl, but the thick inside padding is also made of steel and doesn’t compress at all so there is not enough room for the figurine head to fit in there. The solution? I will make a mold of the item and cast a new one out of polyester resin. On this copy I will grind the padding inside and replace it by a normal spongy material. Then, the figurine head will fit inside. I also have another helmet with a visor molded in. It is made of a soft plastic, some vinyl I guess. It would need some modifications to look fine, but my best one, the most beautiful is the diecast one… and here it is!
*
*
**** Flashback ****
*
*
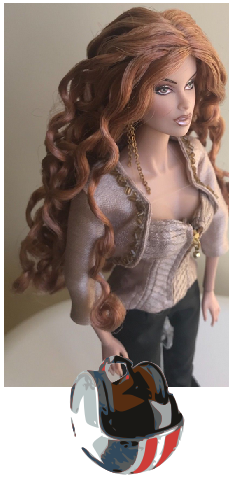
This is a quick collage that I had made some 2 years back with pictures of a few figurines and open face helmets broutht to size, to give me an idea of what some of them would look like as female racing drivers. I made more collages with a couple of different releases of Vanessa Perrin. At least 4 of them. The version shown above of Vanessa was called Runway Right Away. It was the one that I originally chose to be my race car pilot and the racing suit had been built for her first generation Fashion Royalty body style.
She had so much hair that I couldn’t install a race helmet on her head. and also her original outfit was seemingly too difficult to remove as it looked almost sewn to the skin so it was tightly installed, I boutht this figurine used and wondered if the outfit hab been glued on the body.. She was shorter than the newer versions, the new bodies, so the race suit could not fit on the taller ones. I could had used other beautiful figurines from the prestigious Fashion Royalty line of dolls, a gorgeous Poppy Parker, a Véronique Perrin (sister of Vanessa), a Natalia Fatalé or other beauties. They produced so many gorgeous figures. I don’t own a lot of them, so I had also to look and find a doll or a head that I liked at a reasonnable price.
*
*
So here is the vintage racing jumpsuit crafted for a first genetation female body from Fashion Royalty. It was still missing some details like the collar still to be sewn but I changed my mind and decided to craft a female body of my own for a new head that I had the chance to buy at a very reasonnable price, another release of Vanessa Perrin named Star Power, as mentionned higher above. I find her very, very beautiful. So the racing suit will end up as a diorama item on a miniature hanger I suppose. My best friend Mimi is the one who made the outfit. She said that she is going to take the measurements on the new body and fabricate a new suit. She is working on her own figurines and she alternate on mine but I craft things for her too, so we combine our talents together to build figurines as beautiful and as detailed as we can. We love to be very creative.
On the above picture, this is the same helmet by the way… with an improvised sunvisor as a plan B or plan C for this project. This one too would need some work to fit the hard hat properly.. I till probably continue to work on this one too because I love variety. Maybe I could produce other female racing drivers. At the present time I own at least 2 different car bodies into 1/6 scale, both accurately made.
*
*
*
*
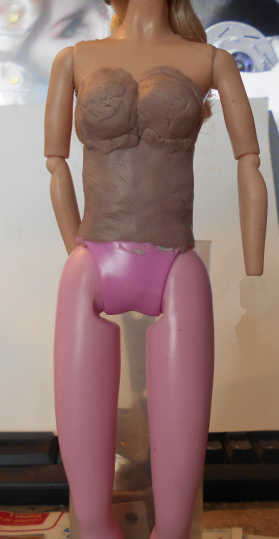
This is an early stage of the 4 different pieces used at first. The new arms had been installed. The torso had been shortened before installation on a bottom from another figurine. Notice that a part of the pink hips had been removed. I had installed a copper wire inside the torso and the hips as a squeletton. Not long after, I decided to separate the 2 parts and leave a gap in between them, then fill the space with some polymer paste (Apoxie Sculpt).
*
*
Some more polymer paste added on the resized body, chest improvement. I will fill the joints of the leg articualtions. I plan to make copies of this body for my personal use, with some various modifications as needed for my other figurine projects.
*

*
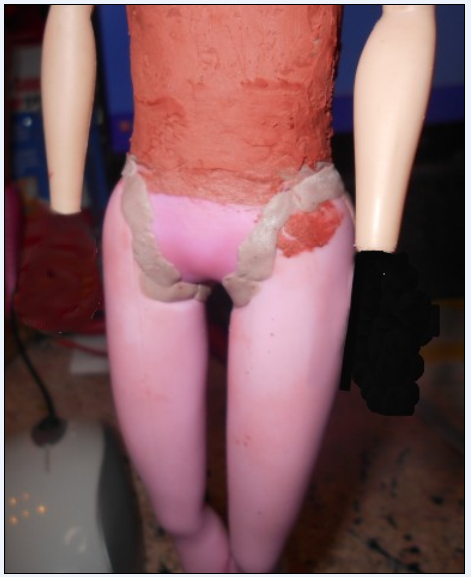
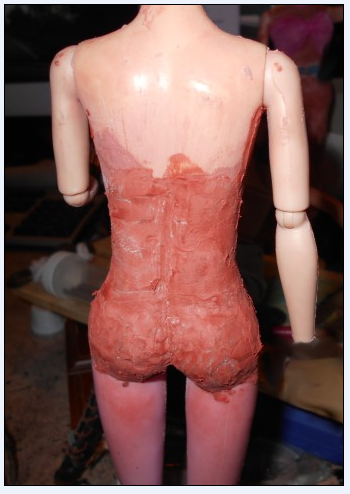
And here is the first coat on the more proeminent buttock. The back and front side have already been sanded and a coat of glazing applied. There is also a need of reshaping the waist and carve the line that is the continuing of the separation of the 2 sides of the buttock … till the neck.
*
*
Filling the leg joints up front.
*
*
Some more work on the breast, waist and leg joints.
*
*
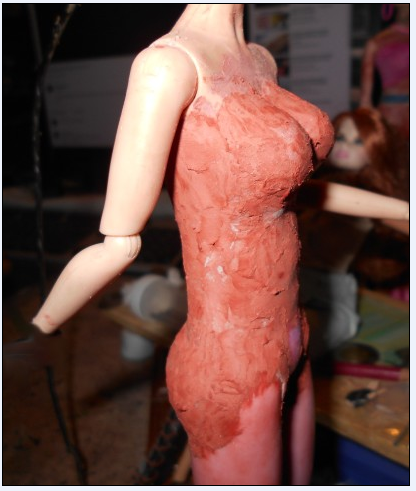
Side view. Rounder and smoother bum, breast taking more shape.
*
*
Slowly carving the hollow line of the back.
*
*
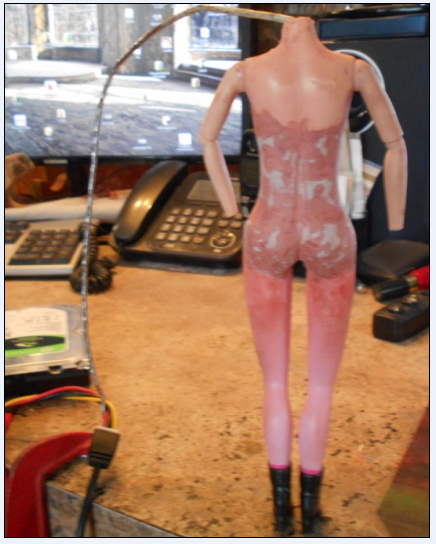
An improvised stand made with a hard steel wire clamped to the counter. The rod is bent 90° and goes inside the neck. The figurine doesn’t stay on her feet (drunkenness is a very bad habbit).
More sanding has been done. It needs some more coats of glazing and sandings.
*
*
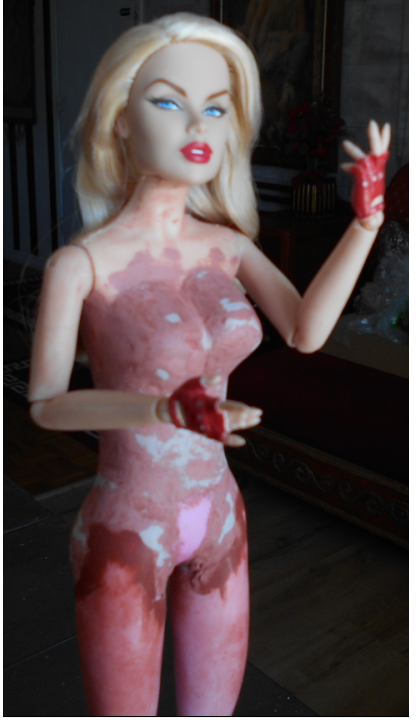
I needed some rest. I took a break and went to take 3 pictures of Van, without her helmet.
Vanessa ma beauté, mon amour, I love you… I love you.
I am so happy that you belong to me.
*
*
And here is what she answers by signing me a song
https://www.youtube.com/watch?v=S6BalhjGfjM
*
The lovely heart is also singing to me
”Nobody does it better” (building her, loving her)
https://www.youtube.com/watch?v=SaV-6qerkqI
*
More to come when I have some time.
As usual, any question? Any comment?
Feel free to contact me
florent@montrealminiatures.com
Please do not contact me to tell me that I am an idiot.
I was born like that. There’s nothing I can do about it.
Florent