1/25 scale 1959 Mercury Park Lane promo short tracker project
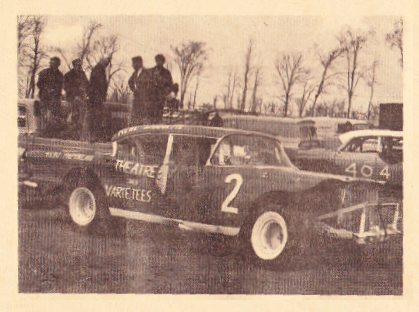
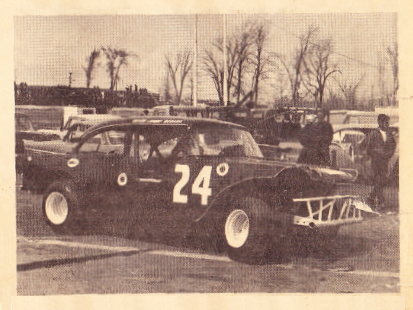
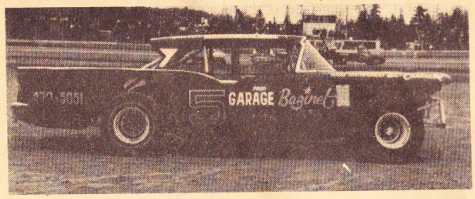
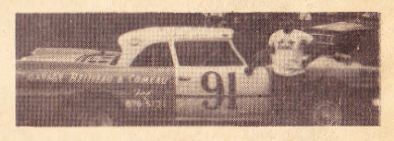
When I started to attend Stock Car races in 1968, there were plenty of full size sedans on the short tracks and also many 4 door cars. It was the era when these race cars had steel tubbing bumpers, shortened nose (hood and fenders) and many times an opening cut on top of a door. Door panels were welded and could not open, so to ease the access, some car builders would remove some sheetmetal on the top part of a door to increase the opening of the side window area and ease the driver climbing in and out of the race car (particularly if the driver had a big pot belly and had to be pushed hard in the car by his skinny mechanics, lol, what a good show!). It was also a common practice to weld crash bars on each side of the cars. This would protect the sheetmetal to be banged and rubbed against other race cars or guard rails around a race track, less bodywork to do, less paint jobs and lettering, easier and less expensive to repair and repaint a crash bar than the sheetmetals.
*
I loved these race cars because they were built “heavy duty” style with their steel reinforcements. They were a lot better built than the recent years Ford advertising about their vehicules saying “Built Ford tough!”.
*
*
*
*
*

*
All the race cars above were running on short tracks here in the province of Quebec in 1968.
*
*

*
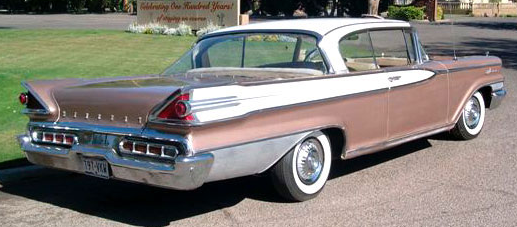
This is what a 1959 Mercury Park Lane looks like
I always liked the tailfins and the taillights on this model. Beautiful car.
*

*

*

*
I have this “promo” (promotional scale model offered trough car dealerships) since several years and wanted to turn it into a stock car racer since it was warped a bit in some areas. I had heated the roof with a hair dryer to straighten it the best I could and it turned out not bad. Whit some more work I believe that I could make it very good. The fact is that these promo models were made of acetate, an unstable plastic that warps, shrink and stretches by areas when it is exposed over a long period of time at the light. The scale model manufacturers using acetate for their promos (only) stopped using this plastic by 1964 when they discovered the relults over a period of time (no scale model kits were produced with acetate, the styrene glue used in this trade by scale modeling doesn’t work on acetate) Acetate was used only for the fabrication of promotional models sold to car dealerships, nowhere else that I would know in the model industry.
*
One day I boutht an old International pickup truck promo from around 1960. It was made of acetate, for sure but it wasn’t warped at all. It had been hand painted with a heavy coat of dark green inside and out. I understood that the dark coat of paint had kept the light from reaching the acetate and the plastic did not shrink, wave or stretch anywhere. A very good thing to know.
*
So coming back to this ’59 Mercury, it became narrower with the time. Notice that the chrome parts were made of styrene, a plastic of a lot better quality that doesn’t warp at the light like acetate does. I’m not sure if this is because the kind of chrome that they apply on plastics doesn’t stick well on acetate but all the promo makers used styrene for their parts covered by chrome as far as I noticed. The result for this particular model of mine is that the lenght of the 2 bumpers stayed intact trought the years but the rest of the body became narrower with the time, so the headlight bezels molded with the grill and the front bumper in one unit came out of the fenders and sticked outside of the tip of the fenders and the car looked very silly. It was the same for the rear bumper and back panel unit. They were wider than the quarter panels, so If I wanted to bring the body back to its original condition I had to cut the body in 2 halves right in the middle and widen it. Prior doing that I wanted to cut the hood and the trunk lid and separate them from the rest of the body.
The underside of this promo was a black piece of sheetmetal with holes for the axels and wheels. I removed the 4 screws and removed the plate, the plastic interior and the glasses of the car. As I plan to build a Stock Car racer with this promo I want to install a nice scale model frame and floor pan from another scale model kit. The ’58 Edsel would be a very good choice, or the ’60 Ford. Both models are “new tooling” kits manufactured by AMT and share the same scale as this Merc promo (1/25). If you are knowledgeable about vintage cars of this era you know that these 3 models (real cars) used a very similar frame and floorpans if not the same ones. Don’t forget also that it was common to swap a body on another frame and floor panels when it became too damaged or just for a change of model. In the Stock Car trade they call it “re-skin” a race car. It is not rare that race car builders are cutting a body in pieces (quarter panels, back panel, roof and the rest and then re-align the body parts and weld everything into place over the existing rollcage, engine bay, frame, firewall and floor panels of a race car that was stripped from it’s body. You can find plenty of examples of this on the Net if you search on Stock Car racing topics. I, personnaly as a fanatic about vintage stock cars racing, constructions, assemblings, mechanics, weldings and other subjects have plenty of pictures of such things in my files, and I worked a lot on real cars too.
*
I happen to have a used ’58 Edsel in my scale models and I plan to take the frame, suspensions, engine, firewall and other parts that I need and fit them on the Mercury. This ’59 Mercury is a rare scale model. As this promo was dammaged (and has also a missing piece of tail fin) it was not possible to bring it back to an excellent condition without covering the molded color, and I will have to make a new fin with plastic paste. Once it’s painted it loses it’s original value and I will have to straighten the front fenders a bit and the hood too, then it was OK to me to radius the wheel openings, open the hood and trunk and so and so to turn the promo into a short tracker. Some collectors of promos would maybe think that this is an abomination. This is their opinion then. To me, I’m going to make a more unique model and I don’t plan to make a piece of junk plenty of glue. Since I worked on this model I solved some problems and it is in a better condition than when I bought it. Why I break my head working on it? Well I take it as an interresting challenge. How can you develop new skills if you don’t try something more or less difficult sometimes? I am very used to hardships anyway, suffering of crhonic depression all year long. I try to keep going and it is really not easy. If I had a switch on me I would shut it donw and would prefer not existing. On the other hand, I still see some interresting things to do in this life, even if the pain is there all the time, I forget it sometimes for a moment, and pretty soon it comes back. It is not physical. It’s in the mind.
I plan to build a Late Model Sportsman or a Limited Sportsman race car with it. There were plenty of big sedans in the Limiteds or equivalent classes in these years. I’d like to cut the front and put tubbings as bumpers but if I do that I will make a mold of the body and probably cut a copy of it. I don’t want to alter the original bumpers/grill because they are rare stuff. Except maybe cutting these ugly plates used to hold the body shell, bumpers and bottom together.
*
It took me around 4 hours to cut the hood and the trunk lid because this plastic is hard enough and thick, especially the line of the trunk close to the tail lihgt at the back, where it curves. They are a bit rough but I will fix it with strips of plastic, putty etc.
*
Once these 2 pieces were removed I draw a line at the center of the roof from front to back and I took a saw blade to cut it. I cut also the 2 narrow panels between the windshield and the hood and between the backglass to the trunk lid in their center, so I ended up with 2 halves of the scale model.
*
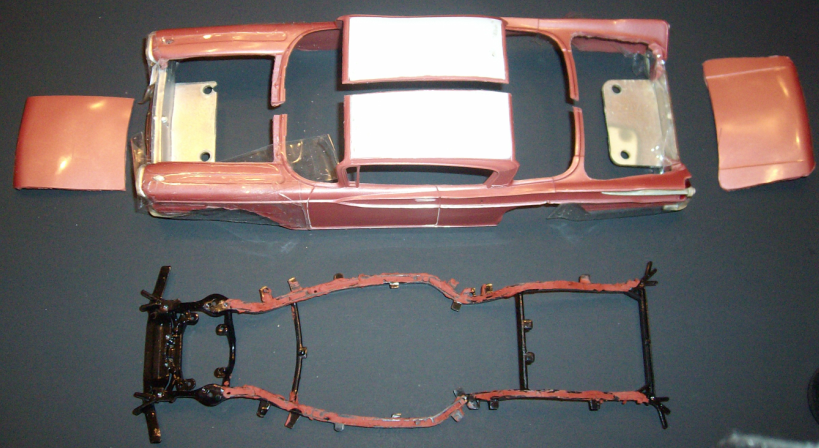
I used scotch tape to stick the bumpers to the fenders solidly so that the headlight bezels would fit in their original place on both side and the bumper corners sticked to the bottom of the fenders I have done the same for the back bumper corners versus corners of the quarter panels. I ended up with a gap of approximatly 3/16 of an inch between the 2 parts of the body.
*
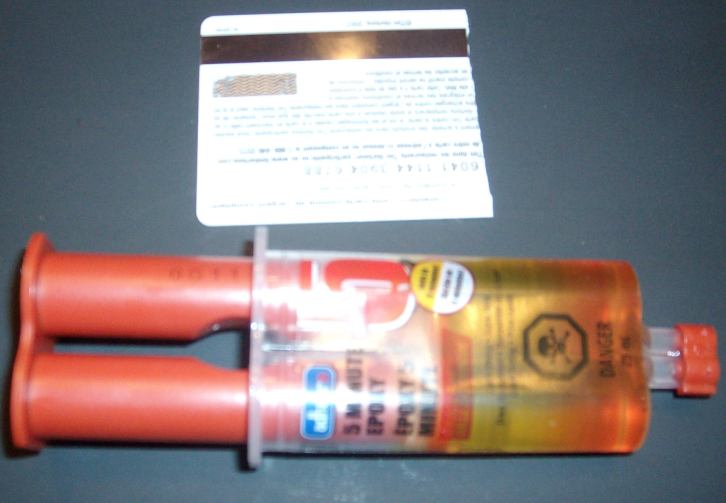
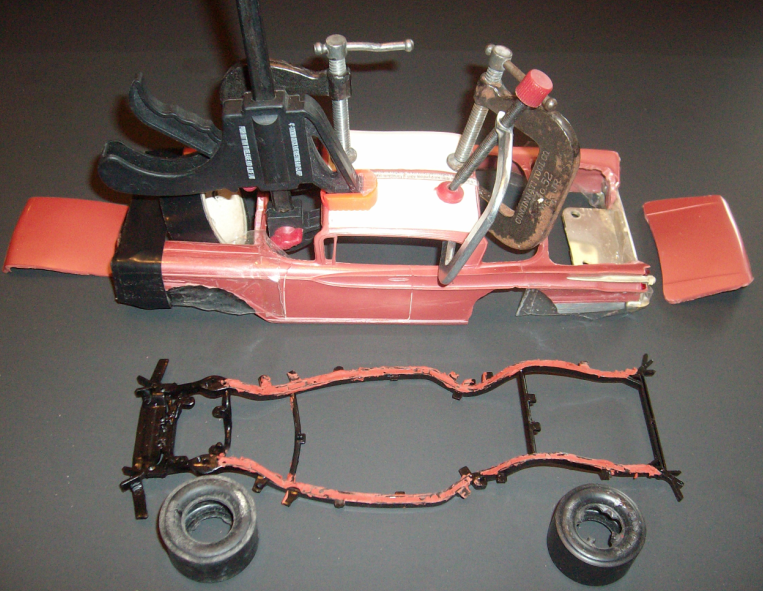
I measured the lenght of the roof from front to back and cut 2 plastic (bank card style) of the same lenght. I superimposed the 2 cards to make a more rigid piece (thicker) of plastic and placed them under the roof and tightened them into place with 2 clamps on one side and 2 other ones on the other side. I didn’t want something too rigid under the roof so the 2 plastic cards could bend a bit and stick well to the shapes of the roof, compressed by the 4 clamps. It took a little while to align the 2 halves perfectly and I used a rigid piece of plastic to use it as a guideline at the front of the roof while playing with the clamps slowly to aligh the 2 parts perfectly. Not an easy task as it moves suddenly too far at one side then too far on the other side, or not enough, then too far again. This is not the first time that I do some work like that but each time it is a difficult step. Once it was done properly I just had to mix some epoxy and pour it along the gap between the 2 halves of the roof. The plastic cards were compressed under the roof and because they are glossy the epoxy, when it is very dry, doesn’t stick solidly to the plastic card, but you have to make sure that the epoxy is very hard before removint the clamps and plastic cards. You have to think that the surface of the epoxy exposed at the air dries faster than the part sticking on the plastic because this area doen’t have as much oxygen to dry as fast and can remain softer. When some glue or epoxy or fiberglass resin or what ever is not dry enough it still sticks to a plastic card, or scotch tape or anything that would nomally come off easily, as the substense is still gummy it will stick until it is completely dry. If you try to separate the pieces it will turn like a mess and you will have to clean everything and start over. You better wait several hours or at the best 24 hours before splitting the guide or mold from the epoxy. Epoxy like polyester resin, silicone or other stuff stick very well on some material, or some plastics but don’t stick much on other surfaces. If you are not sure of some combinations you better make some tests before. Through the years I tested many kind of glues or products and materials, especially many different kinds of plastics and they don’t all react the same, oh no! Silicone,or polyester resin, or epoxy or glues don’t stick the same on acetate, or acrylic, or styrene, or vinyl or other plastics. Some combinations stick very well, some other ones stick very poorly. They are all different. For a try you can put a piece of vinyl into a jar of lacquer thinner. It wont melt. But if you put a piece of styrene in it it will melt slowly and mix with the lacquer thinner.
*
*
The 2 halves of the body with the gap in between them. The bumpers secured into place with scotch tapes.
*
*
This is what I used to fill the space left between the pieces of roof and the front and back narrow panels close to the glasses. 2 old bank cards cut to the right lenght and a syringe of epoxy (please don’t try to use this syringe to shoot this stuff in your blood, stay with me, I beg you). This brand (Adhaero) is relatively cheap and of good quality. It is sold by a chain of dollar stores called Dollarama, here in the province of Quebec. It is a lot cheaper than the epoxy syringes sold by Canadian Tire. 3 or 4 times cheaper.
*
*
So here are the 2 halves of the body with the 4 clamps and the 2 sheets of plastic cards pressurized under the roof. I installed some more tape (black vinyl) around the front to maintain the fenders with the headlights bezels and bumper with lower sections of the fenders more solidly together. I poured the epoxy along the gap in the middle of the roof and left it aside for a real good hardening for around 24 hours. Besides the car is the frame of the Edsel that I filled with glazing because it is hollow. Note that these race cars had no trunk floor sections, only the frame and braces. You could see the tires, suspension, gas tank, shock absorbers, bracings and the ground between all these parts. These cars were not built like the Grand National division race cars cause these last ones had trunk floors like a regular car.
*
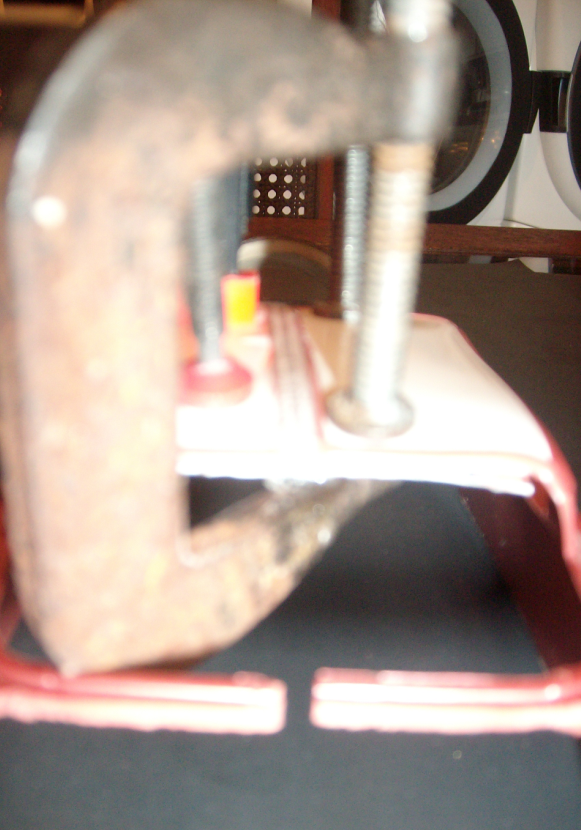
*
Sorry for the fuzzy picture. The epoxy has been poured along the slot in the center of the roof.
*
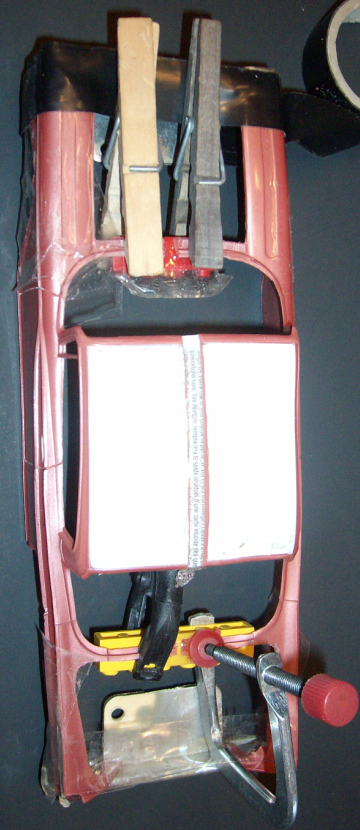
*
This is the next day. The clamps have been removed. The epoxy is almost as clear as water. We can see the writing characters on the back of the plastic card trough the epoxy. I have been using plastic blocs of Lego, clothespins and clamps to hold the small pieces together. They are not all the time easy to align correctly. I applied a couple of drops of epoxy in the gaps of these parts.
The next day it will be ready for grinding the excess of epoxy on top of the roof with a Dremel and apply the glazing.
*

*
I just had a good idea. The cheap digital camera that I am using for the moment is a full automatic (my Nikon D40 is broken since several months). The flash on this camera is automatic and many times it is overexposing my pictures. I just had the idea to place a piece of black vinyl tape on the flash to cut it. It works! Even if the flash works the black tape is preventing the light to reach the subject that I am shooting and the picture just comes out fine.
*
This is a close picture of the underside of the roof. The plastic cards were also easy to remove because epoxy doesn’t stick well on their glossy surface. It is leaving a smooth epoxy finish on the underside of the roof, as flat as the roof panels each side of it. Some excedents of epoxy has to be grinded at both ends of the roof and some glazing has to be applied, then sanding and repeating the process till excellence or perfection. I placed the plastic cards on the underside because it is more difficult to grind epoxy inside the body shell than from the outside. Using a Dremel inside a roof is not an easy task because of the obstruction of the side panels in the way, the trunk lid area and the engine bay don’t help eighter. This is not the first time that I cul a model in halves and widen it, nor the first time that I have to use powertools on the underside of a model. It is always more difficult to work so this is why I leave the bumpy sufface of the excess of epoxy outside of the roof. It is so much easier to grind a roof from the outside, you have plenty of room to manipulate your tools and turn in a 360 degres if needed, especially with power tools because they are most of the time bigger and longer than manual little tools like files and other ones, so by experience I try to manage to make minimum work on the underside surface of a scale model.
*
The line of epoxy in the middle of the roof sticks pretty good to the acetate. As a little test of solidness The very bottom of the scale model on both sides, at the level of the rocker panels is wider than it should so if you look at the model from the front or the back, the top of the door panels and front of the quarter panels are more pushed in than the bottom, so the rocker panels at the bottom have to be pushed in a bit from each side to come back where they should be. This is making a good test on the solidness of the joint of epoxy in the middle of the roof because when you force both rocker panels by the inside this is the roof that receives the pressure. Because the roof is slightly higher by its center if you look sideways, this means that the front of the roof is slightly lower than the center and the back of the roof is also slightly lower than the center so the roof is making a little arc and an arched surface is stronger or more solid than a flat surface that is bending a lot more easily, so because of the design of this arched structure it helps to the solidness of the joint of epoxy. If it would happen to crack just appliying some superglue and put the parts together with pressure would fix the problem. I didn’t want to break my head to make these complicated cuts, the kind of square zigzags that some customizers do with sheetmetal on cars or some scale modeler imitating them when cutting their scale models. In many cases (but not all of them) It is a lot of work for nothing. The way that I do it is strong enough and a lot easier. I have done it many times. It is always a bit more touchy to widen a model than narrowing it. Some scale modelers would take 2 identical scale models when they want to widen it and cut the first one a bit wider than the exact middle at the right side and cut the second model a bit further than the exact middle to the left. Then they take the 2 wider halves of bodies and glue them together. It is faster but you scrap a second kit or end up with 2 halves of body a bit too narrow to make a normal scale model. As my attitude is oriented toward saving material instead of saving time I choose the more difficult way to perform a job. Less intelligent you think? Not necessarily. Doing that I also to choose the challenge of doing more work and learning to become a better scale modeler. While performing the job you find another way to do a particular step and you gained something, a new technique, or you find the idea to create a new tool to perform a particular task. It is not rare that I stop my project to create a new tool, or try something new.
*
OK, we are now a few days later and this is how the roof looks like after 3 coats of glazing and sandings. Some warped areas will require more sanding or grinding and more coats of glazing.
*
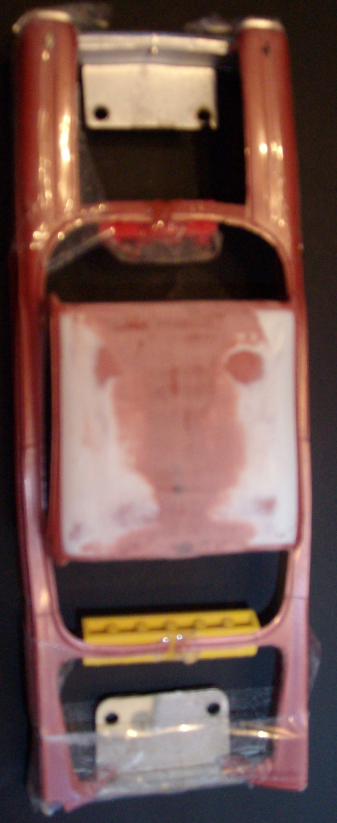
*
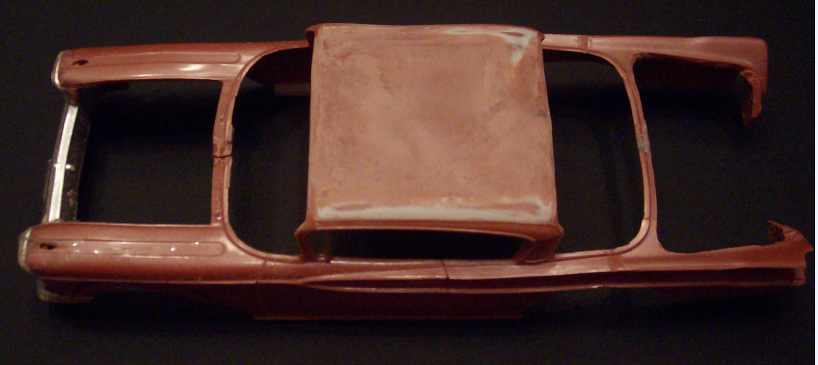
*
After 2 more coats of glazing. It will need more work.
*

*
This is the side of the model where I didn’t radius the wheel openings yet. A good thing for the moment because I wanted to show the kind of “lips” (arrows) embossed in the sheetmetal of the real car, the true ’59 Mercury. Those are not only moldings but the sheetmetals are embossed. I managed to remove these pieces of the body parts because to my taste it would look silly if I wouldn’t cut them. On the other hand and fortunatly, because of the huge race tires this is the good thing to do.
*

*
I had already started to remove some material to increase the wheel openings, but I had done it roughly with a dremel inside the lines that I had drawn, but this was only the first step of the job. Lately I reworked the back wheel opening with a car suspension rubber bushing squeezed on a bolt with 2 washers and a nut. I used a piece of coarse sanding paper glued around the bushing with contact cement. I just installed the shaft of the bolt in my drill and slowly turned the improvised tool till every till I had a smooth round wheel opening I made plenty of these grinding wheels with different sizes of bushings, ratchet sockets, toy wheels and their axels and so on. Some friend scale modelers in a club where I was going laughted when they saw me grinding a wheel opening of a scale model with a toy wheel covered with sanding papers rolling on my drill, but the admitted that the idea is very good. Don’t go always at the hardware store to search for some tool. Fabricate it whit what you have at the hand. Use your imagination.
*
The front wheel openings are always more touchy. You can not make a perfect circle like for the back wheels because a real race car has a stering because the huge race tires need more space forward and backward to move in the wheel opening when they are steered to the left or to the right. The scale model company AMT made a big mistake on their series MODIFIED STOCKERS because none of these race cars could had turned its front wheels. They just could go straightaway because the wheel openings at the front were perfectly round around the huge tires and left no space for the huge tires to steer on the left or on the ritht (forward and backward for the opposite wheel and vice versa). So, on a stock car racer with huge and wide tires at the front and full fenders at the front too, race car builders had to cut the wheel openings on a long oval shape, not on a perfect round shape. You see that I draw a new line around the front wheel opening, higher than the back wheel opening. Many race cars had the front lower than the back in these years and it is probably the case often today too. Race car builders had all kind of tricks to lower the suspensions of their race car. They could move the brackets higher on the frame, even modify the frame to lower the car as much as possible.
*
The trick is simple enough if you want to radius the front wheel opening. You take a bigger tire than the one that you will use on the car, or a piece of tube or anything bigger than your tire. You move the round piece a bit too forward and draw the line from the bottom front to the middle of the wheel up (like from 20 to 8 on a clock to Noon) and you move your round piece a bit past the center backward, but at the same height on the fender. Then you draw the line from noon to 15 after 3 on a clock. Depending on the shape of the back of the wheel opening you draw a line with a straight piece like a ruler at 90 degree or in an angle depending on the shape of the existant wheel opening. You must keep in mind to build your race car stylished. Some body worker prefer to cut a piece of embossed sheetmetal and replace it by a flat one that they weld and change the shape of the wheel opening, making putty and glazing over it. They just modify a bit the shape of the fender and make it look up to their taste. I have seen it regularly on race cars. They make nice flarings, flanges and so on. I will have to cut my model along the line that I draw on the front fender. Sometimes you even have to cut a piece of the front bumper tips because it would touch the front wheels when they are turning, or push the bumper a bit forward and put spacers behind it.
*
I found a new problem on this scale model. The tail fins have some waves (arrows on the picture). The real car doesn’t have these waves in the body. I found a scale model kit (non promo) on internet and it has the same waves, even the top of the quarter panel has this curve on the promo and the scale model kit too. I will have to take courage and do my best to fix it. It bothers me.
*

*
I found this interesting picture on the net at this address:
http://www.desertclassics.com/Merc59mcpe.html
*
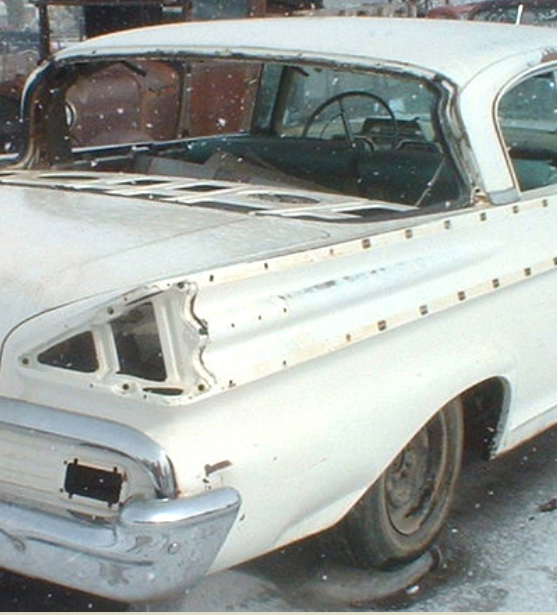
The above picture is from a 1959 Mercury Monterey without the body moldings. My scale model is a Parklane and the “spears” on the quarter panels, below the tail fins are a bit different on my model. They are chrome parts and they are shorter. I didn’t find a picture of a Parklane with the chrome spears removed from the quarter panels. I suppose that the Parklane has a kind of cone shape embossed in the sheetmetal like the Monterey, but shorter. Nevertheless, all the pictures of Parklane don’t show the kind of waves on the tailfins that we find on the scale models. I’d like to transform my Parklane into a Monterey by adding this long cone shape below the tail fins.
*
*
Here is a closer view of the cone spear embossed below the tail fin. A short tracker should look like this car with sheetmetal covering the taillights, removing the “MERCURY” cast letters on the trunk lid, then all the body molding holes filled with putty and a fresh paint job with graphics (sponsors, numbers and stickers of brand names of performance race car parts and so on), or if you want to build a battered race car you can heat the plastic to distort it, make some dents on the body and make some weathering adding dust and scratching the paint by areas.
*
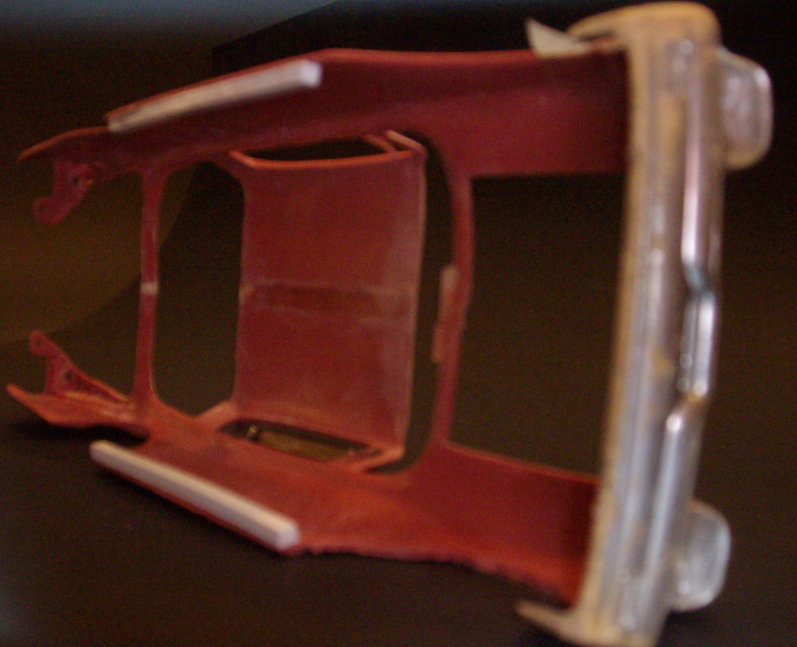
In the mean time I tried the 1958 Ford Edsel floor pan under the body of the Mercury. The Mercury is wider, so no problem, I made 2 rocker panels to the scale model by adding some styrene square rods (on a real car it is a square tubbing instead but of course if you install a square plate at both ends of a square tubbing and make the putty on it and paint it nobody can tell if it is a square tubbing or a square rod). Since a long time I noticed that scale model manufacturers never make these rocker panels on their cars. They just skip this detail. It is going to be nice to have a rollcage install directly on these rocker panels. I started already to modify a rollcage that I took from a more recent NASCAR model. I don’t know from which model it came since I boutht more than 30 used scale NASCAR models and gave the bodies to friend scale modelers and kept the rest for parts kitbash. The rollcages from the ’60s and early ’70s were a bit different than the ones from the 80s and up, I use mostly the door sections of the rollcages and even modify them by shorten them or lengthen them and I build a new window to roof tube frame that fits the real confiturantions of the body with styrene rods (Evergreen brand), so that it doesn’t look silly.
*
*
More pictures and blabla to come when time permits.
*
You can leave a comment, ask a question or start a discussion right here if you want. If you want a reply, make sure to leave a correct email address please.
*
Florent Beauchemin
My new email address :
florent@montrealminiatures.com
